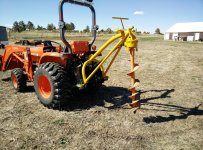
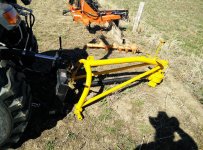
Quick hitch for a 3 point hole digger

   / Quick hitch for a 3 point hole digger #41  
Here are some more tips for your set up. Some of this I had to learn the hard way.
1.After you have established your height... mark this position on the boom where it will be welded to the yoke.
2. Remove the gear box and lower the boom tip onto a flat table top
3.Make sure the the 3 point hitch is level to the tractor and the floor.
4.Place the boom end on a table, but the boom up to the yoke, and align the marks on the boom and the yoke.
5. Measure from the end of the boom to some point on the lower QH attachment point. This will square the boom to the tractor.
6. Look at the end of the boom that is setting on the table and be sure the end is setting flat on the table and IS NOT twisted. If this is not perfectly flat and level with the 3 point the auger will not hang plumb and your holes will not be straight down.

For my first tries I tacked the boom onto the arch while it was on the tractor. I don't have any electronics on mine though. Dropped the 3pt all the way, ran the toplink most of the way back. Put the gearbox on so it would be at ground height when lowered. Made sure the end of boom to lift pin distance was equal so it was square then tacked it up.

My first failure was running the toplink to about 80% not 95% & not putting the gearbox on. 2nd failure was not measuring for PTO shaft length. No big deal, tack welds are easy enough to grind off.

Next step is to trim some more off the boom. Will probably measure a bit there but if in doubt leave it longer. Its easier to cut it shorter than cut it longer (although a welder makes "cutting" it longer a possibility) Cut re-tack & see how we do for PTO length & clearance. Repeat as necessary.
 
   / Quick hitch for a 3 point hole digger #42  
When I did mine I cut the boom off just in front of the yoke. This worked out to be very clsoe to same dimension as top link retracted plus QH, this left overall length close to same as original. Mine is different in that boom is connected to the top hook and yoke sets underneath, rather than yoke attached to top hook.
 
   / Quick hitch for a 3 point hole digger #43  
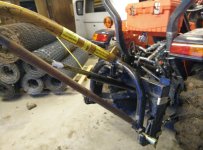
Got the initial fabrication done on mine. The welds on the old drill pipe I put on for braces are pretty crappy & incomplete, but I just tried my hand at stick with some 6013 as my argon tank is out. The PTO shaft will barely touch the quick hitch at max up, so I need to remember to run the top cyl out first.

IMG_20150111_165026.jpg

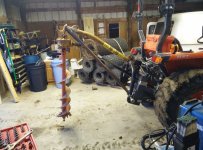
I have have maybe 5-6" of clearance between the augur & the ground when at max up, so I should be dropping it to put the augur on the ground before firing up the PTO anyway. As long as I don't drop the 3pt first I should be fine.

IMG_20150111_165020.jpg
IMG_20150111_165051.jpg

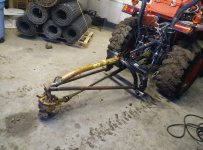
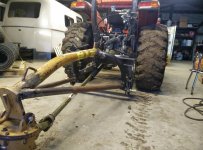
The gearbox will sit on the ground without the augur attached, probably will go a bit lower than that if I tried, although I might run into more QH clearance issues.

IMG_20150111_165227.jpg
IMG_20150111_165233.jpg

Next up is to finish off the welding on the braces, sand blast it, then paint it. Somewhere in there I'll probably try to put a bracket or 2 over the gear box to hang a couple hundred pounds of weight for some more down force. I probably didn't need the bracing without the extra weight, but better to be safe than sorry.

I did have to pull the metal PTO guard off the front of the gearbox to clear the braces, but those same braces should do somewhat the same thing. I only got half the plastic PTO shield & no shield for the bottom of the gearbox with the post hole digger anyway.
 
   / Quick hitch for a 3 point hole digger #44  
Just curios as to the size and stroke of your top link cylinder your using?
 
   / Quick hitch for a 3 point hole digger #45  
Just curios as to the size and stroke of your top link cylinder your using?

Not sure, I got it from FitRite, he had all the dimensions & stuff already for a TnT kit for my Kubota L3200. I assume length is the same as my OEM manual link. My L3200 was right on the line between 2 cylinder diameters I went with the bigger one. It might have been 2" & 2.5", but I'd have to go measure to make sure.

I'd recomend Biran at FitRite any time. Good quality gear & support. Not necesarily the fastest option (hoses are usually pretty quick as well as cheap though) as he has a big backlog & is a 1 man show. He's a good TBN advertiser & supporter too.
 
   / Quick hitch for a 3 point hole digger #46  
Finally got everything painted, gear box lube changed & hitched it up for a test run. Paint isn't as good as I'd like, but it's just farm equipment I'm going to abuse & some of the welds are a bit ugly.

It will lift the back end off the ground with the 3pt up & extending the toplink. I didn't try hard or go more than an inch or 2, as balancing on the pivot pin on the front axle & the PHD is not a pleasant or safe experience.

It's easy to hitch & unhitch now while also having more height so the augur isn't dragging on the ground. I also welded on the but of one of the drill rods to the back, so I can add another 6' or so & use it as a boom lift (need to rig up a carrier for my chain harrow now) as well as a mounting plate & handle to hold down a 100+lbs chunk of pipe for some extra down force if I need it. I can easily unhitch it with 1 hand after removing the augur.

I'm pretty darn happy with how it turned out. Now I just need to get the $3,000 worth or fence posts I'm planning on installing this spring...

IMG_20150328_151018.jpg IMG_20150328_151027.jpg IMG_20150328_151237.jpg IMG_20150328_151307.jpg IMG_20150328_151224.jpg


Tractor & Equipment Auctions

Dynapac Walk Behind Trench Compactor (A44391)
Dynapac Walk...
2019 VANGUARD 53FT DRY VAN TRAILER (A43004)
2019 VANGUARD 53FT...
3 Point Hitch and Set of Rippers (A44391)
3 Point Hitch and...
2008 Mercedes-Benz E-Class Passenger Car, VIN # WDBUF56X78B212099 (A44391)
2008 Mercedes-Benz...
40ft 5 Dual Door Shipping Container (A44571)
40ft 5 Dual Door...
2018 Chevrolet Silverado 1500 4x4 Crew Cab Pickup Truck (A44572)
2018 Chevrolet...
 
Top