HYD QUICK ATTACH GAUGE WHEELS

   / HYD QUICK ATTACH GAUGE WHEELS #1  

3RRL

Super Member
Joined
Oct 20, 2005
Messages
6,931
Location
Foothills of the Giant Sequoia's, California
Tractor
55HP 4WD KAMA 554 and 4 x 4 Jinma 284
Hi guys,
I've decided to start a new thread about the hydraulic quick attach gauge wheels I made. They started out as dedicated wheels for my Rotary Cutter, but at some point I came up with the idea to make them into a quick attach unit so I could use them on a number of implements as gauge wheels. So instead of dragging out the old thread, I've ended it with only pictures of the Brush Hog mod as I started out to do. I felt a new thread about these wheels as a stand alone item was in order to show how they fit other implements.

You can read about the original idea in this thread to get the background about the machining I did to make them.

Modify Brush Hog Some More

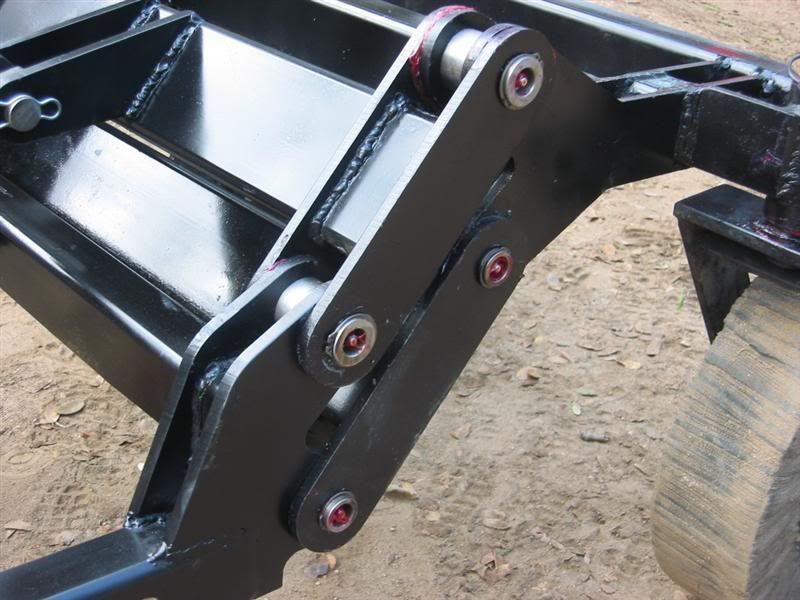
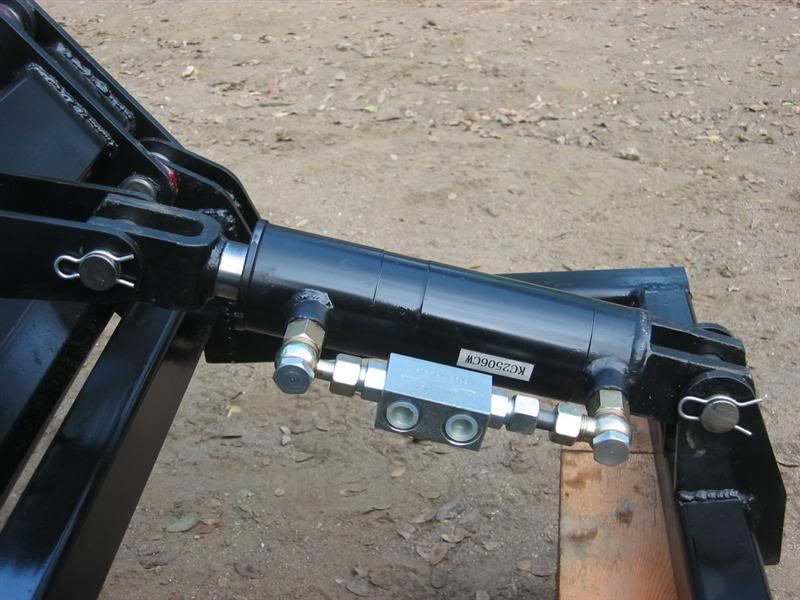
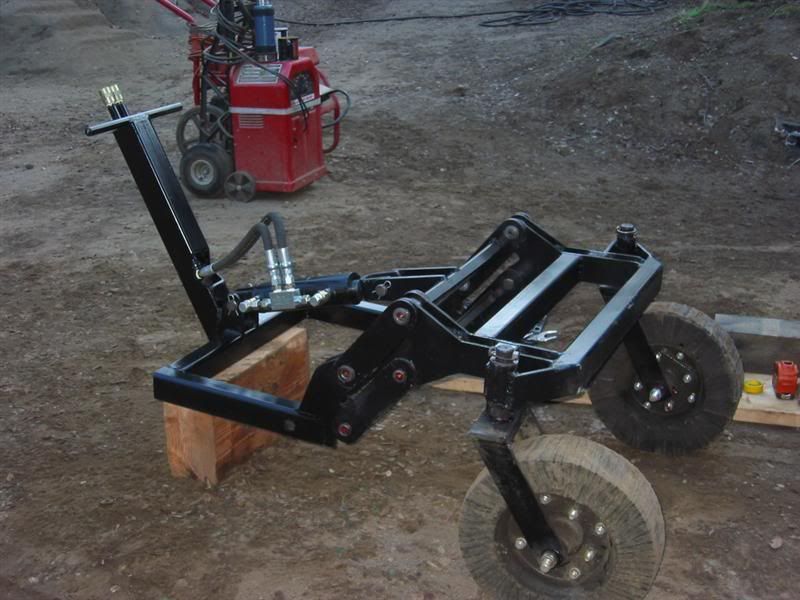
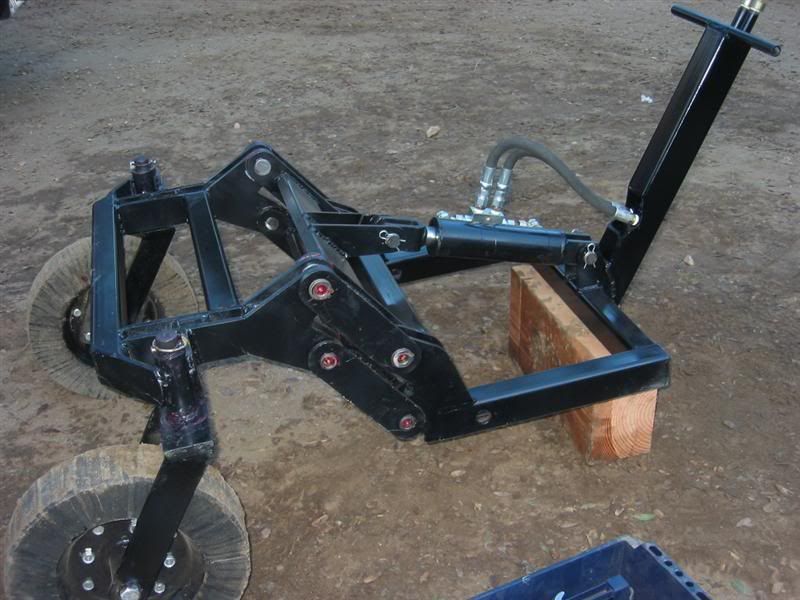
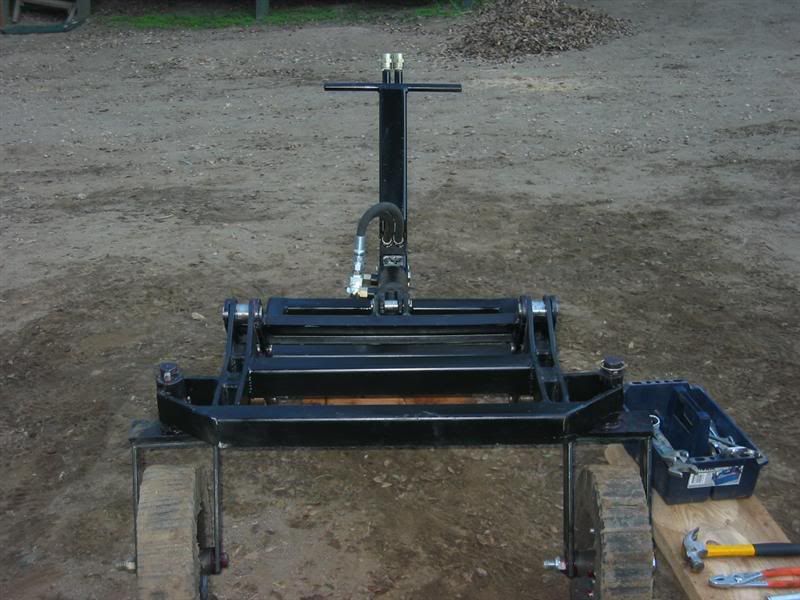
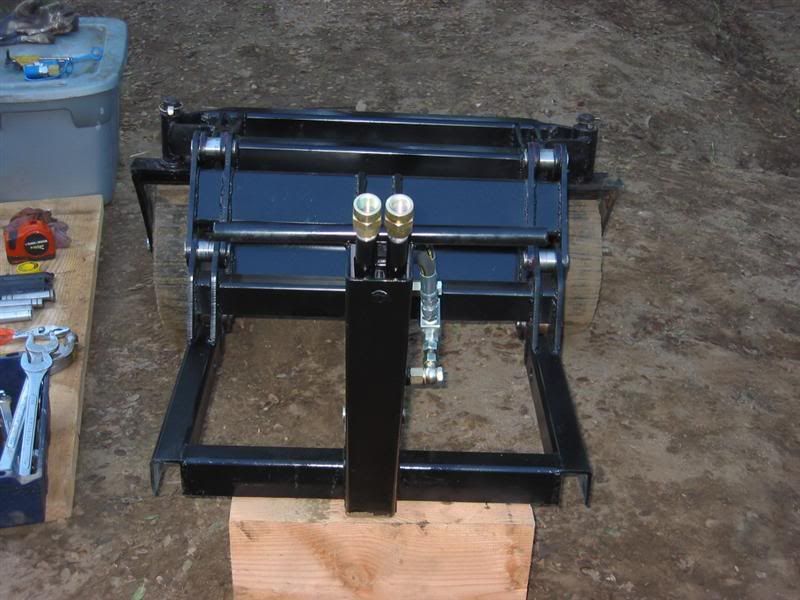
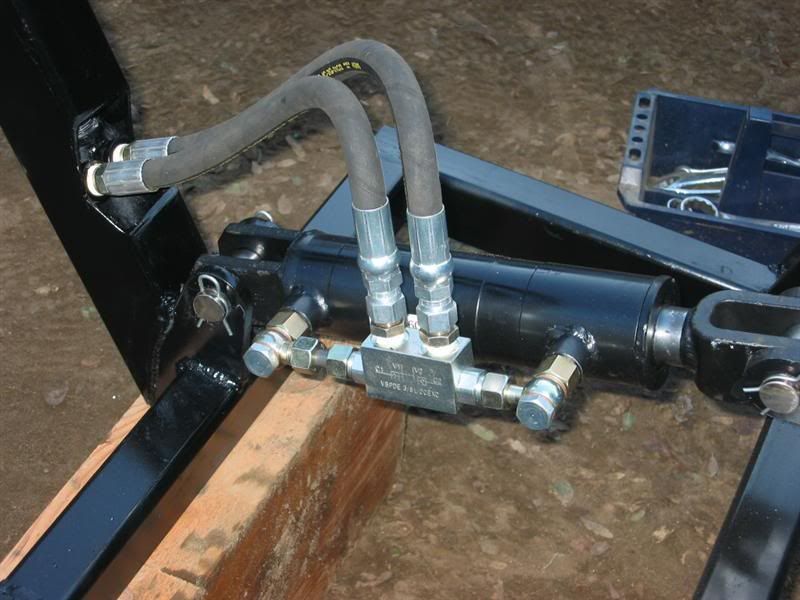
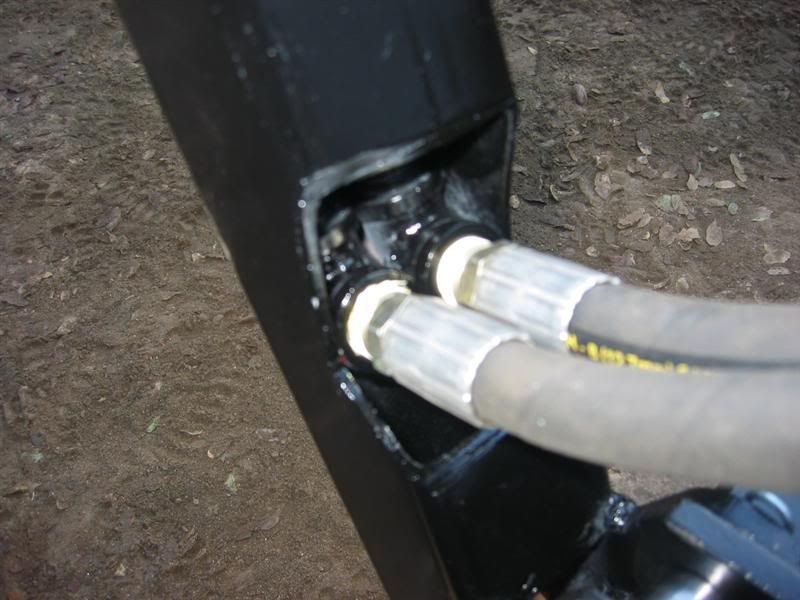
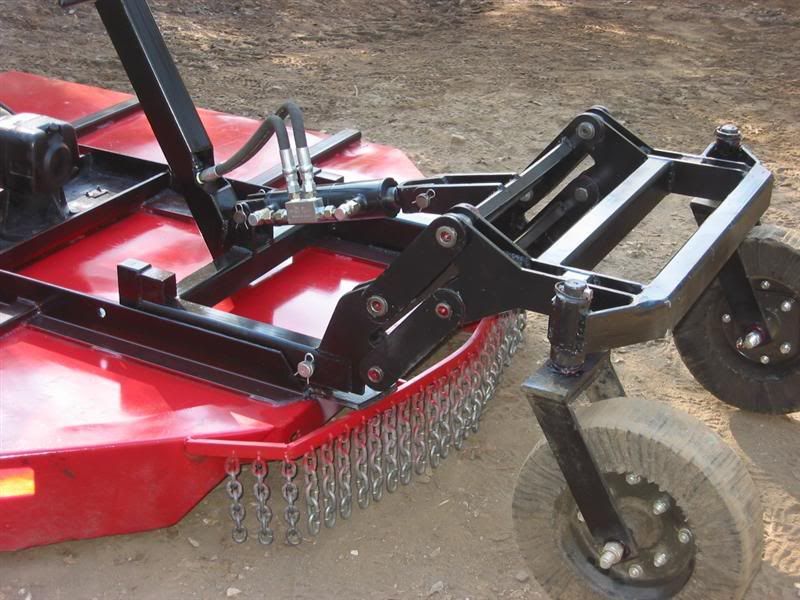
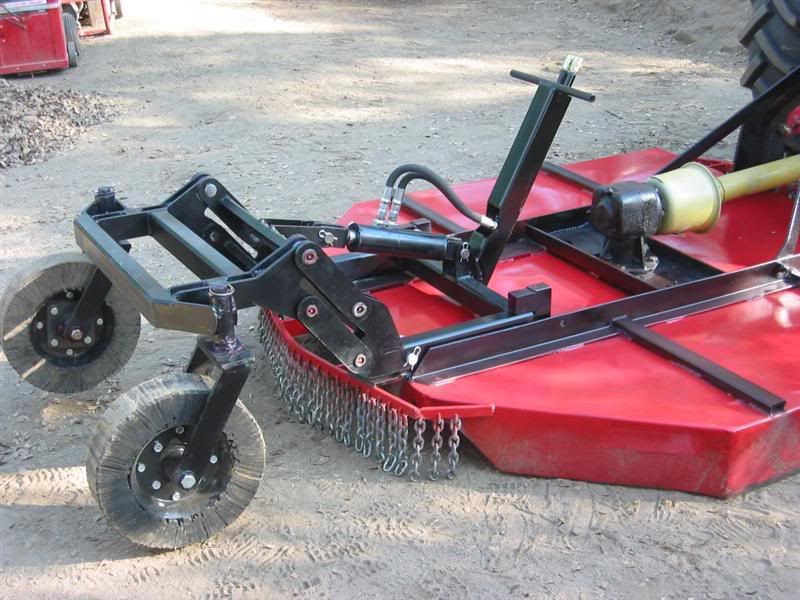
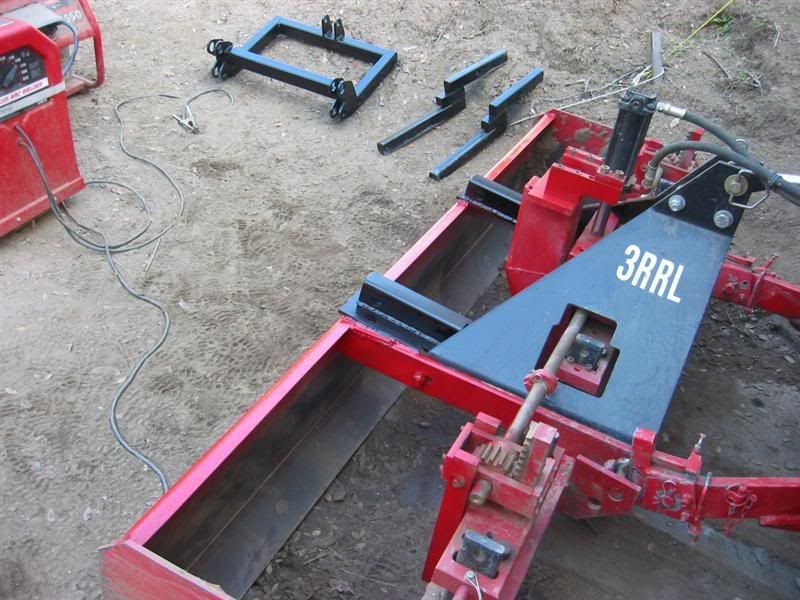
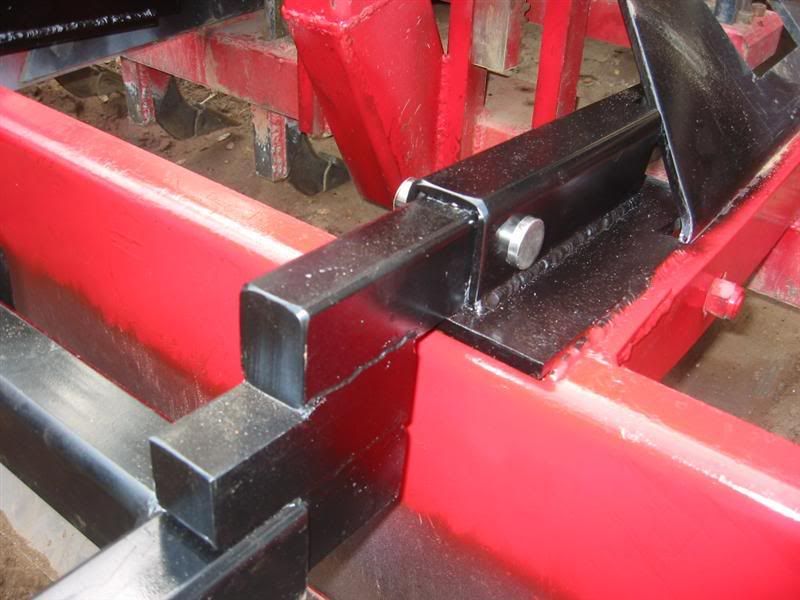
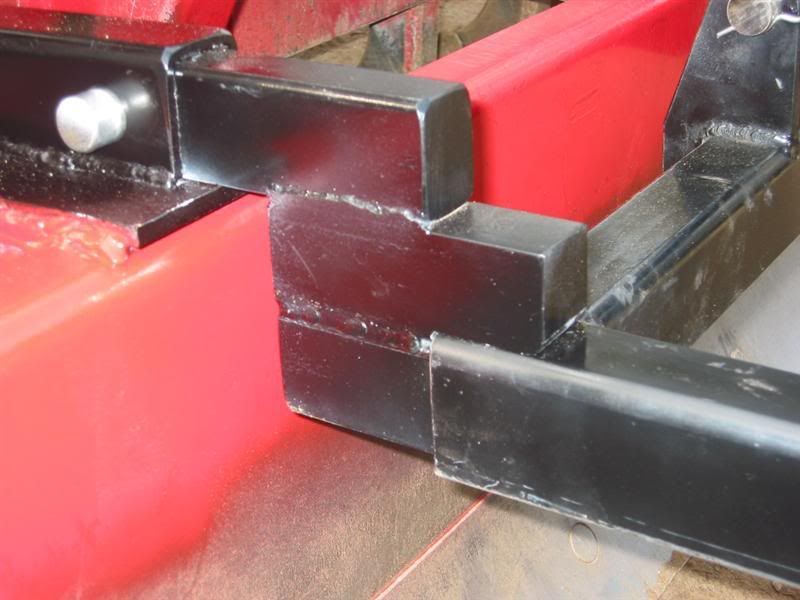
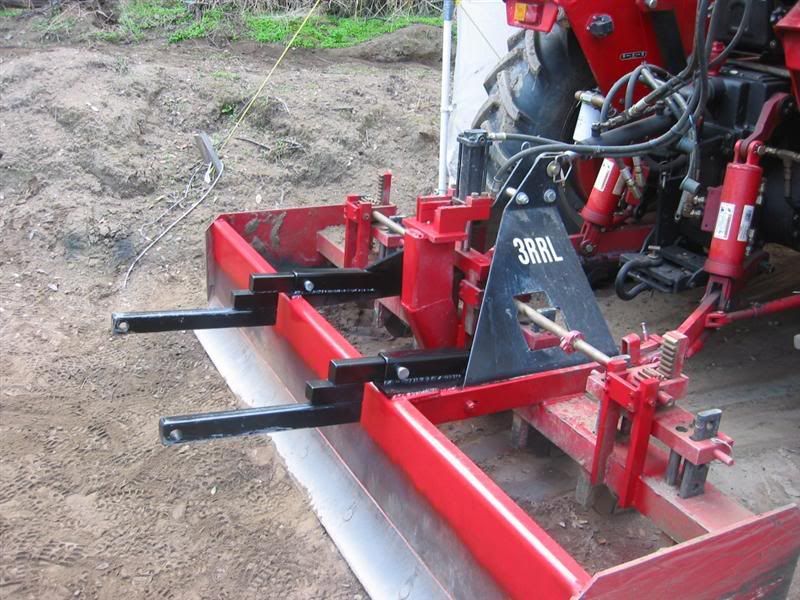
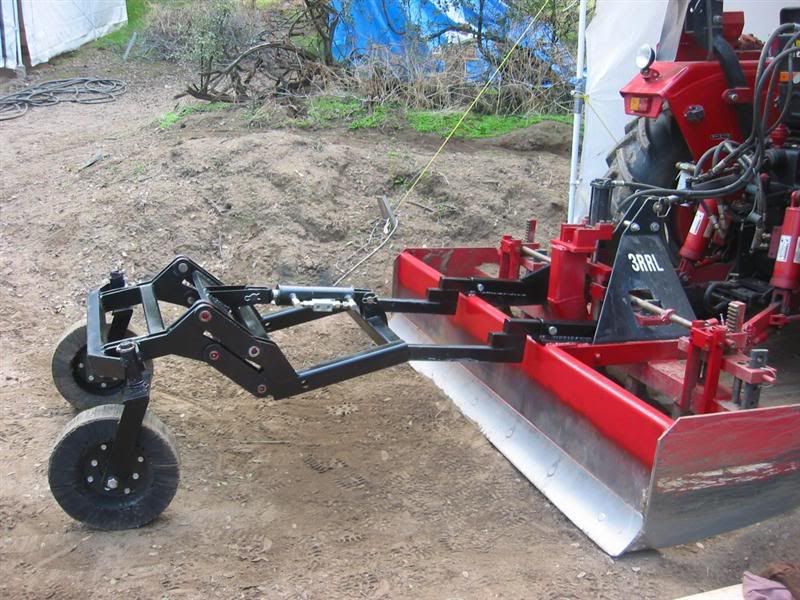
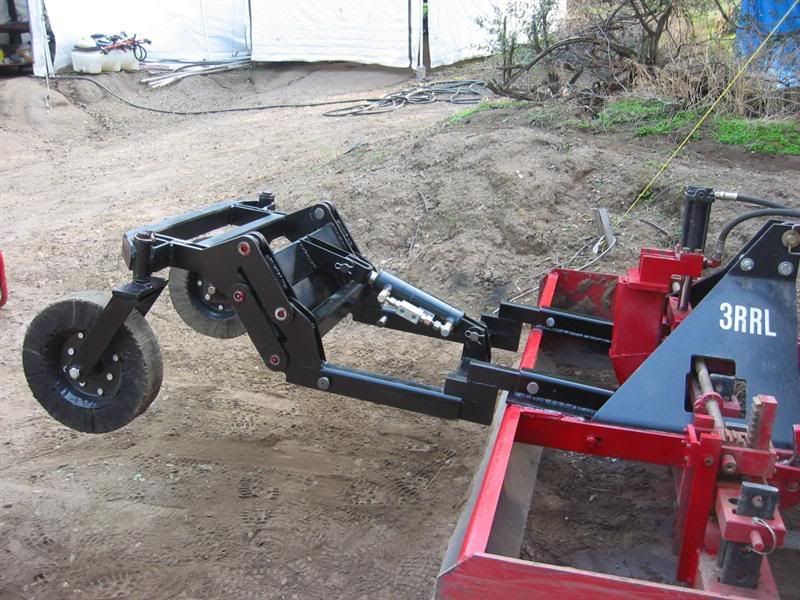
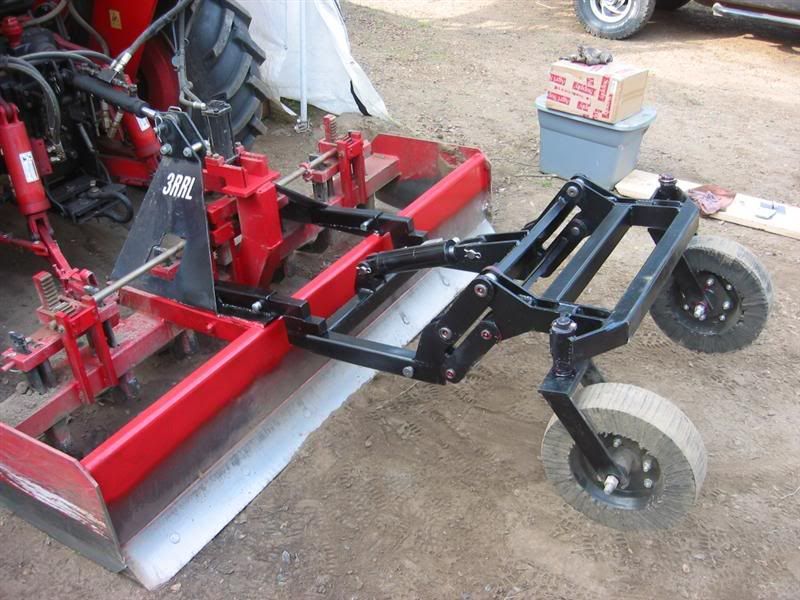
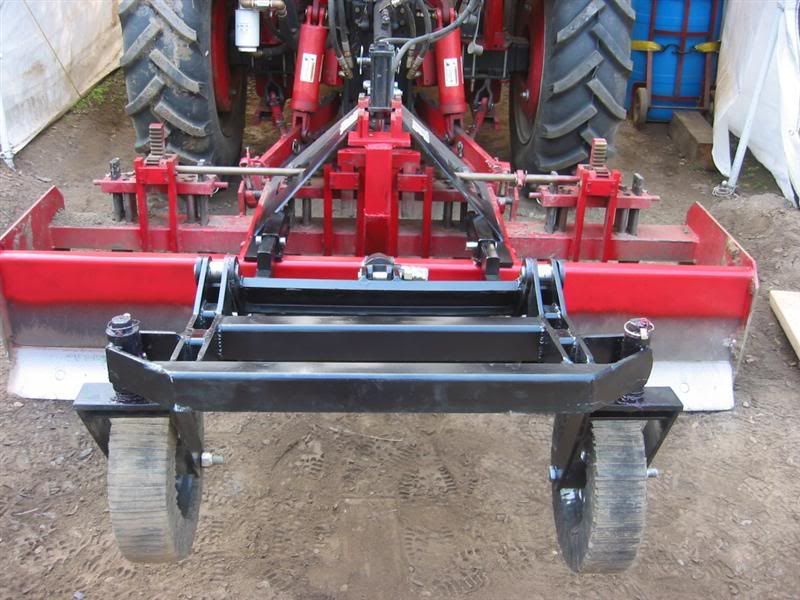
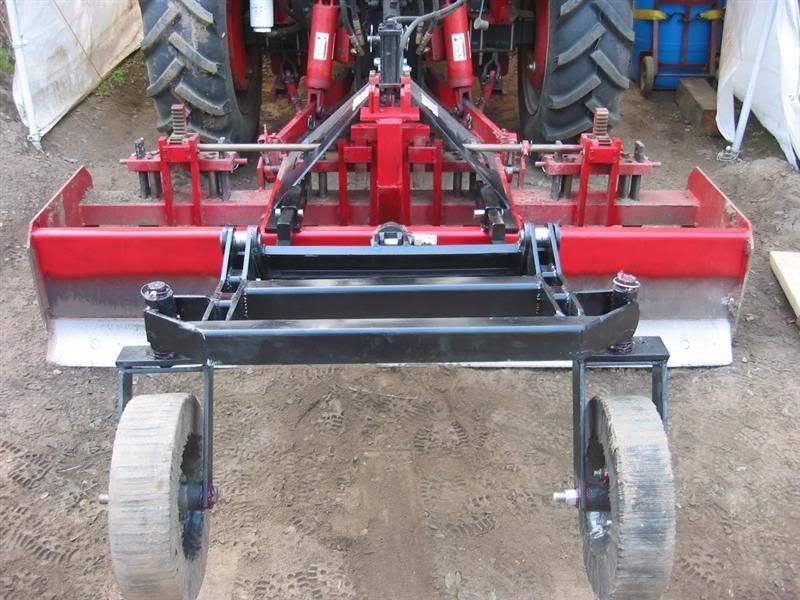
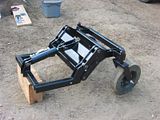
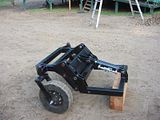
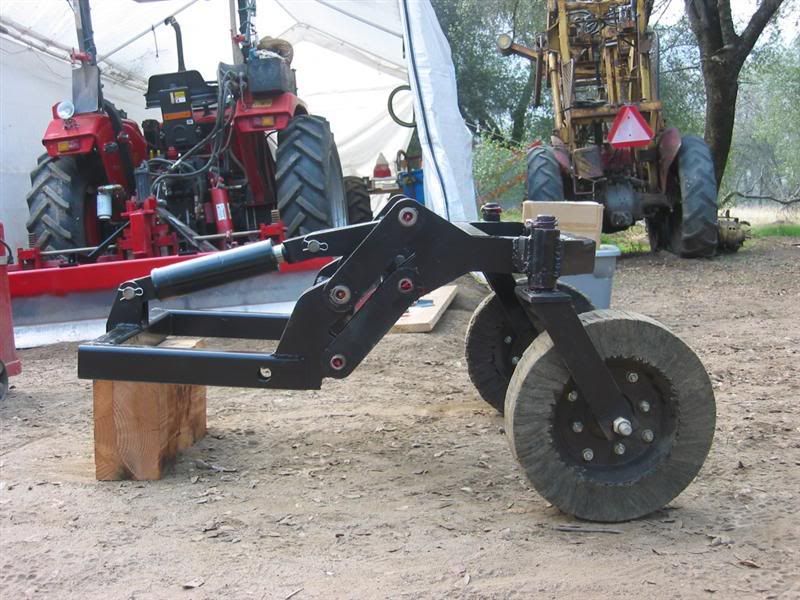
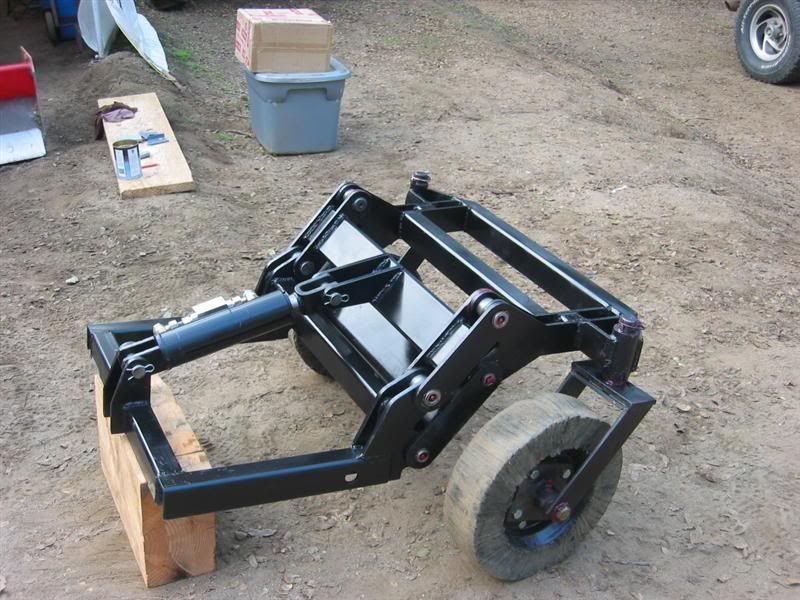
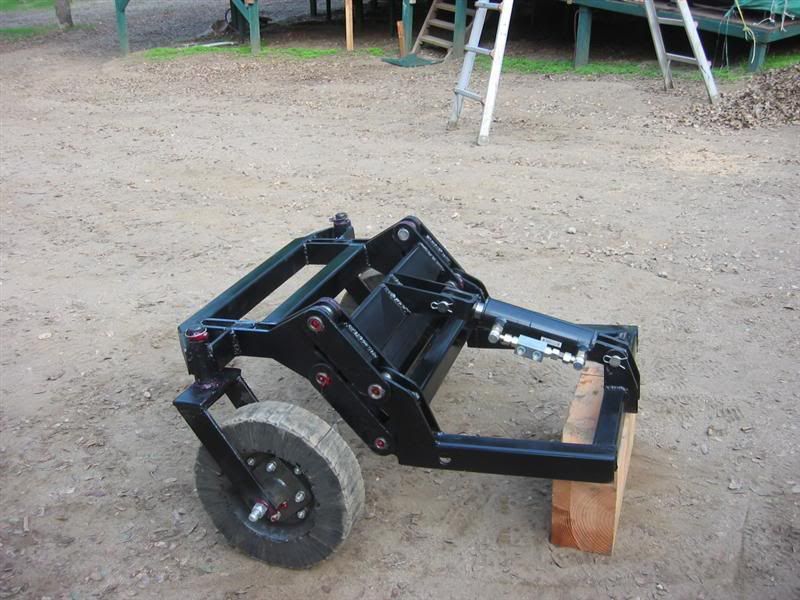
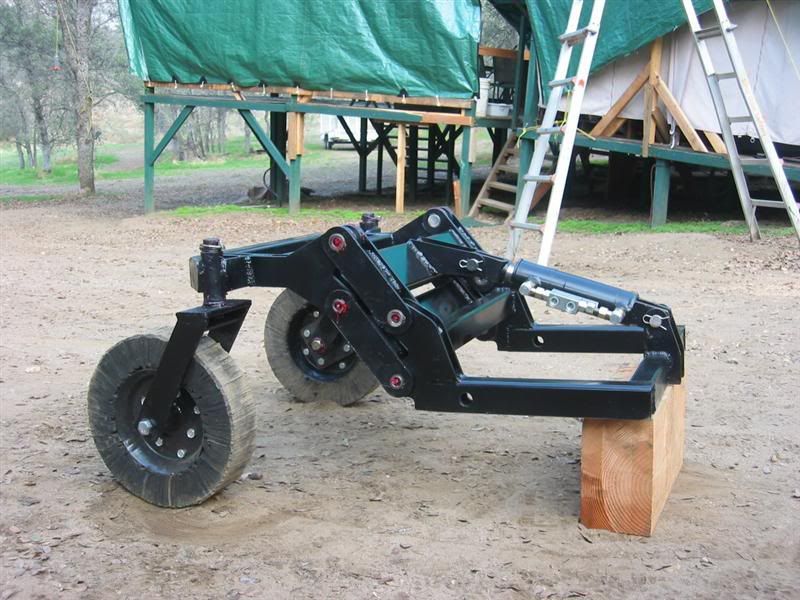
In the mean time, here are a couple photos to show how the project evolved into a stand alone Hydraulic Quick Attach Guage Wheels. You can see from these photos that the hydraulic cylinder is part of the unit. The cylinder has a double pilot operated check valve on it to keep the wheels in position.


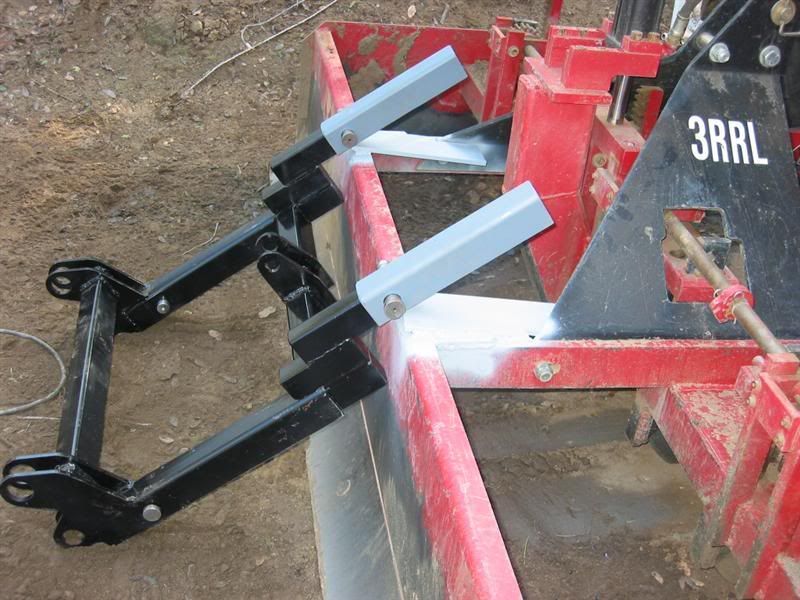
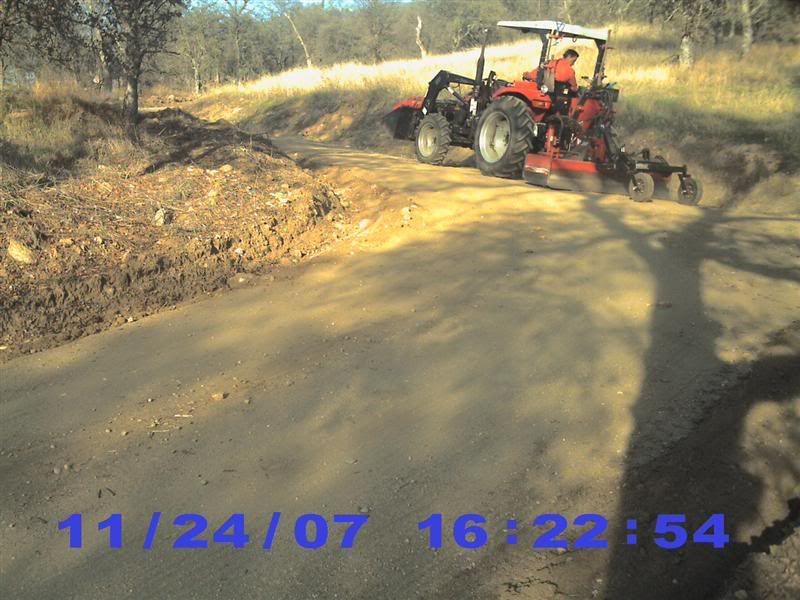
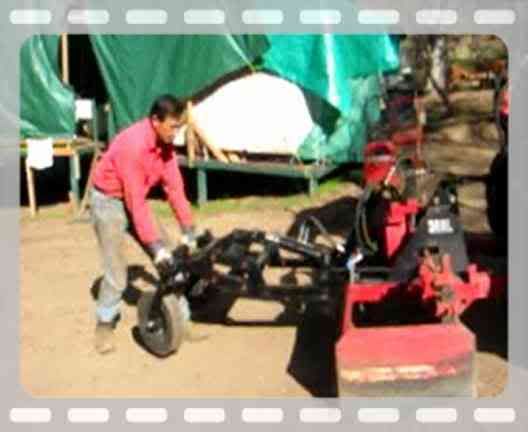
I will show photos of how the unit fits onto the brush hog and also on the boxblade, and how the switchover is done. There are a couple of additions to the unit itself after these photos were taken.
 
   / HYD QUICK ATTACH GAUGE WHEELS #2  
Bravo Rob!!

Those are a real work of Art. But don't let them sit in a museum, they deserve to work! ;)


Great job!! :D :D
 
   / HYD QUICK ATTACH GAUGE WHEELS
  • Thread Starter
#3  
Hey thanks Skunk!
I'll try to get them in the dirt asap. I've got a couple more pictures to share about the build.

Here are some more details like the self leveling links. They ended up being a very tight fit and there is no slop at all in the links. It turned out to be a super heavy duty construction...probably overkill for it's application. With the solid tires, cylinder and hoses, my guess is this thing weighs nearly 300lbs! It will make a great weight addition to my boxblade when raised up and not in use for leveling.

Notice how the hardened pins and bushings attach the system together. Each pin is drilled and counterbored from the outside with a Zerk fitting installed. There are internal grease lines that lead to the bushings and pivots. The other photo is a close up of the double pilot operated check valve mounted to the cylinder with hard lines. This will keep the wheels at the position I choose to put them. I got the dpocv from Mark Carter at CCM. I have used them on several of my projects and they work great.

 
   / HYD QUICK ATTACH GAUGE WHEELS
  • Thread Starter
#4  
After all the fitting and moving I realized I needed some kind of handle to move it around.
I also wanted to protect the lower hoses coming from the cylinder. So I built a square tubular housing and handle for both needs. The tube rise into the air with steel pipe inside. It's angled to get closer to the tractor to make the hoses shorter and they are suspended up in the air out of the way of flying debris. It also has a little better leverage for handling like this.


Below you can see the short hoses I used to connect the hydraulic cylinder to the steel lines inside the tubing. I moved the dpocv to allow for up and down movement of the cylinder. I also made spacers and clamps to hold the pipes on the inside securely so the don't rub or move. You can see them in the last photo above. There is also a close up of where the hoses connect to the pipe at the bottom of the tubing. There is a cut-out in the tubing to allow this. I mounted the hoses like that so they would curl over the top of the cylinder for a little protection. I did all this fabrication at camp.

 
   / HYD QUICK ATTACH GAUGE WHEELS
  • Thread Starter
#5  
Ok, so now that the QA wheels are built, I wanted to show how they interchange from one implement to another. In the other thread, you saw how they were mounted onto the Rotary Cutter and how they worked.


Here's a video of taking them off the cutter.
I had already disconnected the rear remotes and rolled the hose up onto the handle. This is pretty cool because it went a lot easier then when I was wrestling and fitting all this stuff. I guess everything must have finally lined up. :)


They truly are quick disconnect as you can see.
As heavy as that unit is, I managed to move it because it rolled on those big wheels. The only awkward thing is those wheels pivot in all directions and you end up chasing it around.:D But other than that, it's not too bad to handle for an old dude like me.
 
   / HYD QUICK ATTACH GAUGE WHEELS #6  
That's a pretty slick setup. Nice work.
 
   / HYD QUICK ATTACH GAUGE WHEELS #7  
Rob
Both of the wheels look pretty clean did you run them through the dish washer?

We won't tell Loretta honest!

Tom
 
   / HYD QUICK ATTACH GAUGE WHEELS #8  
Looks good from here!!!!
David from jax
 
   / HYD QUICK ATTACH GAUGE WHEELS #9  
Rob, the video was great. By lip reading i think you were saying "Heck, these are nice I am keeping them!"

Where did you get that compact pilot-operated check valve?
(assuming that is what it is?)
 
   / HYD QUICK ATTACH GAUGE WHEELS
  • Thread Starter
#10  
Hey guys, thanks a bunch for the nice compliments. They are greatly appreciated! I haven't forgotten some of the suggestions about a kickstand for parking it either, but I'll wait till next time I go up to see what I can do about that. I wanted to get them done since the other thread dragged on like that.

Skunk,
Yeah, I'll be keeping them alright. I got that dpocv from Mark Carter at CCM who makes the hydraulic top links (TNT) we buy. He had a couple spares and I bought some for this project and also for my backhoe stabilizer legs. Man, they work great. You can see how I did that on post #13 in this thread. Backhoe Feet & Stabilizer Legs Only on those I had to make my own 10mm tubing out of 303 SS hex stock.
That backhoe of mine has been sitting on the legs for over 3 months and it has not leaked down an inch!
Like I said, they are Metric using 10mm hard tubing for the compression fittings and 3/8 BSPT for the outlets. So I had to get adapters going from BSPT to JIC to fit my hoses. But they sure are nice and compact.

Tom,
No, are you kidding?
I didn't run them through the dishwasher after all. I told Loretta about your idea and that you wouldn't tell if I did, so she offered to scrub them up for me. She cracked up when I told her. Now we both know what a nut you are.:)
 
   / HYD QUICK ATTACH GAUGE WHEELS
  • Thread Starter
#11  
I still have a few things to share on this thread. That would be the receivers for the boxblade and also the landscape rake (which I don't have yet). But the attachment will be very similar for it and maybe a rear blade in the future?

I had made the receivers at home to fit those dog-leg connectors you saw in the first thread. For the boxblade and rake, I needed the dog-leg connectors to get the gauge wheels closer to the ground since they were originally designed to sit on the rotary cutter which is much lower profile. I don't need them to suspend the boxblade or rake up very high off the ground anyway, since they will be true leveling wheels on these implements.

So I went through the same painstaking ordeal of fitting and spacing them. Only this time the receivers not only had to fit the QA wheels, but the dog-leg connectors as well. You can see the dog leg connectors and part of the QA wheel frame in the last photo.


The spacing has to be pretty good for it all to slide on and off for the heavy wheel assembly. I welded a 3/8" plate to the boxblade and the receivers on top of that. I ended up angling them up a little more than I wanted because of where I needed to weld, but I still got enough travel for the wheels to work properly. You can see they will use the same pin on design as the rotary cutter.
 
   / HYD QUICK ATTACH GAUGE WHEELS
  • Thread Starter
#12  
Here are a couple close ups after being welded and painted. The dog-leg connectors are now pinned in the receivers. You can also see the QA wheel frame and how it is captured under that lip on the dog-leg connectors, just like on the rotary cutter receivers.


Here is a series of photos that show the attachment of the QA Gauge Wheels to the boxblade. First is to line up and insert the dog-leg connectors and pin them. Then line up the QA wheels and slide on and pin them too. They sit up pretty good out of the way for regular boxblade work and add a hefty weight to it.

 
   / HYD QUICK ATTACH GAUGE WHEELS
  • Thread Starter
#13  
A few more angles of them on the boxblade. The last 2 shots from the back are with the wheels facing forward and backwards.


Also a couple photos from the game camera when I started up the road to the homesite. In one of them you can see how high they clear when folded up. With the hydraulic cylinder, if I run across an area that needs real cutting or ripping, I can lift them clear up out of the way. Another lever sends my hydraulic activated scarifiers down if needed.

One thing I noticed was how well the added weight made the boxblade sit down better. My boxblade is pushing 1,000lbs as it is with all that hydraulic gearing I have on it, so the QA wheels add even more. You can tell I've got some mileage on that boxblade too.

 
   / HYD QUICK ATTACH GAUGE WHEELS
  • Thread Starter
#14  
OK, now for the acid test. I have 2 videos of how the QA Wheels attach to the boxblade.
I needed 2 videos because Loretta ran out of video on the first one. I guess it took a little longer to mount than on the rotary cutter due to the extra dog-leg connectors.


So I guess they are really "Almost Quick Attach" or AQA Hyd Gauge Wheels now. :D
You can see indeed they are pretty heavy duty and even a robust senior citizen like myself had to struggle a little to get them on. Nevertheless, I got them on within a minute and they work great.
I'll just have to get Loretta to get them off now.;)
 
   / HYD QUICK ATTACH GAUGE WHEELS #15  
Great Job!!!!! Thanks for such a detailed and image filled post:)

Wish I had this attachment for my box blade:D
 
   / HYD QUICK ATTACH GAUGE WHEELS #16  
Rob, they look just as good on the box blade, I can really see a huge benefit having them for fine grading chores.

I remember you rigging the pilot valves in the other thread, wsan't sure if the vavles were a stocked item or not. Carter's toplink is the only place I see them, he must have a good sole supplier, I can't find them as an "orderable" part, I'm guessing they are from Italy or Turkey or somewhere like that.

Back to the wheels, I'm drooling. ;)

Here is your next challenge, you mentioned getting a tiller at some point.

Imagine being able to "split" your two parallel wheel sections, and mount them on each side of a tiller? That would handle your depth adjustment!
You could certainly use them behind, just like the Box blade, but running tires over the freshly tilled soil is counter-to the tilling process.

Is there any way you could sleeve the middle sections so that they could be widened, then put back to their original width?

Not trying to make more work for you, more thinking out loud.

Those wheels are a patentable item right there!
 
   / HYD QUICK ATTACH GAUGE WHEELS
  • Thread Starter
#17  
tex, thanks for the very nice compliment.
They are not that hard to make and being QA like that are very handy for the other implements. Now, I only need to attach the receiver on any other implement and the wheels can get mounted to it. Like what skunk is referring to.

And skunk, Hooowee!
Those wheels are a patentable item right there!
Well consider this thread a copyright and patent pending then.

Sounds like you have a good idea about making it work on the tiller. Indeed I have a tiller on order (for Loretta) so I will be thinking about your suggestion very hard. If not splitting them like you say, perhaps adding wheels that go out sideways? I'll have to look at what's the easiest way without compromising the design too much.

Since I've never owned a tiller before and you are saying the wheels should go out sideways instead of trailing so as not to have them ride over tilled soil, what happens when they are on the side? Won't one of them ride over the area just tilled in the last row? Is that what would happen? Or do you leave un-tilled soil between rows?

Ok, thinking about it a little more, what about having them "in front" of the tiller then? Wouldn't that be about the same as having them on the sides? For sure they will never ride over tilled soil when up front. Heck, with these wheels, if I added a motor and a seat I could ride on the tiller?:)
 
   / HYD QUICK ATTACH GAUGE WHEELS #18  
3rrl,
You watch your back with that thing, as I am sure it would get to you with just the wrong twist.
Nice work, but you already knew that!
David from jax
 
   / HYD QUICK ATTACH GAUGE WHEELS #19  
Rob, you are correct, if on the side, then yes, one of them would roll in freshly tilled soil, the other would be out bound. But, I guess that's no different than the tiller skids themselves.

Tiller skids and their height adjustment is pretty rudimentary as we discussed in my tiller post. I got sidetracked on the front mount snowplow, when the deal fell into my lap, but will get back to the tiller soon. I was originally going to use hydraulics to raise and lower the skids, not use wheels.
But your wheel system just looks so universal.

The up side to wheels is that they have this tendancy to roll ;)
On the other hand, the skid runs the entire side of the tiller, hence, it may actually be supporting it better, spreading it's weight more evenly.
A single tire each side may be too much psi pressing on that freshly tilled soil.

The idea about mounting them forward of the tiller is real out-of-the-box thinking. I'm studying that one, now that you mentioned it.
So far all I can think of that may nix the idea is that there would be a lot of cantilevered weight (the tiller) hanging outback.

Hmmmm.....something to ponder.
 
   / HYD QUICK ATTACH GAUGE WHEELS #20  
So I guess they are really "Almost Quick Attach" or AQA Hyd Gauge Wheels now. :D

HaHaHa - are you kidding me? The first video is 29 seconds long, the second one is 22. Unless of course you cheated while Loretta was changing the "film" in the digital camera!

Well quite a conclusion to another fantastic project. You know everyone is green with envy and secretly wants a set. I can't get over how much you've worn down that Robo-Box-Blade. Do you think you got your monies worth out of that (several times over) ? My personal feeing is the wheels will be most useful and effective on a rake and a scraper blade. Maybe you can use them to position all your machine tools and furniture when you move in? Or attach them to the front of your wheel chair when the time comes. The possibilities are endless.

I have no doubt, you could built a Rob-ot, what a mechanical genius. - Very cool :cool:

Don't forget to update your profile with your proud new creation.

Larry
 

Marketplace Items

2008 INTERNATIONAL WORKSTAR 7400 SBA 6X4 DUMP TRK (A57192)
2008 INTERNATIONAL...
Volvo L45H (A61306)
Volvo L45H (A61306)
UNUSED IRANCH MINI EXCAVATOR QUICK COUPLER (A60432)
UNUSED IRANCH MINI...
2014 Forest River Rockwood Premier 2317G S/A Pop Up Trailer (A59231)
2014 Forest River...
2019 Bobcat T590 Compact Track Loader Skid Steer (A59228)
2019 Bobcat T590...
2016 INTERNATIONAL PROSTAR TANDEM AXLE DAY CAB (A59904)
2016 INTERNATIONAL...
 
Top