HYD QUICK ATTACH GAUGE WHEELS

   / HYD QUICK ATTACH GAUGE WHEELS #1  

3RRL

Super Member
Joined
Oct 20, 2005
Messages
6,825
Location
Foothills of the Giant Sequoia's, California
Tractor
55HP 4WD KAMA 554 and 4 x 4 Jinma 284
Hi guys,
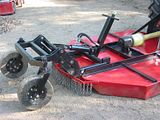
I've decided to start a new thread about the hydraulic quick attach gauge wheels I made. They started out as dedicated wheels for my Rotary Cutter, but at some point I came up with the idea to make them into a quick attach unit so I could use them on a number of implements as gauge wheels. So instead of dragging out the old thread, I've ended it with only pictures of the Brush Hog mod as I started out to do. I felt a new thread about these wheels as a stand alone item was in order to show how they fit other implements.

You can read about the original idea in this thread to get the background about the machining I did to make them.

Modify Brush Hog Some More

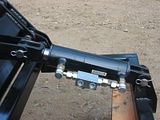
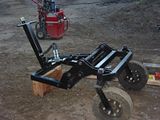
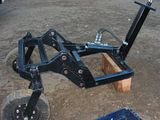
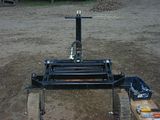
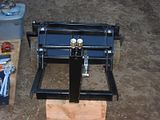
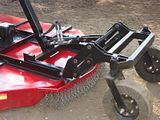
In the mean time, here are a couple photos to show how the project evolved into a stand alone Hydraulic Quick Attach Guage Wheels. You can see from these photos that the hydraulic cylinder is part of the unit. The cylinder has a double pilot operated check valve on it to keep the wheels in position.
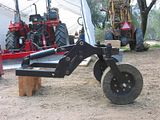
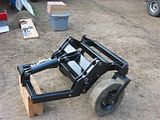
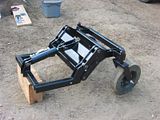
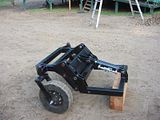
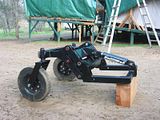
I will show photos of how the unit fits onto the brush hog and also on the boxblade, and how the switchover is done. There are a couple of additions to the unit itself after these photos were taken.
 
   / HYD QUICK ATTACH GAUGE WHEELS #2  
Bravo Rob!!

Those are a real work of Art. But don't let them sit in a museum, they deserve to work! ;)


Great job!! :D :D
 
   / HYD QUICK ATTACH GAUGE WHEELS
  • Thread Starter
#3  
Hey thanks Skunk!
I'll try to get them in the dirt asap. I've got a couple more pictures to share about the build.

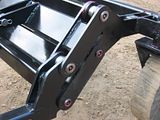
Here are some more details like the self leveling links. They ended up being a very tight fit and there is no slop at all in the links. It turned out to be a super heavy duty construction...probably overkill for it's application. With the solid tires, cylinder and hoses, my guess is this thing weighs nearly 300lbs! It will make a great weight addition to my boxblade when raised up and not in use for leveling.

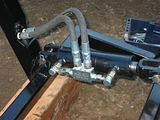
Notice how the hardened pins and bushings attach the system together. Each pin is drilled and counterbored from the outside with a Zerk fitting installed. There are internal grease lines that lead to the bushings and pivots. The other photo is a close up of the double pilot operated check valve mounted to the cylinder with hard lines. This will keep the wheels at the position I choose to put them. I got the dpocv from Mark Carter at CCM. I have used them on several of my projects and they work great.

 
   / HYD QUICK ATTACH GAUGE WHEELS
  • Thread Starter
#4  
After all the fitting and moving I realized I needed some kind of handle to move it around.
I also wanted to protect the lower hoses coming from the cylinder. So I built a square tubular housing and handle for both needs. The tube rise into the air with steel pipe inside. It's angled to get closer to the tractor to make the hoses shorter and they are suspended up in the air out of the way of flying debris. It also has a little better leverage for handling like this.


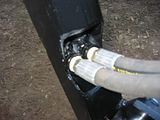
Below you can see the short hoses I used to connect the hydraulic cylinder to the steel lines inside the tubing. I moved the dpocv to allow for up and down movement of the cylinder. I also made spacers and clamps to hold the pipes on the inside securely so the don't rub or move. You can see them in the last photo above. There is also a close up of where the hoses connect to the pipe at the bottom of the tubing. There is a cut-out in the tubing to allow this. I mounted the hoses like that so they would curl over the top of the cylinder for a little protection. I did all this fabrication at camp.

 
   / HYD QUICK ATTACH GAUGE WHEELS
  • Thread Starter
#5  
Ok, so now that the QA wheels are built, I wanted to show how they interchange from one implement to another. In the other thread, you saw how they were mounted onto the Rotary Cutter and how they worked.


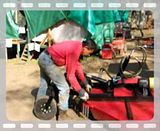
Here's a video of taking them off the cutter.
I had already disconnected the rear remotes and rolled the hose up onto the handle. This is pretty cool because it went a lot easier then when I was wrestling and fitting all this stuff. I guess everything must have finally lined up. :)


They truly are quick disconnect as you can see.
As heavy as that unit is, I managed to move it because it rolled on those big wheels. The only awkward thing is those wheels pivot in all directions and you end up chasing it around.:D But other than that, it's not too bad to handle for an old dude like me.
 
   / HYD QUICK ATTACH GAUGE WHEELS #6  
That's a pretty slick setup. Nice work.
 
   / HYD QUICK ATTACH GAUGE WHEELS #7  
Rob
Both of the wheels look pretty clean did you run them through the dish washer?

We won't tell Loretta honest!

Tom
 
   / HYD QUICK ATTACH GAUGE WHEELS #8  
Looks good from here!!!!
David from jax
 
   / HYD QUICK ATTACH GAUGE WHEELS #9  
Rob, the video was great. By lip reading i think you were saying "Heck, these are nice I am keeping them!"

Where did you get that compact pilot-operated check valve?
(assuming that is what it is?)
 
   / HYD QUICK ATTACH GAUGE WHEELS
  • Thread Starter
#10  
Hey guys, thanks a bunch for the nice compliments. They are greatly appreciated! I haven't forgotten some of the suggestions about a kickstand for parking it either, but I'll wait till next time I go up to see what I can do about that. I wanted to get them done since the other thread dragged on like that.

Skunk,
Yeah, I'll be keeping them alright. I got that dpocv from Mark Carter at CCM who makes the hydraulic top links (TNT) we buy. He had a couple spares and I bought some for this project and also for my backhoe stabilizer legs. Man, they work great. You can see how I did that on post #13 in this thread. Backhoe Feet & Stabilizer Legs Only on those I had to make my own 10mm tubing out of 303 SS hex stock.
That backhoe of mine has been sitting on the legs for over 3 months and it has not leaked down an inch!
Like I said, they are Metric using 10mm hard tubing for the compression fittings and 3/8 BSPT for the outlets. So I had to get adapters going from BSPT to JIC to fit my hoses. But they sure are nice and compact.

Tom,
No, are you kidding?
I didn't run them through the dishwasher after all. I told Loretta about your idea and that you wouldn't tell if I did, so she offered to scrub them up for me. She cracked up when I told her. Now we both know what a nut you are.:)
 
 
Top