Rear Blade build

   / Rear Blade build #11  
Mike,
Great follow up on your blade and especially those cool gauge wheels.
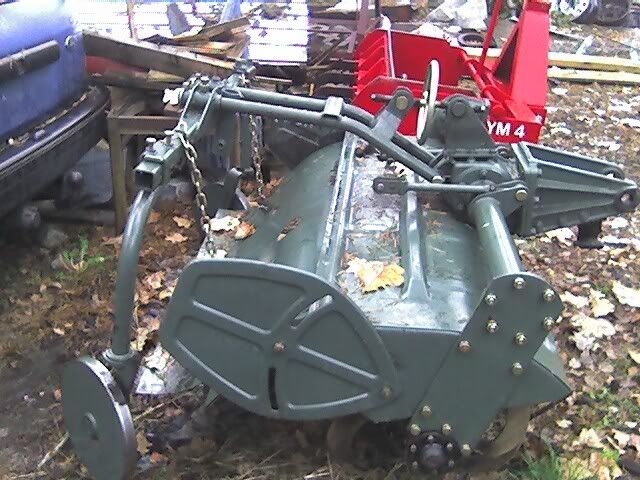
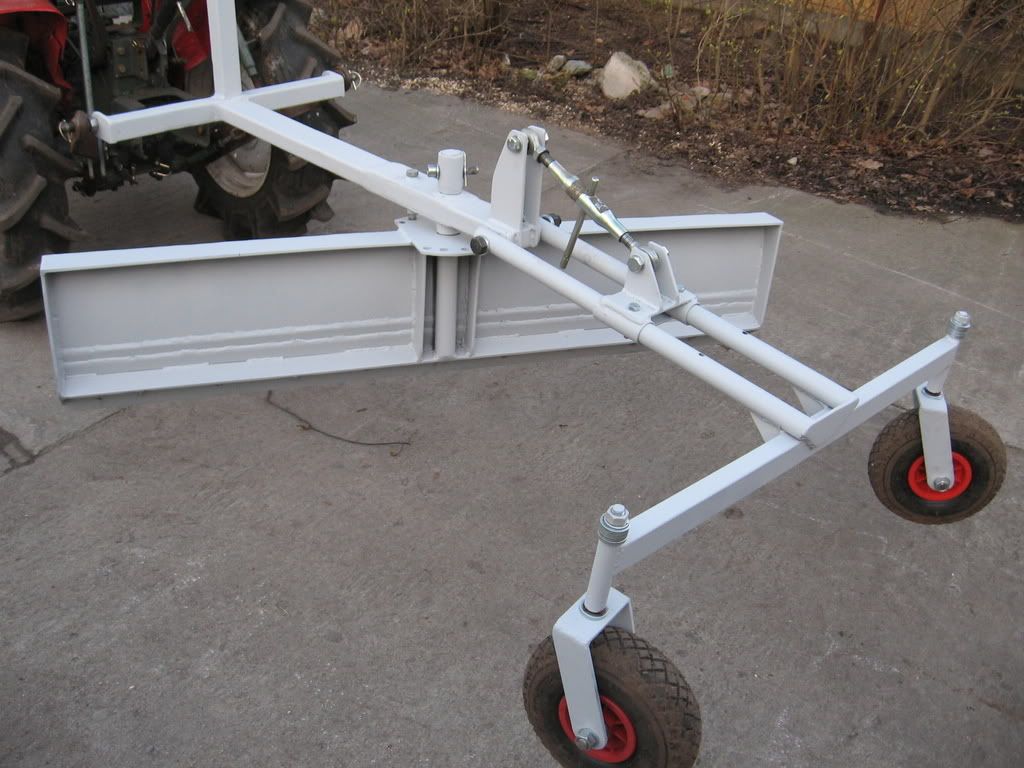
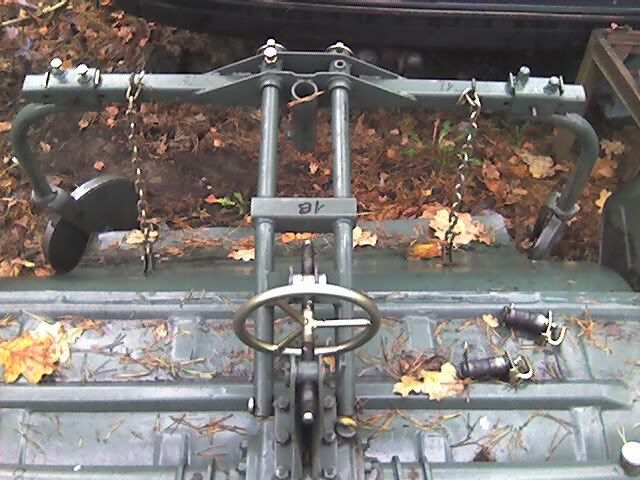
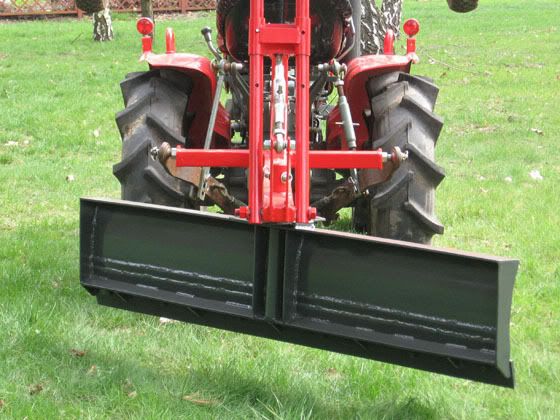
They remind me of a mechanical version of mine. Have you thought about making them "quick attach" like I did? I use mine on other implements now. I move them from the boxblade to the rotary cutter. I don't have a rear blade like yours, but if I did, they would surely go on there also. I'm thinking of adding them to Loretta's landscape rake too. Don't know how much help they'll be there, but why not? In the "up" position they add quite a bit of weight to the implement.
BTW, those clickable thumbnails are way cool!
 
   / Rear Blade build #12  
I especially like the design of your guage wheels. I thought you did a good job when I initially posted my reply, but I am really impressed with the design of your guage wheels. Welding the gussets I spoke about earlier, you have the ultimate rear blade.
 
   / Rear Blade build #13  
Poland must be humid as it didn't take long for surface rust to appear. I have no doubt that the rust will be wire brushed off prior to painting. Just speculating as I've never been to Europe.

As you mentioned, the length of your rig is substantial. I still suggest you add lateral gussets to the frame to keep it intact, as there is a lot of stress on that connection near the 3PH. The vertical gusset is a good start.

Great work and the gauge wheels mechanism is simple and elegant.
 
   / Rear Blade build #14  
Very nice! Some very nice ideas that i may have to copy when i get around to building my rake/blade combo

Stew
 
   / Rear Blade build #15  
Exelant job Mike, I realy like the gague wheels.
 
   / Rear Blade build
  • Thread Starter
#16  
Thanks for the compliments guys. Maybe this afternoon if the weather holds I will get a chance to finish the clean up, make some mods and even paint it. We will see.

3RRL I have thought about making them QA, but right now I do not have anything else that I would attach them to. I have a Rollover box that is already so heavy that if I fill it with sand (that is about all we have and it is easy to do) I cannot pull it. I do not have a mower or cutter that might benefit. They are quickly removable with only the 2 bolts, which could be pins for that matter. If I were to get something, then I would seriously consider putting the "fins" on the new tool with a place to connect it up.

mjncad
Poland must be humid as it didn't take long for surface rust to appear.
Actually it is not that humid (like in GA or FL)--but rather working when it is raining with unpainted steel.:rolleyes:

I still suggest you add lateral gussets to the frame to keep it intact, as there is a lot of stress on that connection near the 3PH.
I thought about putting in gussets, but I have this idea that I would like to put a pivot at the 3pt hitch that would allow the blade to swing out a bit more to the left or right sides.

cruzer I actually plan on making a rake that will fit this same frame. I cannot find the spring steel that I need to make the tines. When I find them I will make the rake. I can drop the blade by pulling only one retaining pin, so switching from one to the other would be quick and easy.

Mike
 
   / Rear Blade build
  • Thread Starter
#17  
cleatus said:
I realy like the gague wheels.
mjncad said:
the gauge wheels mechanism is simple and elegant.
Thank you for the comments. It is the gauge wheels that really give the blade function above what I could do with box blade and it is very beneficial to be able to get them up out of the way.

As much as I might like to claim originality with the wheels the basic idea for them comes from the wheel set up for the Yanmar 2pt tillers.


I actually thought about making it possible to slide the wheels closer to the blade (like is possible on the tiller), but decided that I needed the stabilization that the wheel cross bar gives the set up (the tiller gains the stability through a fixed adjustment bracket). I could have put a stabilization brace in somewhere else, but it seemed that every place I tried would limit the movement of the adjusting bracket or the movement of the bars in the "up" position. Plus, I would not shorten the overall length because the bars still stick out the same distance. So in the end I decided to weld the crossbar solid and just have the adjusting bracket slide.

Mike
 
   / Rear Blade build #18  
MJPetersen said:
I thought about putting in gussets, but I have this idea that I would like to put a pivot at the 3pt hitch that would allow the blade to swing out a bit more to the left or right sides.

Mike

If you end up putting in a pivot near the hitch portion, the hydraulic cylinder or an adapted adjustable top link will go a long way towards providing lateral strength to the frame.

I really do like the quality of your work.
 
   / Rear Blade build
  • Thread Starter
#19  
We had a couple of beautiful spring days here this past week and I had an afternoon free so I decided to make a couple of small mods and paint the blade.


I did not have enough of the Yanmar Red that I had mixed last summer left to do the whole job, so I opted to paint the blade the paint that I got to match the Yanmar chassis color--it was a bit darker than I expected and is not a perfect match. It seems to be in the same family, but is too dark. Oh well it still is paint and it covered the steel.:(


My modifications were to put in a diagonal brace for the top link post and to move the blade indexing plate closer to the main boom. I had bent this pin before and I wanted to shorten the length necessary for the pin to reference the blade. I will make a harder pin with a handle, maybe this week.

Mike

PS. All pics are clickable links to larger, but not VERY large pics.
 
Last edited:
   / Rear Blade build
  • Thread Starter
#20  
Since the RB was not made to be a lawn ornament, I decided that I needed to get it dirty. I am building up the area in front of what will be my work shop and had thrown some broken up pieces of concrete into the area that I wanted to build up. I then took my scoop and hauled in a few loads of sand. Then I planned on using the blade to level it all out.


It was not a complicated or highly involved sort of thing, but it was a project that would get it dirty. Of course if I hooked one or two of the now hidden chucks of concrete and bricks I could expect a scratch or two. That would be a good initiation and get it past!

I did manage to snag a couple of chunks and put a few scratches on the blade so I am in good shape now.:rolleyes: One of the things that this project highlighted was the ability to get in close to the building with gauge wheels folded up to the maximum. I am able to get about 6 inches from the building and that saved that much shoveling.:D


After I got it roughed out with the blade, I dropped the wheels for some finish grading. It came out fairly well and I am very pleased with the performance of the blade. I would still like to make a rake for it and I will when I find the springs that I need. It gives me an excuse to cruise the metal recycling places.:rolleyes: I forgot to take some pics of the finished result, but the whole thing is not totally finished. It is an on-going project.

Mike
 
 
Top