Hitch on your backhoe

   / Hitch on your backhoe #21  
Here are pictures of the FEL hitch setup. The Blade is 1/2" x 4" weld on, the three glide plates under the bucket are 3/8" x 3", and the top bucket brace is 1/2" x 2" stock which took a while to fab - had to mock it out of cardboard for the bends. Bottom lift eyes are 316 stainless. The brace rod doubles as support for the blade when the forks are used.
 

Attachments

  • FEL HITCH 2.JPG
    FEL HITCH 2.JPG
    79.1 KB · Views: 254
  • FEL HITCH 1.JPG
    FEL HITCH 1.JPG
    76.3 KB · Views: 324
  • FEL BRACE 2.JPG
    FEL BRACE 2.JPG
    42.1 KB · Views: 233
  • FEL BRACE 1.JPG
    FEL BRACE 1.JPG
    56.5 KB · Views: 222
   / Hitch on your backhoe #22  
The hitch assembly mounts to these two stainless tabs under the starboard FEL arm for storage
 

Attachments

  • F HCH STORE.JPG
    F HCH STORE.JPG
    67.3 KB · Views: 273
   / Hitch on your backhoe #23  
ACHINBAC said:
The hitch assembly mounts to these two stainless tabs under the starboard FEL arm for storage

man i tell you what, ive seen alot of fab guys on here but your stuff is the shiznit, excellent work !!! need you to come over and help me out for awhile, i stick stuff together but you make it work and look good.
good ideas. seems pinnin the bh would stop the motion of the dipperstick while pulling the trailer. Somewhere i saw an add for a trailer hitch mounted to the draw bar for use with tlb units but i cant find it anymore

good work man !!!
 
   / Hitch on your backhoe #24  
Thank' W.A.T.T. Appreciate the offer but my friends think I should seek medical attention (as in a shrink) - so I guess that's where I'll have to go if I get some time off - as my name implies, I would have your's if you hadn't taken it already.

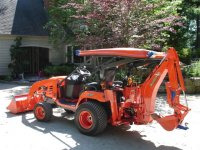
I had found and read the board front to back since September of last year in an effort to determine which tractor to purchase (bought new in November - could not find any local used under 1000hrs but that spoke volumes to me). A lot of the inspiration for my customization was drawn from the great work and ideas of others.

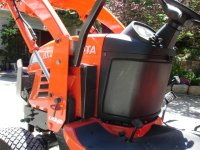
I will take some more shots and post to return the favor to everyone.

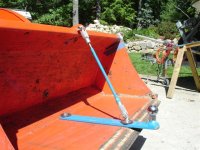
As to pinning the dipper stick, it was considered & of course would work, but limits the articulation of hooking up, unhooking, so on and so forth. May be done in the future though.

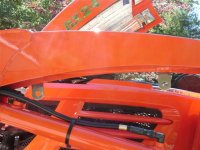
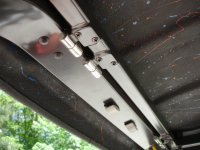
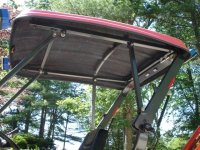
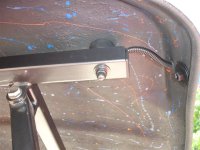
By the way, as you will see, I welded the piss out of the rop, and drilled lot's of holes in it too - I do not condone or advise this to others. As to the ones that will lean on me regarding this - don't bother putting the skirt and wig on, I already have one of you at home . . . .

Dave
 

Attachments

  • tie down 1.JPG
    tie down 1.JPG
    47 KB · Views: 254
  • rop 1.JPG
    rop 1.JPG
    59 KB · Views: 228
  • canopy 2.JPG
    canopy 2.JPG
    56.7 KB · Views: 180
  • canopy 1.JPG
    canopy 1.JPG
    102.5 KB · Views: 247
  • ammo 1.JPG
    ammo 1.JPG
    49.6 KB · Views: 255
  • top down.JPG
    top down.JPG
    91.7 KB · Views: 322
  • canopy 3.JPG
    canopy 3.JPG
    59.3 KB · Views: 154
  • ammo 2.JPG
    ammo 2.JPG
    76 KB · Views: 262
   / Hitch on your backhoe
  • Thread Starter
#25  
Dave that is some nice work you have done there . I like the roof bit too. I was planning on also making something like that but having walls and a plastic or plexy glass front and rear windshields put into it. I also need to be able to drop the roof so I can get clearance for storing the tractor in the garage. What is the size of the square tubing you have used and the wall thickness of it.

I was going to make the walls out of canvas so I could paint them whatever color I wish to.

Getting back to your trailor hitch what kind of loads are you hauling with this. Have you found this causing any premature wear on the pin where the end of boom and arm meet,cause I am sure as you are hauling a load there is some slight swinging of the trailor tow bar left to right.
 
   / Hitch on your backhoe #26  
So Dave...

Tell us the truth...

You build tractor upgrades for a living, right?
:rolleyes:
 
   / Hitch on your backhoe #27  
Defective,

You got it amost right . . . . I LIVE to build tractor uprades...

I am a renovation, maintenance & painting contractor & had worked only in wood for 20+ years. 5 years ago I bought a miller 175 mig with some extra cash - a toy I'd always wanted to own - & a 12" dewalt abrasive chop, though I find myself doing most of my cutting with my hand held right angle grinder (10k rpm with 4" to 5" whizzer blades in it cuts wicked fast and accurately also awesome for cutting bolts to size & doesn't mess up the threads). I also have a 16" drill press and all the usual shop toys. I taught myself to weld and work with steel by trial & error and actually rarely build wood projects any longer except my day job of course.

There are very few things I own that have not been tweeked, enhanced, reshaped, (wrecked sometimes) by the desire to have them perform a little better - a curse I inherited from my Dad.
 
   / Hitch on your backhoe #28  
Fiddler,

The tubing is 1&1/4" x 1/8" wall with 1" x 1/8" wall tubing pounded inside it - would have used 1/4" but did not have any on hand - sounds foolish, but guarrantee you it won't be the last foolish thing I do. The bends have additional 3/4" tubing in them to help strengthen the weld. The ends are 1 & 1/4" bored rod stock from Speedy Metals (find them on the web) they are great for small quantities of any type of metal stock - a bit of a premium payed, but I work all day and don't have time to drive all over the place looking for stock. Same with the bolts I used - from the Bolt Depot in Weymouth, Ma. They have all kinds & I don't mind paying shipping.

I would also like to make some sidewalls too in the future though would probably use something like Sunbrella or other marine fabric - very uv stable & available in tons of colors.

As for towing I use the arm for shuttling the boat or the tractor's trailer around my property short distances - I would not use the arm to continually trailer a box of rocks around all day for the reason you mention, though I suppose the arm could take it, you don't want to yank on it laterally - the boom and the dipper are engineered primarily for linear loads. If I had the need for heavy duty trailoring I'd fab something for the base of the boom @ the pivot, or drop the BH and fab a receiver to the frame.

Also If you look close at the top of the rops you'll see stainless marine hinges. One was bored all the way through and pinned with a bolt. With the bolt removed, the top can shift to the side an inch which unhooks the top for removal.

Dave
 
Last edited:
   / Hitch on your backhoe #29  
Fiddler,

This is the port arm @ it's lower pivot. The picture is rotated 90 to the left sorry. You can see the two walls in the 1/2" hole. Also there is an ammo box I mounted for shackles, tools, hitch parts fuses etc. It has two drawers that slide out and the smaller box fits beside the arm like factory - you can see better shots of it in some of my other pics. I also mounted one in the front of the bx - it holds 30' of 3/8" g70 chain.
 

Attachments

  • arm.JPG
    arm.JPG
    44.5 KB · Views: 218
   / Hitch on your backhoe #30  
Amazing high quality work...

I never tire of seeing the great stuff TBN minds come up with...

TBN is one of the rare sites where people actually build, create and improve...

Are you still using the 175 Miller? Would you buy the same model if you were to buy today? I'd like to upgrade one day from my Lincoln Tombstone Stick Welder so any recommendations appreciated...

I bet you could sell all the BX backhoe hitches you'd want to make...
 
 
Top