thanks for the comments
"Larso1, looking at your video, how deep were you rotovating there?
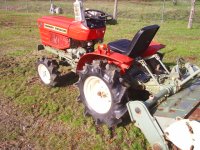
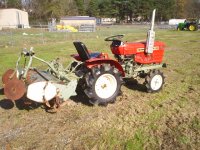
I found best results with 2nd gear, 2nd speed (middle box), low and PTO at 4 for ploughed ground but had best results on hard patches (previously an AG tractor drivethrough area) in 2nd gear, 1st speed, low and pto at 1. Both a lot slower that you in the video. Tiller was floating, so completely down and with these settings i was going with the tiller axle bearings in the ground. (so deep and single pass needed only) 19pto horses but not much reserve in the wet areas (clay)"
Tatra, I wasn't going for real deep, only about 3 to 4 inches because all I wanted to do was dislodge the weeds and their shallow roots. If I go too deep there, and somebody tries to park their car on the road in front of the house (inlaws, etc.) after one of our few rains or snows, it gets really muddy and messy so I try not to sink it down too deep at that location.
When I'm tilling the gardens, which have been previously tilled each year, I thnk I use 2nd gear, low range, for ground speed (I have 16 PTO HP). I put the PTO in 2nd gear also (out of 4-speeds). That works well for me at about 6- to 8-inches till depth (I think?). I have the creeper range as well but ground speed is way too slow in any gear. I once accidently put the PTO in 4th speed and it really threw out the dirt like a rooster tail, and lugged the motor down. I won't being doing that again.