Spike's Truck Drum Waste Oil Heater

   / Spike's Truck Drum Waste Oil Heater #1  

dngspot

Bronze Member
Joined
Jan 8, 2009
Messages
73
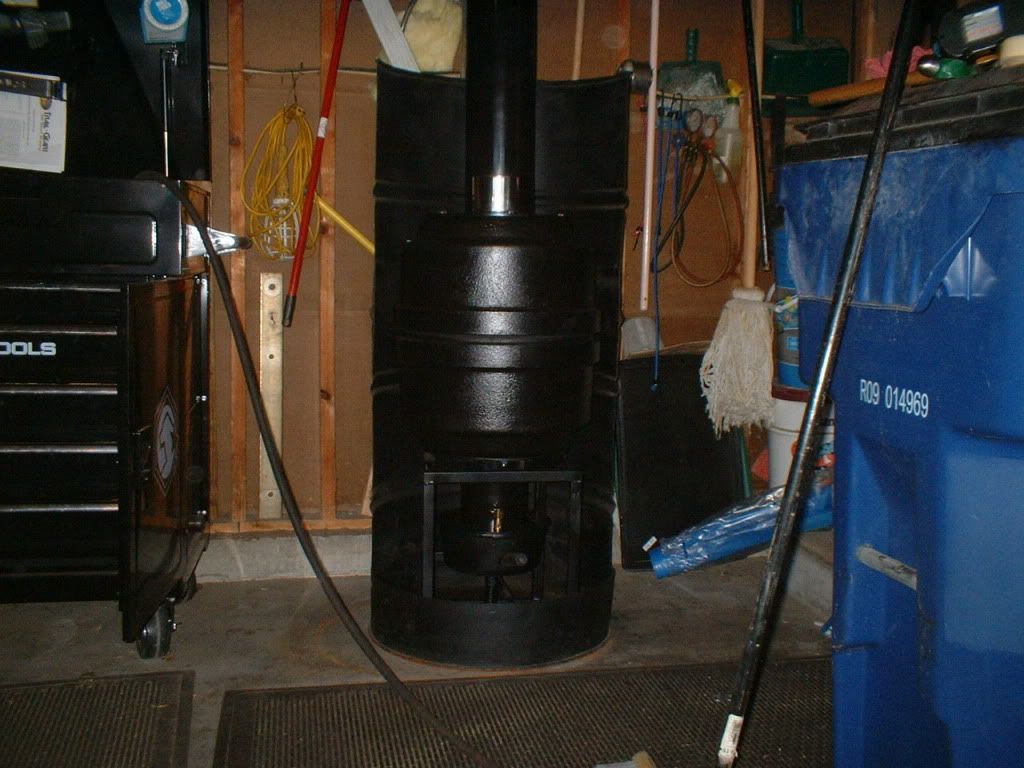
I have been able to get 800 deg from my Roger Sanders heater and want it a bit warmer. So I am giving it a go with a different design. It has cast iron drums and a better air intake than the Roger Sanders design, in my mind.

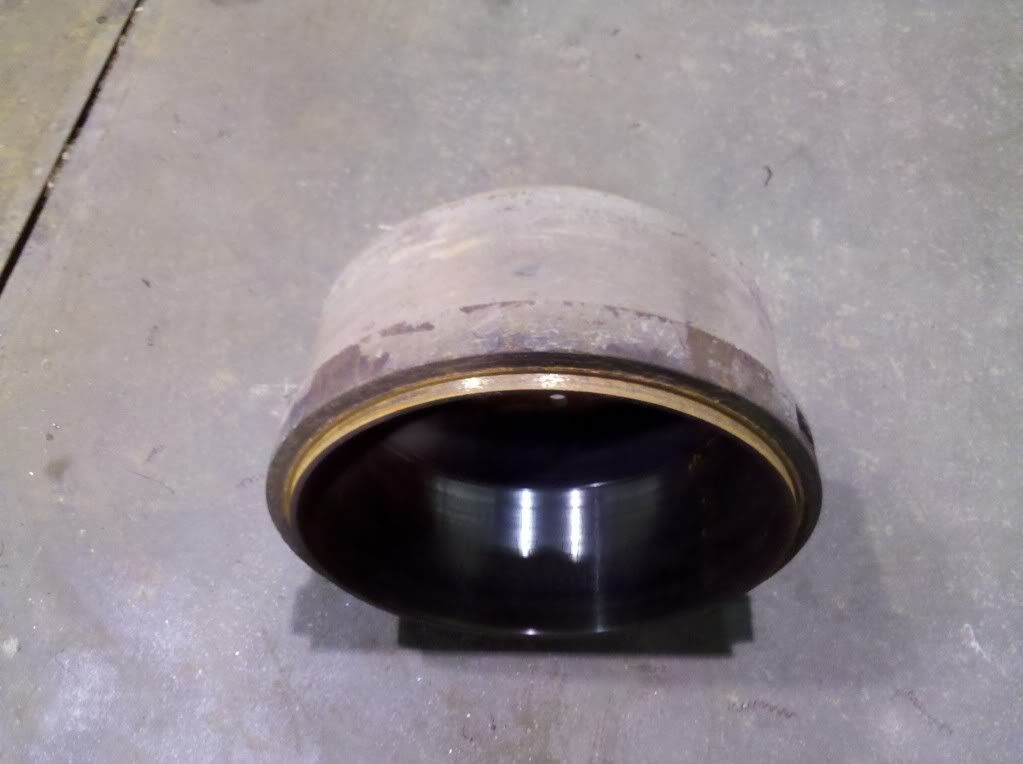
The first thing I did was obtain a couple of 16.5" brake drums from a large semi type truck. I put them on the lathe at work and machined the drums so the open edge of the drums would mate with each other.

Here is a pic of the lathe I used; it took about 2 hours to do both drums. It is also available to me during off hours at work.

IMG_20101226_090518.jpg


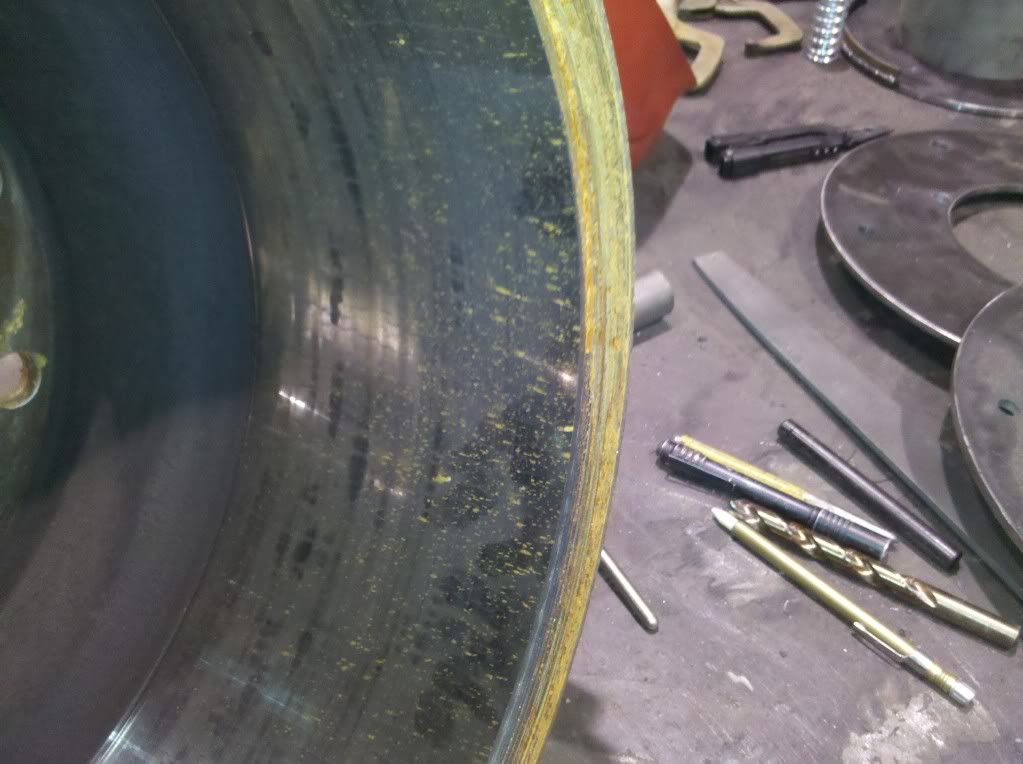
The drum edges, they are orange looking because of the fresh rust. I kept these in the back of my truck for a week while I gathered parts.

The outside cut on the bottom drum.

IMG_20101226_090501.jpg


A close up of the inside cut on the top drum. Sorry for the pic quality.

IMG_20101226_090446.jpg


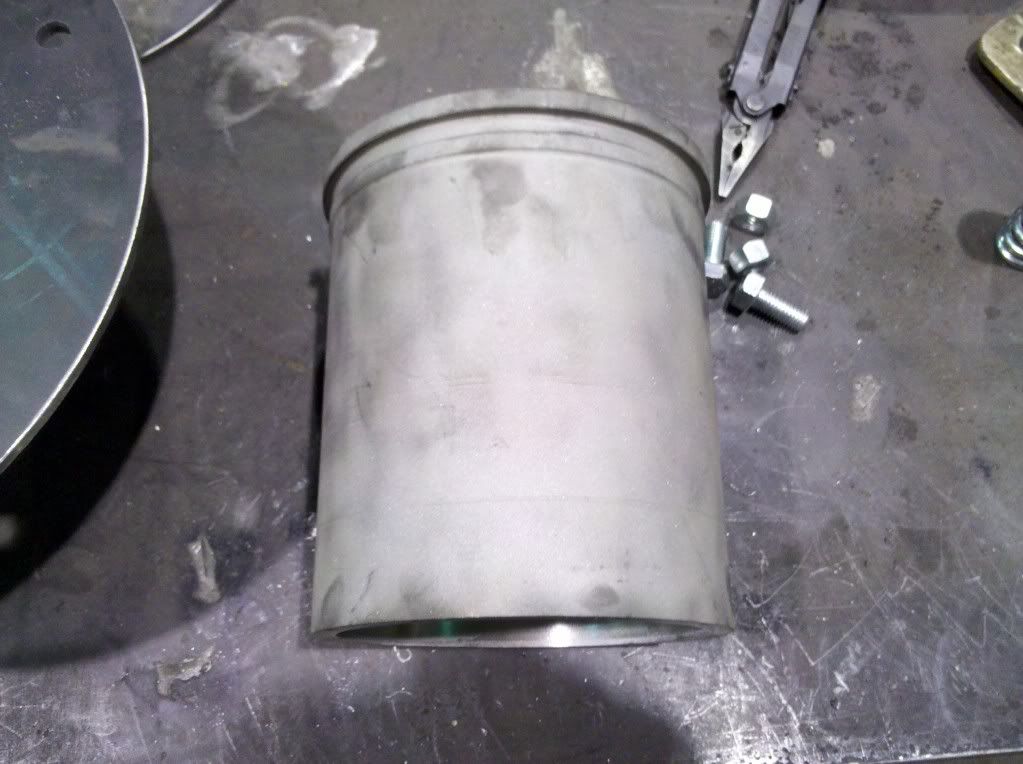
The cylinder after sandblasting and removing the bottom 2 inches, I believe it came from a C-15 Cat engine. I cut the bottom flat and inside of the cylinder with the lathe. I cut the inside of the cylinder about .020" because that area seems as hard as diamonds and does not drill well. The air vent holes will be in the lower 3" of the cylinder.

IMG_20101226_090843.jpg


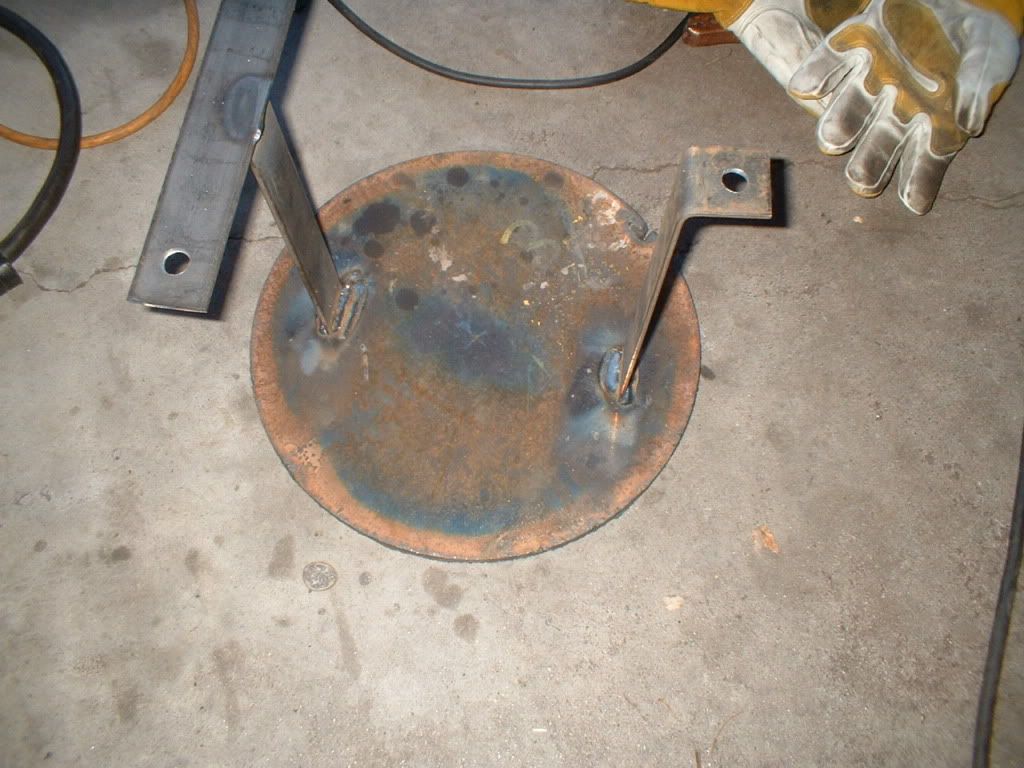
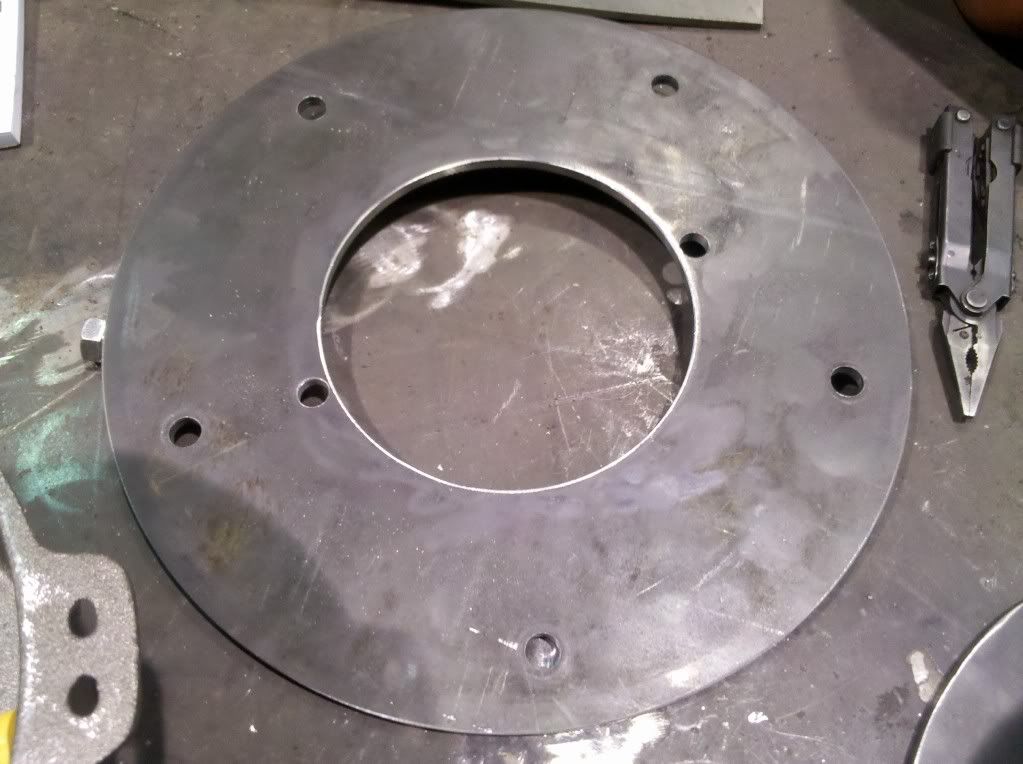
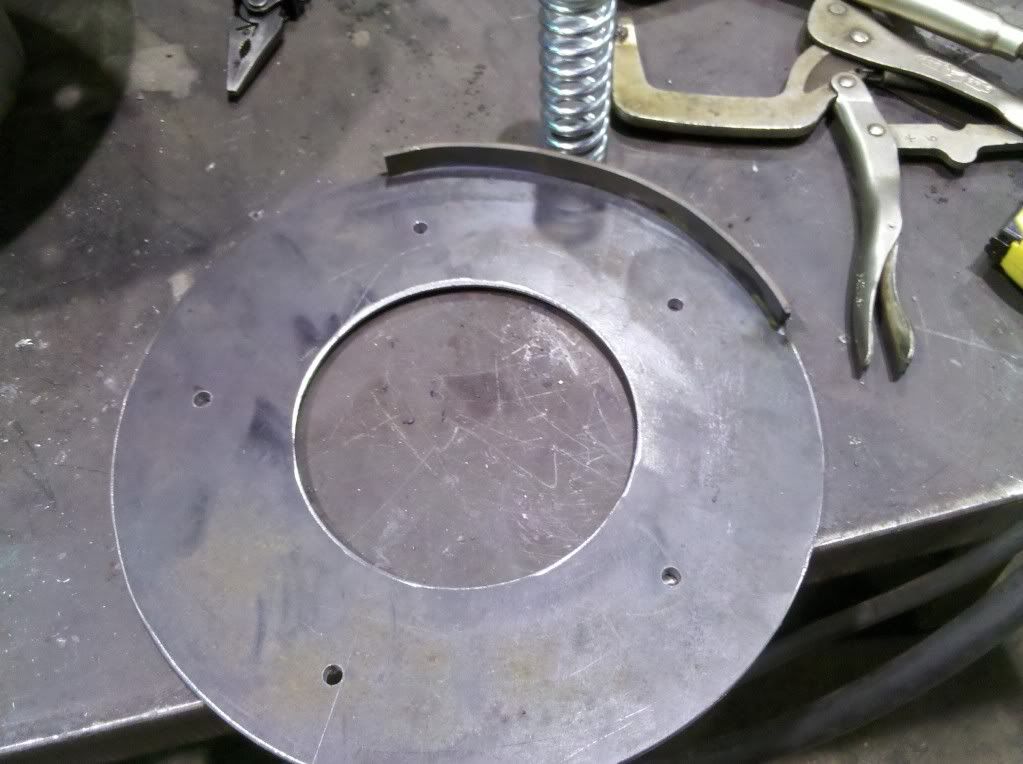
I cut 2 round plates to fit on the lug side of the brake drums. Both plates have 5- 1/2" holes for bolting. There are more holes, two for the bottom plate to fasten the cylinder to.

IMG_20101226_090422.jpg


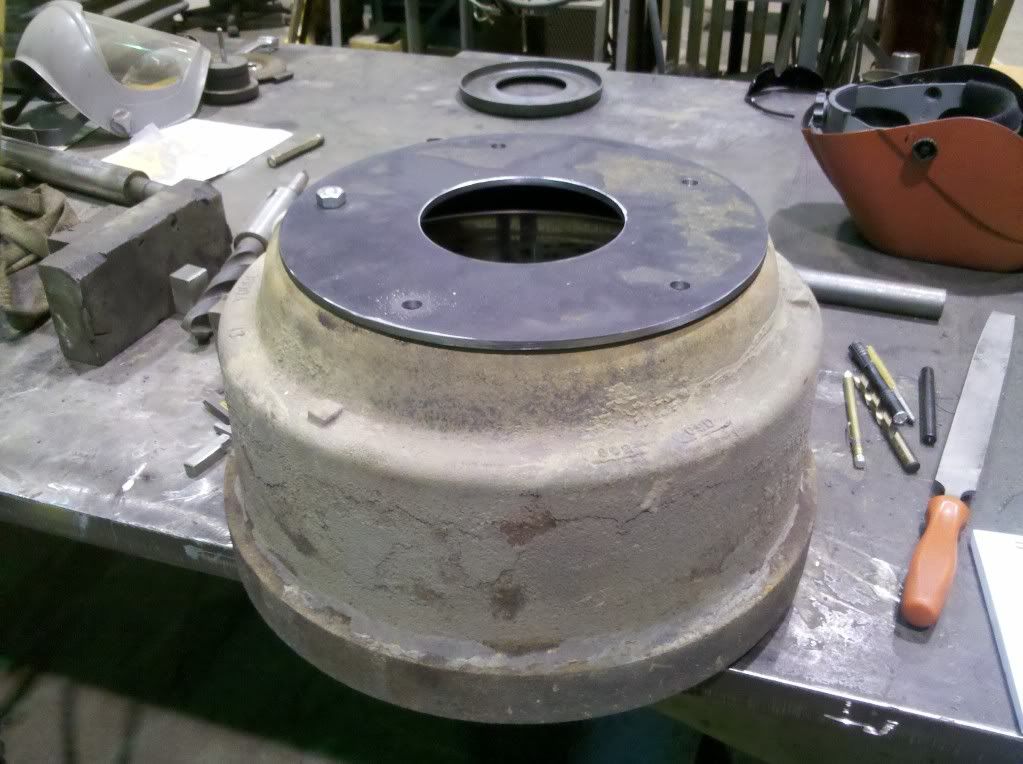
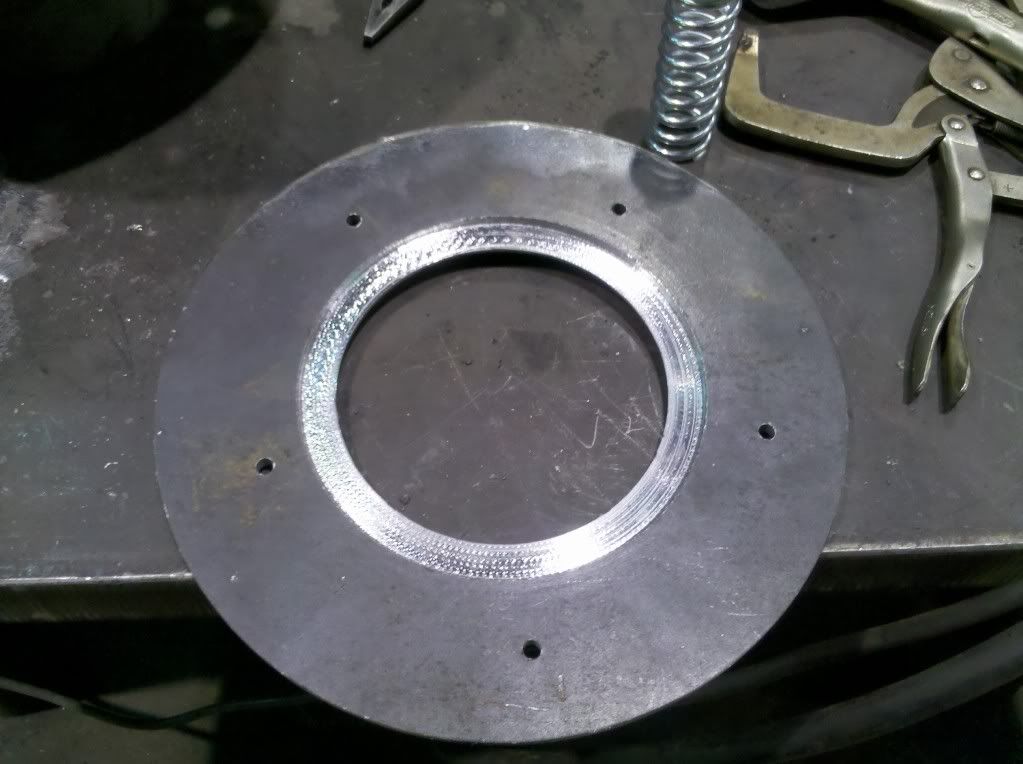
This pic shows the top drum with the second plate on top.

IMG_20101226_090431.jpg


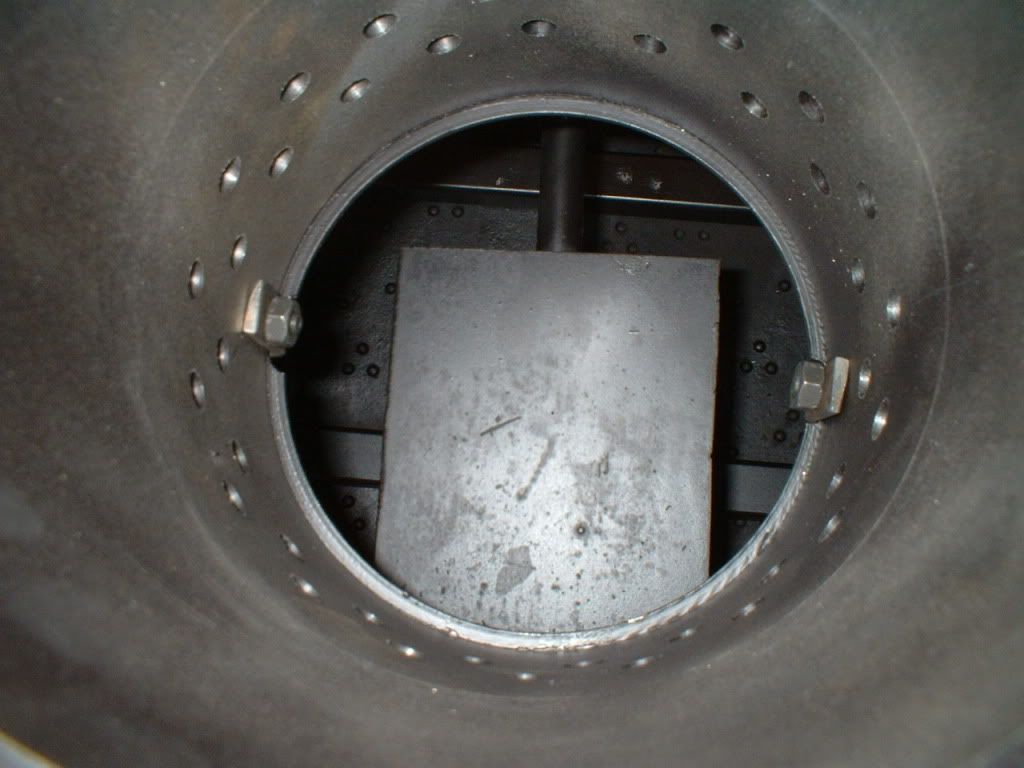
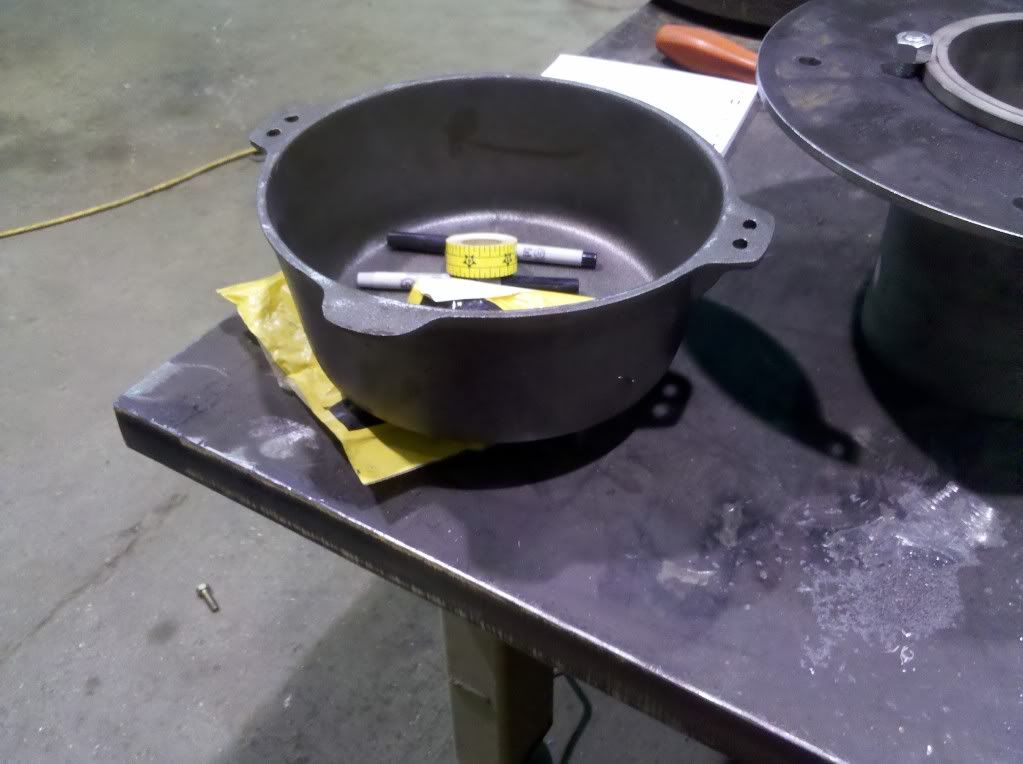
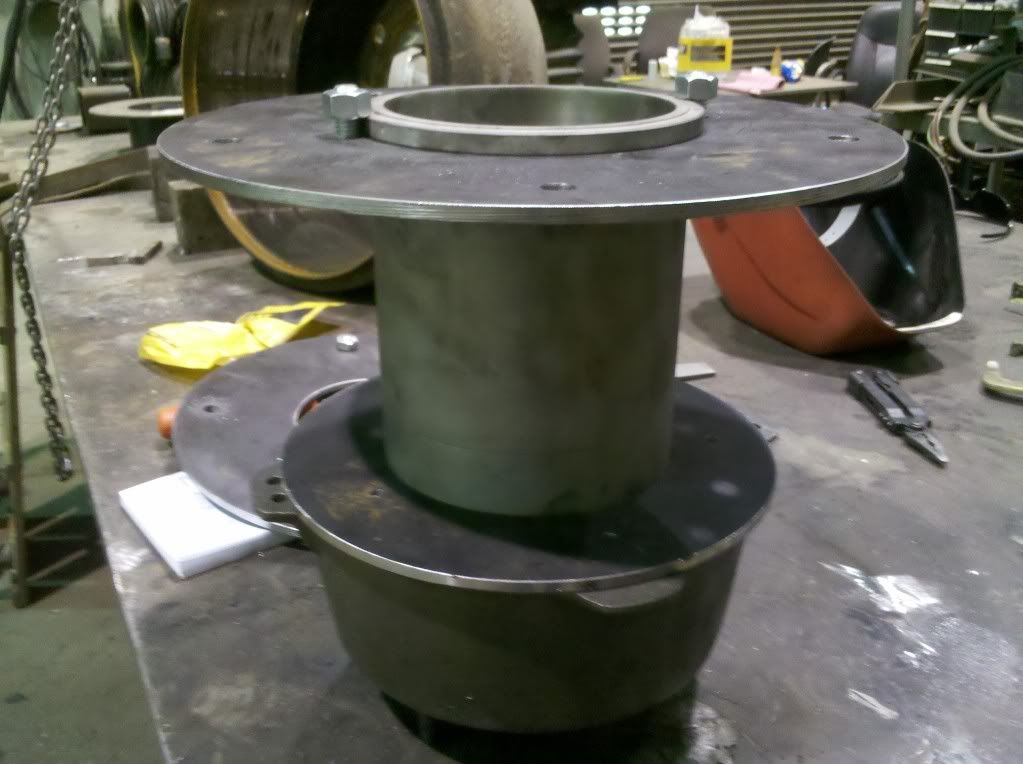
I cut another disk. It will set on top of the cast pot. The pot is the place the oil will drip into. The disk is machined so the cylinder will fit into it. The cylinder is about 6" O.D. The disk also has 5- 1/4" vent holes and a piece of steel welded to it, to help position the pot.
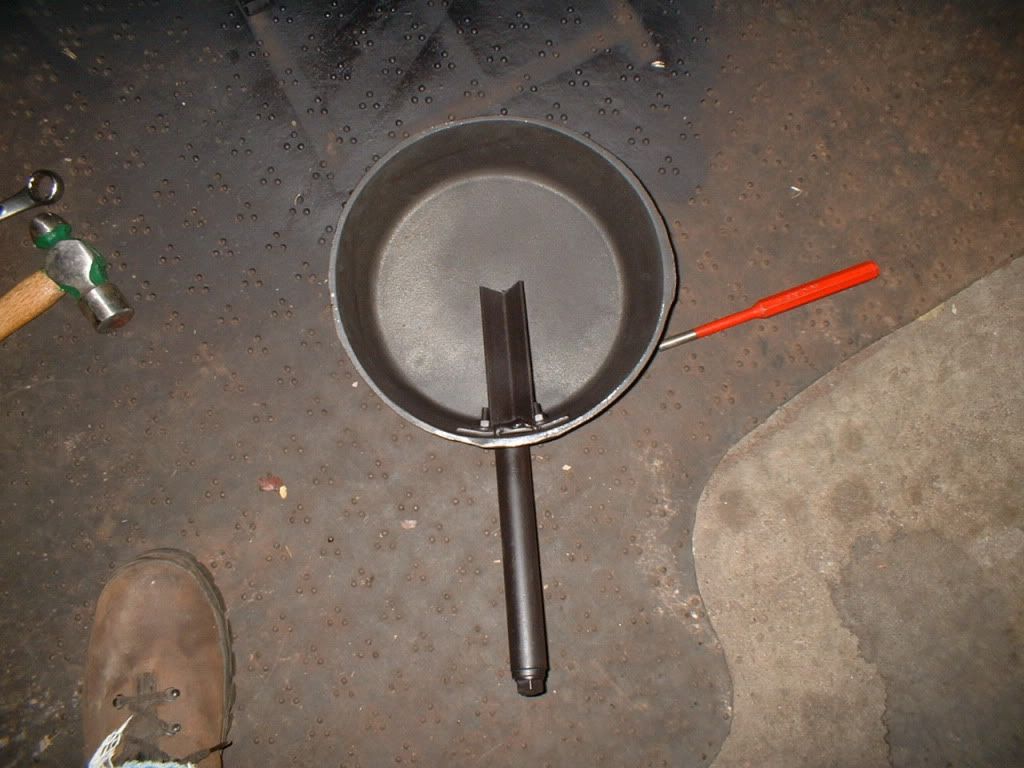
Here is the pot.

IMG_20101226_090355.jpg


The bottom of the disk

IMG_20101226_090349.jpg


... and the top of the disk.

IMG_20101226_090343.jpg


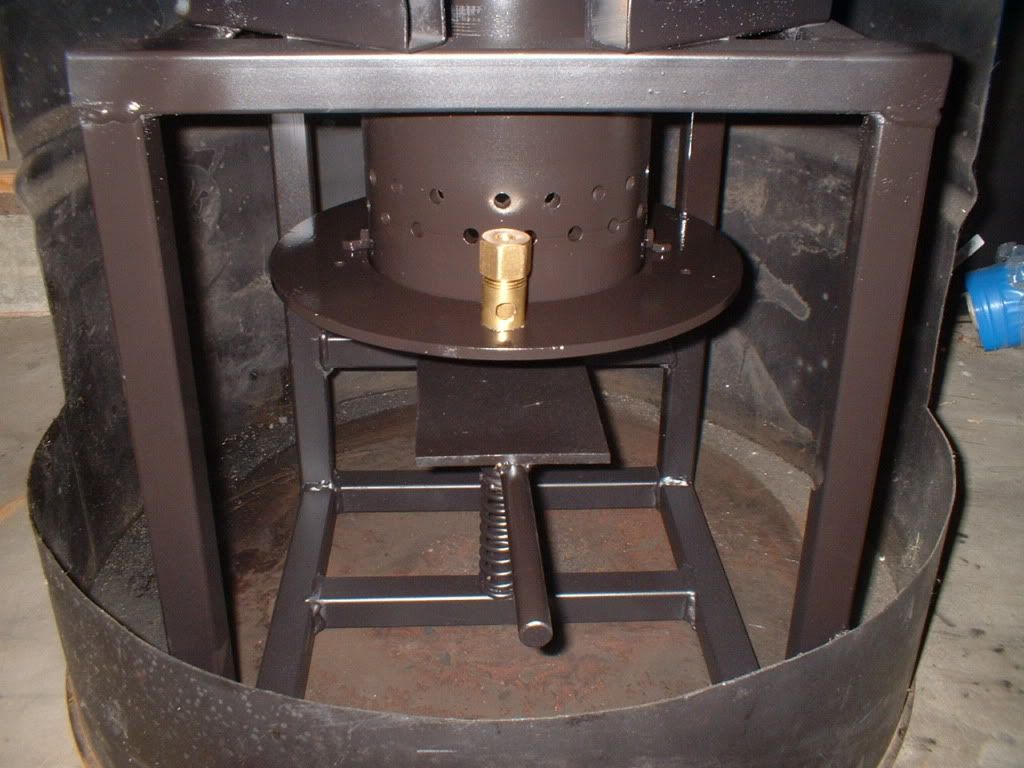
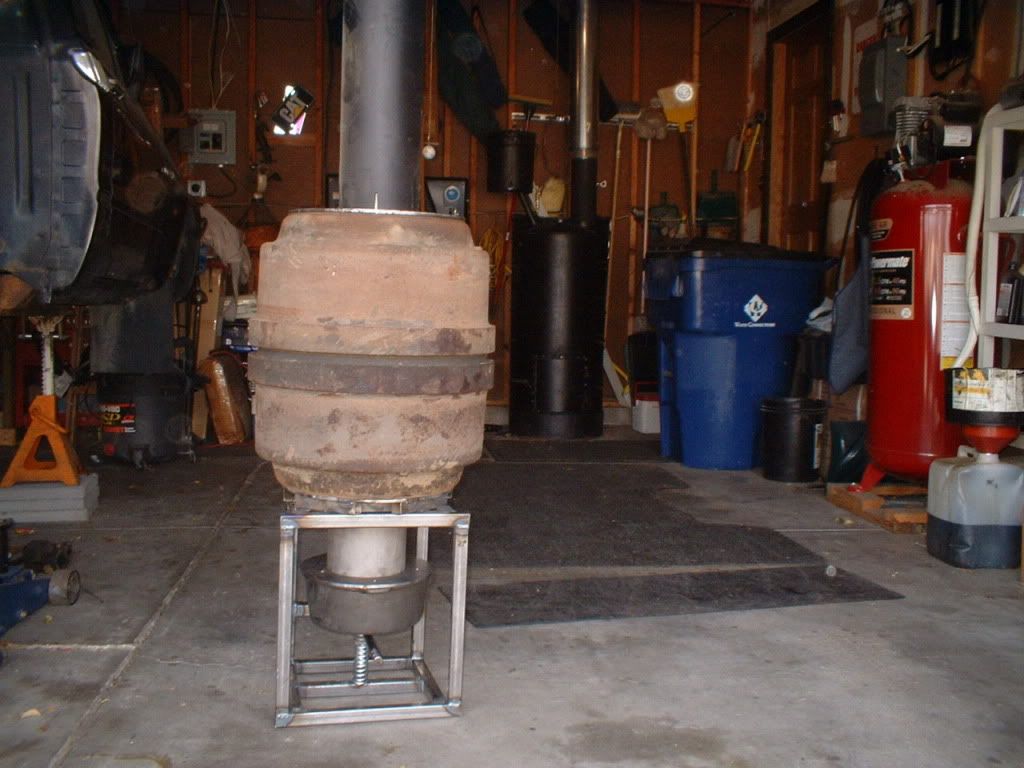
This is a pic of the burner assembly less the frame. The top plate will be bolted to the lower brake drum.

IMG_20101226_090727.jpg


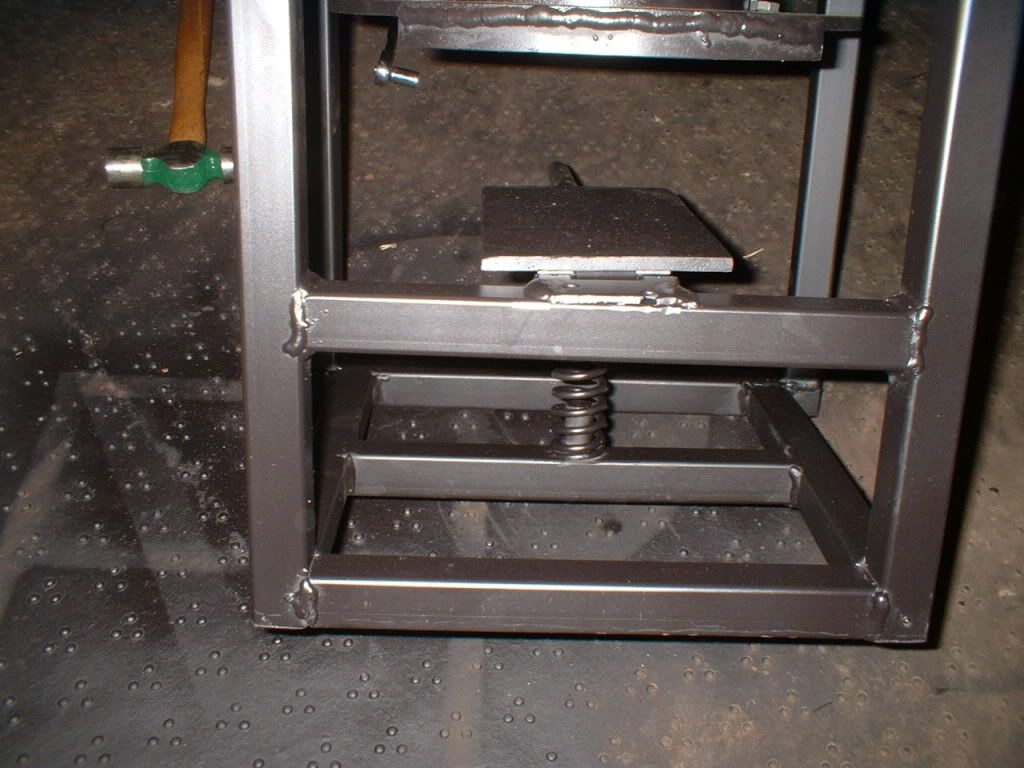
The frame has a spring and a handle to release the pot. The spring pushes directly on the bottom of a plate that the pot sets on. The plate is attached to a hinge that is welded to a cross member on the back of the frame. There are two dowels one for the bottom of the spring and one for the plate to keep it in place. The plate for the bottom drum has 1 inch spacers for bolt clearance, welded to the frame. The drums setting next to the frame are setting as they will once the frame and drums are mated.

IMG_20101227_143339.jpg


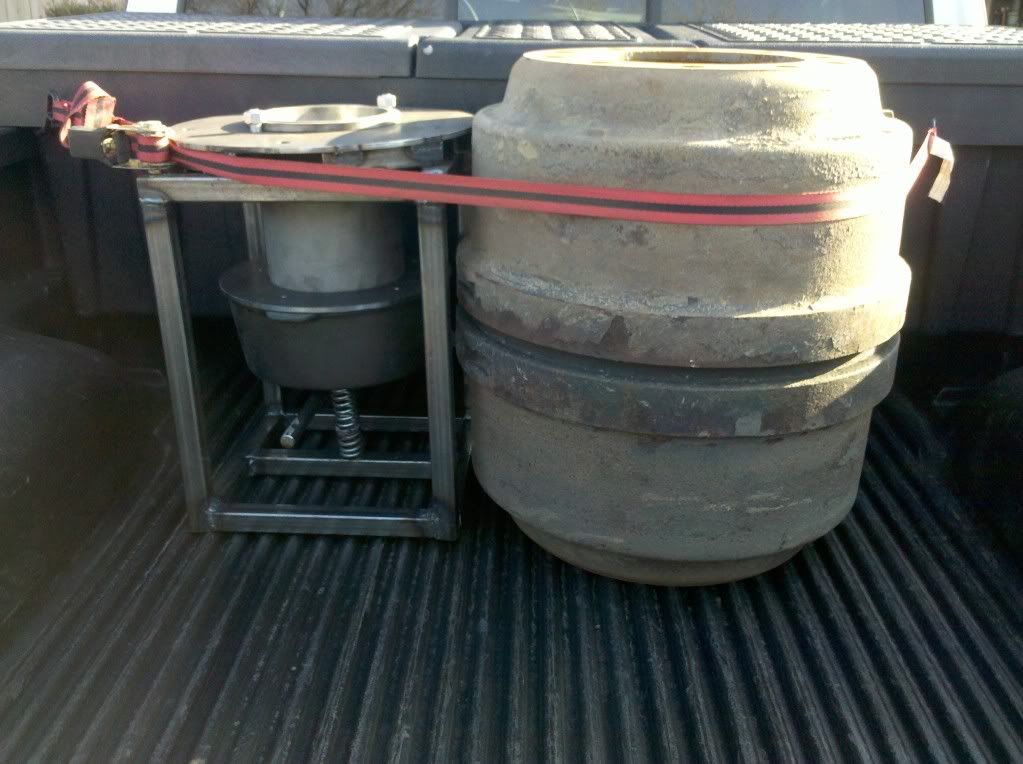
I need to widen the front of the frame; it is difficult to clear the pot. I also need to drill the cylinder for vent holes and install a baffle in the drums to deflect the draft out to the drums. Then I can weld on the draft tube, paint and install.
 
Last edited:
   / Spike's Truck Drum Waste Oil Heater #2  
well you did put a lot of work in to it i hope it works like you want it too :thumbsup:
 
   / Spike's Truck Drum Waste Oil Heater
  • Thread Starter
#3  
This morning I went out to a very cold garage and cut off the front of the stand. I built the front of the stand 2" wider than before. In the pic I put most of the heater together for a quick view of what the dimensions are going to be. To the right and about 15 feet behind is the Roger Sanders heater I built a couple of years ago. I ran it up to 500 degrees and could still see my breath after 2 hours. Nothing is fastened together in the pic.
The remainder to finish the project.
1. Build and fasten a couple of brackets to hold the pot lid to the cylinder.
2. Drill into the pot lid and build or assemble a connector for the oil line. I will use 3/8" copper or steel line.
3. Drill the vent holes in the cylinder.
4. Drill the pot to accept all thread for a handle.
5. Install a piece of angle iron in the pot to direct the oil to the center.
7. Test out side
8. Clean and paint then install.


DSCF0013-3.jpg
 
   / Spike's Truck Drum Waste Oil Heater #4  
Hi that looks good i will be interested to know how well it works:thumbsup:
 
   / Spike's Truck Drum Waste Oil Heater #5  
Very interested in any follow up on this heater. I have wanted to make the Sander's heater for my shop, but am on hold as I like Spike's cast drum approach. Are you planning to use the Sander's conical burner in the cast iron pot? Have been curious if the conical burner performs as well as it's presented. The theory makes sense, but a few people seem to have mixed results with it. Nice work!
 
   / Spike's Truck Drum Waste Oil Heater
  • Thread Starter
#6  
The conical burner does work well but, will not work in this heater. The burn should work like this. Oil drips into the lower pot; it is lit then burns in the pot. Any un-burnt vapor will rise into the cylinder and introduced to more air will burn. If it does work properly then it should burn hotter. The Sanders heater does not allow for more air. If I get the heater any hotter than 800 deg. the heater will start to puff violently. This is because it needs more air. As I give it more air, the flame blows out. I have tried this with both aluminum and steel burners. To date the steel burner seems to work better. I believe the heater would work great in a better insulated shop but not in mine. I also like the larger pot that Spikes heater has. With a standalone conical burner the burner can over flow. To prevent the oil from making a mess I used another cast iron pot under the burner. This turned out to be a greater thing than I intended. If the oil does over flow it burns under the conical burner and heats it up. I also put lighting fluid under the burner for the same reason.
That is enough on the Sanders Heater. It is coming out and going to a friend痴 house.
 
   / Spike's Truck Drum Waste Oil Heater #7  
Thanks, great information. I do like Spike's design with the truck drums. Really interested to see the heat output when installed.
 
   / Spike's Truck Drum Waste Oil Heater #8  
Wow that is amazing. Great work! I am always looking for used oil burner ideas to thanks a lot.

Pretty crummy looking lathe though, I'll give you $10 for it so you don't have to get rid of it if you want! :cool::drink:
 
   / Spike's Truck Drum Waste Oil Heater #9  
What benefits will this heater provide? Other than free heat, zero, period. Free heat is without cost. But in reality, these heater are a waist of fuel and time. Hinze the sooty residue left over and the high routine of maintenance that is required. This way of creating heat far out ways the benefit that one will get from this method of producing heat. The only benefit one will get from this heater, is free heat. But in reality, you need a heater that will allow you to adjust it. All you can adjust is the amount of oil this heater will burn. This heater will take forever to heat a building. I've been down this road cause I've tried this method before. Atomizing the oil is the only way one will benefit from his hard work building one of these stoves. If you atomize the oil, that will allow you to control the amount of oil the stove will burn per hour. It will also allow you to control the heat range and the burner temperature. In the end, I think, scratch that, I know you will not be happy with the performance that you will get from this stove. It will take forever to heat your building that you are wanting to work in.

My shop is 1200 square foot and that does not include the area above the rafters. It takes a large amount of BTU's to heat this area rather quickly. Once the shop is up to required temperature, I needed to be able to control that temperature range. Atomizing the oil is the only way to do this. I can burn two quarts of oil per hour and up to two gallon of oil per hour. Waist oil will create 150,000 btu's per hour. Since I can control my stove 100%, it does not take very long to heat my shop. The ticket here is high BTU's and high burn temperature and zero, yes, I said zero maintenance. I'm not bragging here, but 800 degrees is not allot of temperature. I've had my burner temperature heat so hot, it melted the edges of the this burner plate that I was using. It takes 2500 degrees to melt steel. Guess I need to stop calling my heater a stove and start calling it a forge.

In the end, I think I would build this stove more toward reality than trying to create free heat. :thumbsup:
 
   / Spike's Truck Drum Waste Oil Heater
  • Thread Starter
#10  
I did more. I welded a plate to a piece of angle iron, and then drilled 1/4" holes in the pot to bolt the angle iron assembly to. I also drilled a 1/2" hole, for all thread, to use as a handle. Then a piece of 1" pipe over the handle and a nut to keep the handle tight.

DSCF0016-6.jpg


The cylinder was drilled with 38- 5/16" holes and two tabs were added. The tabs fasten to the pot lid, so when the pot is removed I do not have to fiddle with the lid.

DSCF0014-6.jpg


I did not post a pic of the plate the pot sits on. Again it has a spring attached to under it and uses a standard hinge.

DSCF0015-5.jpg


The lid for the pot was drilled and taped to 1/2" pipe. I made tube connector from a 1/2" pipe nipple and cap. The nipple and cap were drilled a 3/8 bit.

DSCF0017-7.jpg


I built a baffle from a piece of scrap. It hangs from the top about center of the drum assembly. The baffle is about 12" wide

DSCF0018-7.jpg


I painted and placed it in the old heater heat shield.

DSCF0021-5.jpg


I did a test run with about a quart of oil in the pot. The heater smoked out of the pot lid 1/4 inch holes and when the oil came to temp flames came from the cylinder holes. There are about three things that I can change to fix the problem. The first would be a problem with the baffle. It was a design that I thought up not one that Spike uses. The second would be, my chimney reduces to 5 inches. I may have to put in 6 inch pipe. The third would only affect the smoke, I have too much vent in the pot lid, air could be coming in from between the lid and pot. I could install temporary bolts in the vent holes and see if the lower pot continues to get enough air but does not smoke.
 
 
Top