bindian
Super Member
Back in 2007, when I bought my Mahindra 6520 and 511 Backhoe, I modified the backhoe to run the Danuser Hydraulic Auger. It has worked well on the backhoe since then. Now, I want to run some new fence lines and have decided to move the auger to the side of the loader bucket.
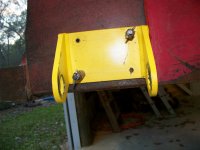
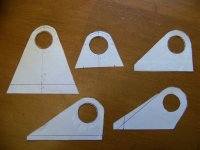
I drew out a lot of different paper designs until I finalized the design. I wanted it to hang a little low, but the bolts had to clear the bottom of the bucket. Thus the off set, low slung rake.
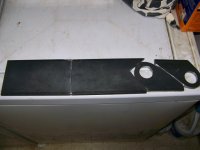
I decided to go with 3/8 inch 4 inch wide plate, as the bracket that will hang from it is 5/8 inch thick. I cut the pieces out with a 3 inch cutoff wheel on a high speed grinder. It took some time, but it took little grinding to get it cleaned up and looking production made. I drilled the 1 & 3/8 inch holes with a hole saw on the drill press at work. That took a while also.
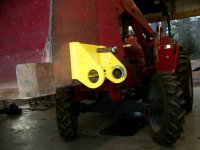
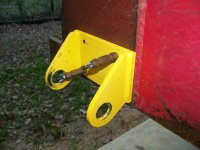
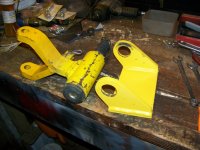
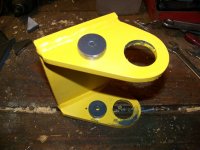
I had to go to my local welding shop, as I do not have a welder. Besides, 3/8 inch thick takes a bunch of welder. I showed the shop manager how it needed a washer inside the bracket for loose fit after welding. I didn't get to watch because of insurance. Anyway, I painted it at the shop while the mount was still warm. I got it home and tried the auger motor's adapter bracket. It barely fit after the paint was removed. Seems the welder took the washer out and now the fit is tight with paint. As you can see in the photos, the paint has been scraped by the adapter bracket, when I tried it out.
Hopefully next weekend I will get it mounted on the bucket. I need to figure out if I want to tap the bucket for threads, or just drill holes and use nuts on the bolts. I am leaning towards tapping the holes, but time will tell.
hugs, Brandi
I drew out a lot of different paper designs until I finalized the design. I wanted it to hang a little low, but the bolts had to clear the bottom of the bucket. Thus the off set, low slung rake.
I decided to go with 3/8 inch 4 inch wide plate, as the bracket that will hang from it is 5/8 inch thick. I cut the pieces out with a 3 inch cutoff wheel on a high speed grinder. It took some time, but it took little grinding to get it cleaned up and looking production made. I drilled the 1 & 3/8 inch holes with a hole saw on the drill press at work. That took a while also.
I had to go to my local welding shop, as I do not have a welder. Besides, 3/8 inch thick takes a bunch of welder. I showed the shop manager how it needed a washer inside the bracket for loose fit after welding. I didn't get to watch because of insurance. Anyway, I painted it at the shop while the mount was still warm. I got it home and tried the auger motor's adapter bracket. It barely fit after the paint was removed. Seems the welder took the washer out and now the fit is tight with paint. As you can see in the photos, the paint has been scraped by the adapter bracket, when I tried it out.
Hopefully next weekend I will get it mounted on the bucket. I need to figure out if I want to tap the bucket for threads, or just drill holes and use nuts on the bolts. I am leaning towards tapping the holes, but time will tell.
hugs, Brandi
Attachments
-
 5-27-07 Auger Motor Line Routing.jpg501.5 KB · Views: 1,454
 -
 5-27-07 PHD Installation.jpg521.4 KB · Views: 1,419
 -
 12-31-11 Auger Mount Paper Designs.jpg95.4 KB · Views: 683
 -
 12-26-11 Auger Mount from Flat Plate.jpg84.8 KB · Views: 731
 -
 12-31-11 Painted Auger Mt with Adapter 2.jpg141 KB · Views: 903
 -
 12-31-11 Auger Mount with Hole saw center cut.jpg121.4 KB · Views: 755