Just a new set of Battery boxes for my 4020

   / Just a new set of Battery boxes for my 4020 #1  

Grayson Klassen

Gold Member
Joined
Mar 1, 2011
Messages
271
Location
Fort St John, BC
Tractor
John Deere 4020
So it all started with me rebuilding a tilt cyclinder.

I finished the cyclinder, re-installed, and went to start the old girl to excersize the cylinder to get some oil in it before I did the other cylinder.

turns key...nada
charges battery....
turns key...."Click!"
****
dead cell in one battery

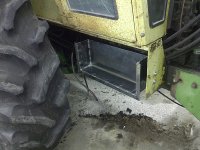
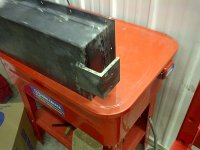
anyway so I went to the local dealer and bought two new batteries. I removed the old batteries which were in an double box on the right side. i Look in the battery box to see it is completely rotten with rust inside.

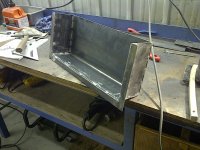
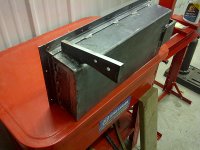
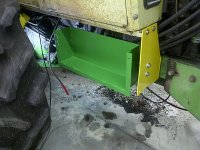
So I ecide to build a new battery box, then I decide to go back to original and have one on each side.

And so it begins I start yet another project except i gotta finish this to start the tractor.

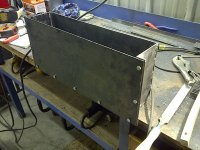
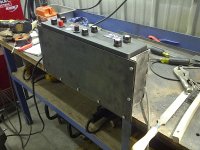
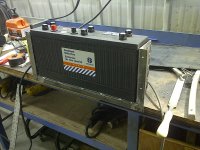
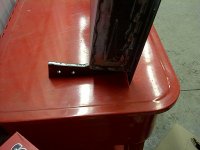
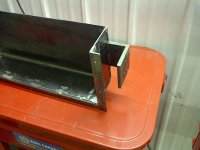
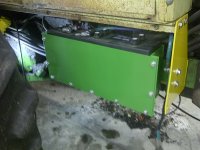
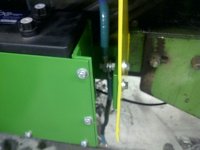
Day 1 I figure out my design and start fabbing
 

Attachments

  • IMG-20120124-00109.jpg
    IMG-20120124-00109.jpg
    401.9 KB · Views: 575
  • IMG-20120124-00112.jpg
    IMG-20120124-00112.jpg
    423.3 KB · Views: 513
  • IMG-20120124-00113.jpg
    IMG-20120124-00113.jpg
    414.8 KB · Views: 1,468
  • IMG-20120124-00114.jpg
    IMG-20120124-00114.jpg
    417.7 KB · Views: 684
   / Just a new set of Battery boxes for my 4020
  • Thread Starter
#2  
Day two I mock into position and build brackets

Tomorrow I will prep for paint and saturday I will install

Then I need to fix that side step cuz it is all bent and dirty

More pics to follow

Note I mae the face removable just to make it nicer to remove the batteries should the need arise.

PS I LOVE MY PLASMA CUTTER
 

Attachments

  • IMG-20120126-00118.jpg
    IMG-20120126-00118.jpg
    389.3 KB · Views: 518
  • IMG-20120126-00117.jpg
    IMG-20120126-00117.jpg
    362.9 KB · Views: 264
  • IMG-20120126-00116.jpg
    IMG-20120126-00116.jpg
    348.2 KB · Views: 322
  • IMG-20120126-00115.jpg
    IMG-20120126-00115.jpg
    443.4 KB · Views: 624
  • IMG-20120126-00119.jpg
    IMG-20120126-00119.jpg
    382.4 KB · Views: 389
   / Just a new set of Battery boxes for my 4020
  • Thread Starter
#7  
Lots of running around this weekend so by the time I prepped for paint with drying time I didn't get too much done.

Last night got home from work at 9, but got an hour in the shop to assemble the first side.

Here is how it looks so far, I have to build a new better step as well, maybe tonight.
 

Attachments

  • IMG-20120130-00124.jpg
    IMG-20120130-00124.jpg
    462.1 KB · Views: 310
  • IMG-20120130-00125.jpg
    IMG-20120130-00125.jpg
    380.9 KB · Views: 1,816
  • IMG-20120130-00126.jpg
    IMG-20120130-00126.jpg
    363.4 KB · Views: 529
   / Just a new set of Battery boxes for my 4020
  • Thread Starter
#8  
The third picture is the ground connection, one end bolts on at the step so is hanging free.

Don't mind the dirt and grease, once it warms up I am going to steam the old girl all clean and pretty and start working on any leaks. :thumbsup:
 
   / Just a new set of Battery boxes for my 4020 #9  
nice work,
but when mine rotted out, I said the Heck with working on them under the cab/floor of the tractor, and built a new box out of angle iron, on the starter side of the tractor right up by the starter, and then put a lift off top on it and it is part of the step system on the one tractor and the other I have the factory cab and just built them out in front of the JD add on steps, easy to clean the battery's off, of dirt and clean the cables, or to jump some thing, or to charge the batteries, if needed,

I went to the 12 volt battery that is the same size as the double 6 volts, one less set of battery terminals to mess with. IMO getting rid of the double battery going to the single 12 volt and moving them out from under the floor board, was the best thing I have done on the tractor,

but for restoration you did a beautiful job, you look like take a lot of pride in your work,
 
   / Just a new set of Battery boxes for my 4020 #10  
I know it's a little late in this thread but was woundering if you included a way for water to drain out the boitom! Looks like a real nice job and well done! :thumbsup: :thumbsup: :thumbsup:
 
 
Top