UK hydraulic log splitter build

   / UK hydraulic log splitter build
  • Thread Starter
#11  
Hi, it's been a while since my last update, but I've had a few productive evenings this week.

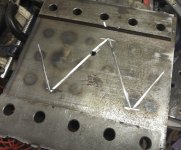
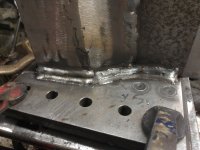
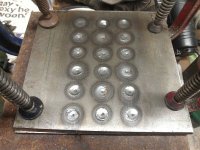
I've made progress on the sliding wedge. I didn't have a nice thick piece of plate for the base of the slider, so I decided to double up with some 1/4" plate. To make this more like a single piece of steel I drilled 3/8" holes through the top plate, and plug welded through to the lower plate, like this:
WeldedBase.jpg

I'll also weld around the edges later on.

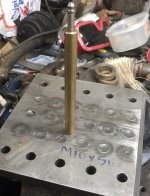
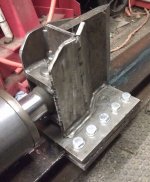
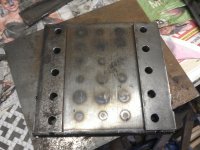
Next for some lateral guides to keep it on the beam. I'm not sure quite how much clearance to leave, so I sat the slider on the beam and clamped more plates to the underside of the slide plate, adjusting their position until the whole thing ran up and down the beam smoothly. I then tack welded them in place and drilled the clamp bolt holes through.
slider guides.jpg

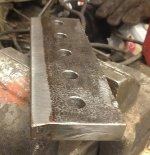
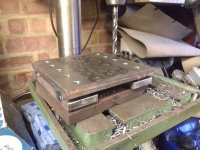
Then for the keeper plates, not sure if that is the correct term but it'll do for now, that stop the wedge assembly jumping off the beam. I had some 2x1/2" bar, so a couple of lengths of that were cut. I tacked them in place to hold everything in place while I spotted the bolt holes through.
drilling slider.jpg

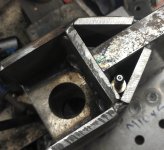
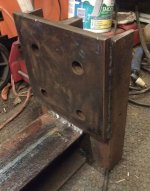
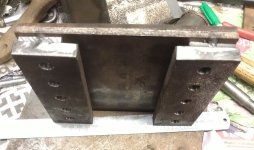
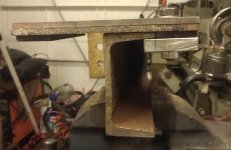
So looking on the end I now have this construction.
slider end view.jpg

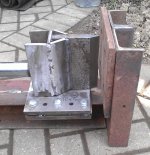
The keepers will need an angle machined on the inner top corners to provide the correct clearance against the underside of the beam.
end view on beam.jpg
 
Last edited:
   / UK hydraulic log splitter build #12  
Looks good Mick. I wouldn't worry about machining the top edges, they will self clearance!
 
   / UK hydraulic log splitter build #13  
Looks good Mick. I wouldn't worry about machining the top edges, they will self clearance!
I agree, if you dont have enough clearance, dirt will be rubbed in the slide surfaces. We have no clearance right now, but it will be about a millimeter when the rust and thick old paint has rubbed off :)
 
   / UK hydraulic log splitter build #14  
A couple of suggestions for you to consider from my years of heating with wood self put up. On your foot weld on some spurs, sharp points that push into the wood 10 to 20 mm to keep blocks that are cut on an angle from popping off under pressure and wacking you in the knee. On your wedge I would drill a small hole through the sliding plate and leave another 20mm hole in the top plate covering the wings. Then you can pour in some used crankcase oil into the wedge at the start of the day and it will run out through the small hole lubing the beam with each stroke. Your wedge is a good design, if anything I would have made the back even wider to get the wood to give up before the piston tops out. Once the 5/8 plate has made it in an inch most wood blocks will be done but the tough ones will cling together until the haves are spread out to forty-five degrees or so. My commercially made splitter has an attachment around the case of the piston that strips wood off the wedge if it is still there on the return stroke. It is better then twisting them off by hand but a wider and taller wedge would have accomplished more.
Nice project by the way, looking forward to seeing the finished product.
 
   / UK hydraulic log splitter build
  • Thread Starter
#15  
Renze, thanks for that. It'll sure save me some work.

Vtsnowedin - good idea re the lubrication holes. I had thought of just greasing the beam, don't know how well it will stay there though. Maybe sticky saw chain oil would be better, but a lube hole will help get the oil under the slider.

As for the spurs idea, I've seen others have run beads or even circles of weld on the foot to prevent the log slipping. It certainly needs something.

As for the wedge, nothing is welded together yet, so still easy to change plans. The widest part is currently 72mm wide, I might try it like this and see how it fares. It'll be pretty easy to add width later on. Nothing will be painted before it's been proven :)
 
   / UK hydraulic log splitter build #16  
Renze, thanks for that. It'll sure save me some work.

Vtsnowedin - good idea re the lubrication holes. I had thought of just greasing the beam, don't know how well it will stay there though. Maybe sticky saw chain oil would be better, but a lube hole will help get the oil under the slider.

As for the spurs idea, I've seen others have run beads or even circles of weld on the foot to prevent the log slipping. It certainly needs something.

As for the wedge, nothing is welded together yet, so still easy to change plans. The widest part is currently 72mm wide, I might try it like this and see how it fares. It'll be pretty easy to add width later on. Nothing will be painted before it's been proven :)
The one I have now is a casting and has a hole in the bottom which is much too big so I stuf the hollow in the wedge with sawdust to ****** the flow. I add about a cup of waste oil at each gas fill up. If you started with a 2mm bottom hole it might work out right. The pattern of the spurs is not critical, I've seen several variations, circles squares star patterns, old bolts welded on and cut of on an angle etc. Just don't have them interfere with the point of the wedge at full extension.
 
   / UK hydraulic log splitter build
  • Thread Starter
#17  
Right! Progress is still annoyingly slow, but last weekend I got busy with the angle grinder for an hour or so, tidying up welds and ragged plasma cut edges. Most of the time I get during the week is late in the evening and I don't wish to wake up the neighbours, or my own daughter for that matter, by running the grinder. So the grinding jobs get saved up for noisy hour :)

I managed to finish welding the wedge components together. Annoyingly I got so carried away when welds started to run neatly that I welded where I shouldn't have. This prevented the rod end fitting as planned. Some chamfers ground on the rod end soon remedied this. Typically these lovely weld are somewhere they won't be seen, lol. They do exist I promise, I might take some more photos for proof.
Other welds were ground back to smooth the wedge, some areas need a few more dollops added to fill in the low spots. I also ground a big chamfer on the leading edge of the slider. I may enlarge this yet.

My mind returned to what Vtsnowedin mentioned about lubrication, I thought I would see how I could incorporate a grease nipple to get lubrication right under the sliding wedge base.

First off I worked out where I could drill a lube hole through the base, and tapped it for the greaser. Next I added some grease grooves to the underside.
Having been 'machined' with a grinding disc these are not particularly tidy, but ought to help keep some of the lubricant in place. I'll have to see how well this works out.

GreaseGrooves.jpg

My original plan was to screw the greaser directly into the slider plate, and hope my grease gun would reach through the space created by the secondary wedge plates. I decided that this would likely be difficult by the time a load of saw dust and muck had blocked up the hole, so I turned up an extension tube from a length of 1/2" dia brass rod. The length of the tube was limited by the length of drill bits I have :rolleyes:

GreaserExtn.jpg

GreaserExtnFitted.jpg

With the items assembled it looks like I will at least be able to get access with the grease gun.
Next step is to weld the wedge and base together. No (easy) going back once I've done that ;)

GreaserInSitu.jpg


Here's a shot of the wedge and slider in place next to the foot. This was taken before the slider plate was chamfered.

Wedge&Foot.jpg

and one showing the general layout so far.

Assembly6-3-13.jpg
 
   / UK hydraulic log splitter build #19  
Looks great Mick! Keep up the good work.
I had to wait until my kids grew up and moved out before I could build mine..LOL
 
   / UK hydraulic log splitter build
  • Thread Starter
#20  
I've managed to get quite a bit done lately, just not had a chance to update this thread.

The wedge is now fully welded together and to the slider. The beams are now welded along their entire length too.

WedgeWeld.jpg CompletedWedge.jpg

I made some precision chamfers on the slider clamps using the angle grinder :) The angle is a pretty good match to the inside of the beam.

clamp.jpg

The foot now has a nice thick lump of plate welded on to reinforce it. I still need to add some pointy bits to stop the log sliding off the foot.

EndPlate.jpg

The best news of all is that I have had the wedge running back and forth under air pressure. I shall put a short video on YouTube soon.
At 90 PSI I even managed to split some pine pallet slats. The movement is very jerky under air pressure, but no load cylinder extension takes about 2 seconds. If it's that quick under hydraulic power I'll be impressed, but I'm not holding out too much hope yet.
 
 
Top