Chilly807
Elite Member
After about 4 years of owning the L3400, I've finally decided I need to be able to easily swap implements on the loader. A little bit of background before I get into the actual build details..
This spring I approached my dealer to see about getting the SSQA adapter for my loader (LA463). It turns out that adapter is no longer available, since the LA463 has been discontinued a couple of years ago.
So, another possibility was to buy an aftermarket adapter, which is available but expensive, almost $800! I'd still have to modify my bucket, too. About now, $500 for the SSQA option if I got it when I bought the tractor looks like a bargain!
Some of the other members of TBN have been in the same boat I'm in now, and have built an ATI/Kubota style adapter for their tractors. This type hooks under the top two pins of the implement, and two lower pins slide in place. A lot easier than fitting pins and bolts every time, and close to being as easy to deal with as an SSQA style adapter.
Some of those builds are here for those that are interested:
http://www.tractorbynet.com/forums/customization/263694-homemade-quick-attach.html
http://www.tractorbynet.com/forums/build-yourself/234595-la-302-bucket-quick-hitch.html
http://www.tractorbynet.com/forums/build-yourself/270685-quick-attach-snow-pusher-build.html
And a thread from converting the same setup I have to a SSQA style:
http://www.tractorbynet.com/forums/customization/208653-so-you-think-converting-pin.html
I'm using 1/4" plate steel, the same as the original setup. Briefly considered using 5/16", then got control over the demon on my right shoulder that wants to over-build everything, just in case... the left shoulder demon says "Ahh, come on.. those things are over-designed anyway, you could get away with a lot less", and "that's good enough!"
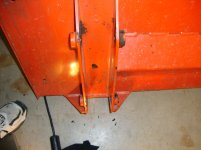
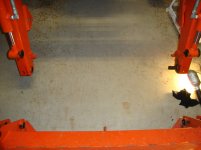
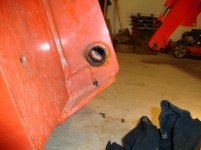
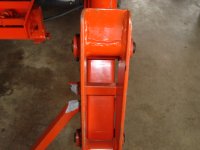
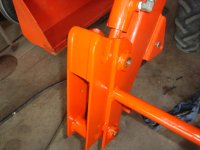
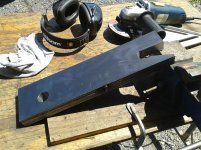
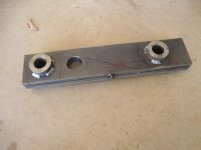
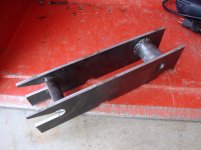
This is what I started with.
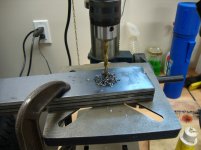
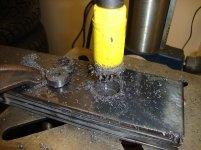
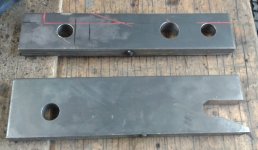
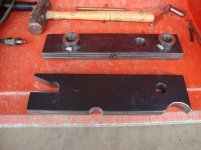
The size for the rear plates was 2.75" x 14" x 1/4. That may get changed as things come together, I'm posting as I build it.
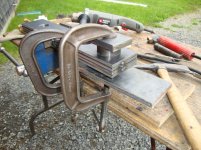
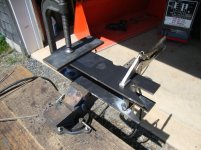
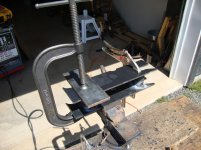
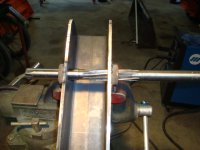
Using a tip from one of the other guys here, I tack-welded the 4 rear side plates together to be sure all the holes were in the same place. Great idea that, it would have never occurred to me if he hadn't mentioned it.
I drilled the pilot holes 1/4", then used a 1" hole saw to cut the pin holes. DOM bushings will be welded over the outside of the plates to support the pins.
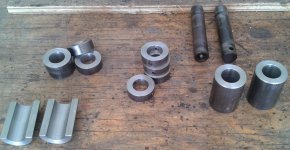
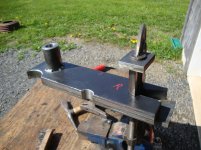
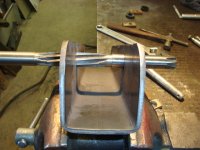
I used 1.75" OD, 1" ID DOM tubing for the bushings, the original was 1.5" OD.. right-side demon had his way with me on that one. I may regret that choice later, it's too soon to tell.
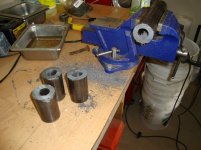
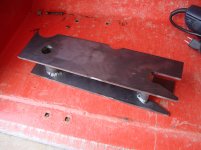
These longer bushings will go in the front half of the adapter, one in each bottom set of holes, and one will be split down the middle to support the upper pins, with one split half in each side. This should get clearer as things come together.
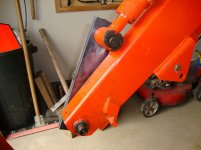
I remembered one of the guys saying that his cross-tube was too close to the loader arms at full curl, so I retracted both cylinders with the rear plates in place, then drew a line across the plates to remind me that the tube has to go in above that line or I'll have the same trouble. I'll be getting the pipe for the cross-tube soon, once I know what the OD will be I'll drill the holes for the tube before I remove the tack welds holding the plates together.
Sean
This spring I approached my dealer to see about getting the SSQA adapter for my loader (LA463). It turns out that adapter is no longer available, since the LA463 has been discontinued a couple of years ago.
So, another possibility was to buy an aftermarket adapter, which is available but expensive, almost $800! I'd still have to modify my bucket, too. About now, $500 for the SSQA option if I got it when I bought the tractor looks like a bargain!
Some of the other members of TBN have been in the same boat I'm in now, and have built an ATI/Kubota style adapter for their tractors. This type hooks under the top two pins of the implement, and two lower pins slide in place. A lot easier than fitting pins and bolts every time, and close to being as easy to deal with as an SSQA style adapter.
Some of those builds are here for those that are interested:
http://www.tractorbynet.com/forums/customization/263694-homemade-quick-attach.html
http://www.tractorbynet.com/forums/build-yourself/234595-la-302-bucket-quick-hitch.html
http://www.tractorbynet.com/forums/build-yourself/270685-quick-attach-snow-pusher-build.html
And a thread from converting the same setup I have to a SSQA style:
http://www.tractorbynet.com/forums/customization/208653-so-you-think-converting-pin.html
I'm using 1/4" plate steel, the same as the original setup. Briefly considered using 5/16", then got control over the demon on my right shoulder that wants to over-build everything, just in case... the left shoulder demon says "Ahh, come on.. those things are over-designed anyway, you could get away with a lot less", and "that's good enough!"


This is what I started with.


The size for the rear plates was 2.75" x 14" x 1/4. That may get changed as things come together, I'm posting as I build it.
Using a tip from one of the other guys here, I tack-welded the 4 rear side plates together to be sure all the holes were in the same place. Great idea that, it would have never occurred to me if he hadn't mentioned it.
I drilled the pilot holes 1/4", then used a 1" hole saw to cut the pin holes. DOM bushings will be welded over the outside of the plates to support the pins.
I used 1.75" OD, 1" ID DOM tubing for the bushings, the original was 1.5" OD.. right-side demon had his way with me on that one. I may regret that choice later, it's too soon to tell.

These longer bushings will go in the front half of the adapter, one in each bottom set of holes, and one will be split down the middle to support the upper pins, with one split half in each side. This should get clearer as things come together.

I remembered one of the guys saying that his cross-tube was too close to the loader arms at full curl, so I retracted both cylinders with the rear plates in place, then drew a line across the plates to remind me that the tube has to go in above that line or I'll have the same trouble. I'll be getting the pipe for the cross-tube soon, once I know what the OD will be I'll drill the holes for the tube before I remove the tack welds holding the plates together.
Sean
Last edited:
