Back blade build started

   / Back blade build started #1  

camshawn

Silver Member
Joined
Oct 28, 2012
Messages
235
Location
Langley BC
Tractor
Mihindra 3616
Hello all:
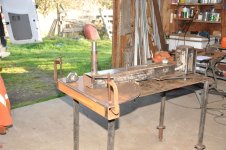
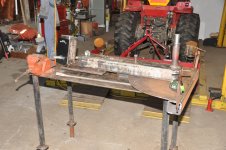
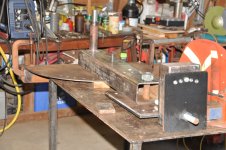
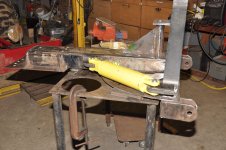
I have been working on a new back blade for our new tractor for the last few weeks as time permits.
I now have most of the steel cut and drilled as needed. I have 2 pieces to take to work to get broke and several small pieces to still acquire.
I still have to source the blade itself and a cutting edge.
Cam
 

Attachments

  • DSC_4399.jpg
    DSC_4399.jpg
    192.5 KB · Views: 790
   / Back blade build started
  • Thread Starter
#2  
some more pictures.
Cam
 

Attachments

  • DSC_4394.jpg
    DSC_4394.jpg
    317.3 KB · Views: 638
  • DSC_4397.jpg
    DSC_4397.jpg
    297.2 KB · Views: 587
   / Back blade build started #3  
Looks like it will hold to a tractor twice as big as the photo. Should be fun to see how you would do it since I'm working on upgrading one myself. Wish you good luck
 
   / Back blade build started #4  
What is the four post lift under the tractor ? Factory or garage fabricated ? Looks like a compact design made for tractors and equipment.
Reference the rear blade. Looks like a lot of planning and hours of building. I bought a used model ( because they are cheap and available ) and sold one I got for free. A MIG welder and a Ellis bandsaw can occupy me for days. Just " fun " work.
 
   / Back blade build started
  • Thread Starter
#5  
Blade work continues, gathering parts from the plasma table at work, measuring and tacking. No pictures today. I was hurt last year so I have spent lots of time planning and this project was a good reason to upgrade my welder and purchase a plasma cutter ( and Christmas is coming). The hoist in the background is an old 4 post drive on one, 2 18" platforms that you drive the truck onto. I built 3 plywood boxes to fill in the hole when the platforms are down.
Cam
 
   / Back blade build started
  • Thread Starter
#6  
Work continues as time permits (having a job does get in the way).
I have tacked up things as you can see in order to measure and cut the next pieces. I have drilled and tapped holes for the pivot shaft covers and positioned the top pivot bracket for measuring the mounting pieces.
CamDSC_4402.jpgDSC_4401.jpg
 
   / Back blade build started
  • Thread Starter
#7  
I got back at the back blade this morning for a few hours. The mounting for the top pivot pin is now complete. The 3 pt mounting brackets are done as well. Just need to add a couple of gussets to keep the top link and upper pivot bracket where I have put them. I have a bunch of pieces laid out to cut tomorrow. The new wire feed welder (Thermalarc fabricator 211i) is working great and I am getting better with each weld.
Cam
DSC_4403.jpgDSC_4404.jpg
 
   / Back blade build started
  • Thread Starter
#8  
update, Back blade build started

Here are a couple of more pictures, Work is slowly progressing.
The blade is to be rolled tomorrow.
 

Attachments

  • photo-2.jpg
    photo-2.jpg
    860.4 KB · Views: 366
  • image.jpg
    image.jpg
    902.5 KB · Views: 326
   / Back blade build started #9  
Looks good! With a little more practice, you won't need to do much grinding at all. I think the least of amount grinding looks the best and also allows for the best paint job.
 
   / Back blade build started
  • Thread Starter
#10  
Backblade is on a delay code today. I went to pick up my blade that was being rolled at a local shop. There were 2 pieces in a pile, one 12 inches wide rolled into a 3/4 pipe section and beside it was it's big brother, a 24" snowplow blade rolled the same way. Someone did not get the concept of a snowplow.
Cam
 
Last edited:
 
Top