Gooseneck trailer build...

   / Gooseneck trailer build... #12  
I can see them now!!!! Thanks!!!
 
   / Gooseneck trailer build... #13  
Very nice work!!!!!

This is an example of something I've always believed about fabrication. It's not how many dollars worth of fancy equipment a shop has, it's the talent of the fabricator!!! Great job.
 
   / Gooseneck trailer build... #14  
Nice work so far. What is the purpose of the tubes?
 
   / Gooseneck trailer build...
  • Thread Starter
#15  
The 4.5" tubes are my crossmembers. The idea was that they would add torsional stiffness to the frame, similar to a longitudinal torque tube. Two birds with one stone, so to speak...

It is stiffer than the trailer I owned that used C-channel for the crossmembers, but not as stiff as some of the torque tube trailers I've bounced on... I'll call it a worthwhile design, if only because the tube was free... :)
 
   / Gooseneck trailer build... #16  
Nice trailer build with good workmanship.:thumbsup:

Curious about registration on the trailer, I was of the impression that trailers in NM had a 2000 lb. limit if home made. Did you work this out or do you have trailer build certification?

I live in Ruidoso and this would be good to know.
 
   / Gooseneck trailer build...
  • Thread Starter
#17  
I didn't see anything like that in any of the reading I did... As I understand it, the requirements are as follows:

VIN Inspection
(to verify trailers does not have a VIN)

Affidavit Certifying Ownership “ACO”
(to attest to the ownership of lien free trailer)
Or in my case, reciepts for materials used in constructing it...

Weight Certificate

Affidavit of Specially Constructed or Reconstructed Vehicle
(to verify that trailer is homemade or shop built)

Vehicle Equipment Affirmation
(to verify that trailer meets all safety standards)

MVD will assign a New Mexico Vehicle Identification Number
(to be able to identify the trailer by its VIN).

A Motor Vehicle Division employee must affix the identification plate (I think it's a sticker...) eight inches from the ball hitch on the left side of the trailer tongue frame. The owner should be advised to permanently stamp the number on the tongue.

If that fails, I'm moving to CO in 6 months, so I'll just change my address a little earlier and register it there. :)
 
   / Gooseneck trailer build...
  • Thread Starter
#18  
Confirmed with MVD, I'll be able to register it, and I will not need to have a VIN inspection done by the police, it can be handled right at MVD. There are three forms to fill out, and reciepts and a weight slip are both needed. They will assign a VIN, affix it while checking to make sure there isn't one already, and I'll be able to register and title it on the spot.

Now where was I?? Oh, yes... Stake pockets and rub rail...
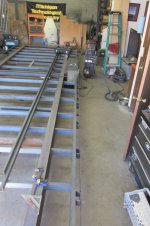
I bought stake pockets from Ebay, and after putting it all together, it seemed rather empty between the pockets... I recalled seeing something there on one of the trailers I looked at... Turns out they're called "chain spools". Just a short piece of 1.5" pipe, welded between the stake pockets.
I got some of them done in this picture, near the fender, and some still to do closer to the camera...
IMG_6387.JPG

I put my lovely wife to work sawing the pipe chunks while I welded them in... She likes my HF porta-band too. :)
IMG_6386.JPG

While the trailer was right-side up, I also welded in some 2" angle to function as ramp holders under the deck.
Hmm... Somewhere along here I cut up a piece of 10" light channel to make the rear of the trailer, including tail lights and ramp slots, and welded it on too, along with doors to cover the ramp slots...
Here's a pic of the trailer back upside-down (the last flip...) so I could weld rub rail/pockets/spools and ramp and bumper stuffs from the bottom.
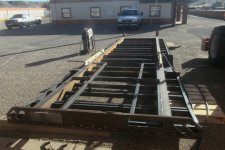
IMG_6508.JPG

At that point, the deck was pretty much done. Time to start putting the tongue together... (Sorry for the picture quality going to crap... My camera is dying at this point...)
Laid out the horizontal parts on the floor and beveled and tacked them. When the both matched, I final welded them. Just a bit of pre-heat got much improved penetration... My Hobart 190 welder is borderline for 1/4" steel without a bit of heat first... Once the first bead has been run, there's plenty of heat to get good penetration.
Took those two pieces and welded them to the hitch tube.
Couple of flips to get all the weldable areas and it's solid.
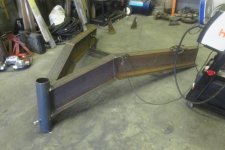
IMG_6509.JPGIMG_6511.JPG

At this point, I wasn't comfortable doing the welding on the two remaining tongue joints... But there's a guy in the complex here that is a certified welder, and he came down with his truck and arc welded the rest of the tongue together for me. Sorry for the crappy camera pics, but his welds are solid. I added gussets to both sides after he was done with the main welds.
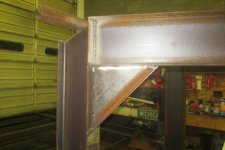
IMG_6513.JPG

At this point, I was starting to see the light at the end of the tunnel. I cut a few braces for the tongue, some of which are also a place to mount the spare tire and welded them in...
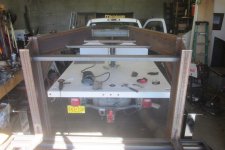
IMG_6517.JPG

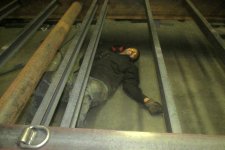
Oh, so before welding on the tongue, I slipped an axle under it so I could move it around... And discovered that the spring hangers were not where they were supposed to be.
I had been messing with the model to figure out where the best spacing was to get the most suspension movement before binding. I finally decided on 29.25" as being ideal for my spring length... But somehow when I welded them on, I put them at 26, which was the actual spring length. Oops... So I got to grind off the welds on the front and rear hangers and re-weld them.
IMG_6518.JPG

I'm getting fairly good at welding upside-down... Not that I wanted that skill...

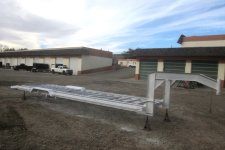
I also drilled some holes to mount the electrical and breakaway boxes, and 3/4" holes for the LED marker lights... And added some angle to the vertical I beams to weld the jacks to eventually...
And then I primed it with rustoleum, rusty metal primer for the rusty places, and clean metal primer for the rest...
IMG_6519.JPGIMG_6520.JPG
 
   / Gooseneck trailer build...
  • Thread Starter
#19  
Man, there is so much other stuff that I'm leaving out... Angle welded across the back for ramps to rest on, hinges, latches, and door handles for the ramp doors, D-rings along the frame, lots of finishing touches near the fenders, so the outer boards have something to rest on... Safety chains and a cross bar to snap them to so they aren't just hanging... I'm sure there was more... This represents about a month of weekends, and at least two solid weeks of evenings from 5 to 9 or 10. A lot of hours... And the detail work too the largest part if it I think... just a lot of cutting and prepping and then welding.

I went through about 2.5 10lb spools of .035 solid wire, and one tank of Argon/CO2.
Burned myself more times than I can count.

But it will be worth it when it's finished and I have a nice trailer for the rest of my life. (No, it is NOT for sale.)
:)
 
   / Gooseneck trailer build... #20  
Looking good!!!!!

For the unknowing, there is no way to describe how much mental time and physical labor go into a project like this!!!!

Looking forward to seeing the completion!!!! Thanks so much for posting your progress!!!!
 
 
Top