BigBoyToys
Gold Member
So after building a York Rake which has been a great addition! I decided to build a Dethatcher/Rack.
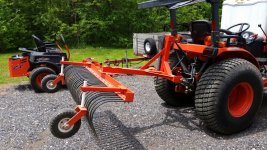
The 3 point hitch frame is the same basic design I used for the york rake. I had all the materials available so it was pretty quick to assemble.
Next was to find the tines I wanted to use. I found these... harrow drag coil tine. I ordered 3 just to make sure they were what I was expecting, and figure out what I wanted for spacing and offset. One thing I found when they arrived was the spec stating that they fit over a 2" round pipe was wrong. The inside diameter was just under 1.5". It really wasn't a big deal as I could save some money buying a smaller diameter pipe. I ended up using Black Schedule 40 pipe which has an OD of 1.315". There was no need for the spring tines to fit flush around the entire pipe, as they are bolted in place. I drilled 1/2" holes in the pipe and used 2 1/2" bolts, washers and lock washers to secure the tines in place.
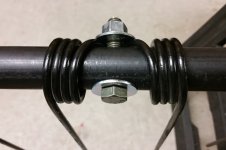
I decided to go with a 70" width for the rake and use three rows of tines. The tines legs are 10" in length and have 4" of spacing at the spring end and a little wider at the bottoms. I spaced the tine assemblies at 8" OC giving me ~ 4" spacing between each tine leg. I offset the center bar tines 2" from the front and rear to create an offset pattern. That ends up being 9 tine assemblies on each pipe for a total of 27 which ends up being 54 fingers scraping the ground. The tines ended up being a little over $100 with shipping.
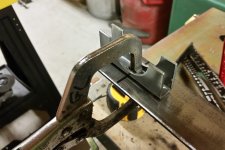
Next concern was to make the tine bar assemblies serviceable in case a tine needs to be replaced. Seeing the Schedule 40 pipe isn't a standard OD dimension, I had no choice but to use 1 3/8" round Guillotine Clamps to secure the pipe. I welded the guillotine body to some angle and drilled the holes for the u-bolts. I decided to space the tine bars at 6" OC. Didn't see any need to space them out further than that. Here is the outer pipe bracket assembly that position the pipes at the ends.
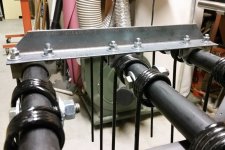
The main bracket assembly for the tine assembly is made from 2" angle 1/4" thick with supports for the hitch receiver tube (Receiver Extender). There are 6 clamps that fasten the unit to the tine bars. The receiver connection makes the tine assembly a quick connect/disconnect unit. This way if I have another brainstorm idea for an implement/attachment, I can design it around using the 2" hitch coupler concept and reuse the 3 point mount.
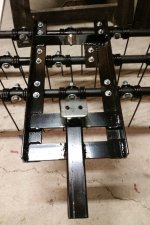
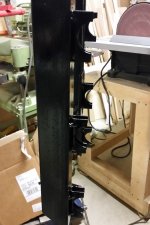
Once I welded the receiver hitch tube to the 3 point assembly, I welded 3 gussets to insure the receiver tube wasn't going anywhere. I also welded tabs to attach vertical and horizontal braces to stabilize the tine assembly to the 3 point hitch. This also required mounting points on the tine mounting assembly.
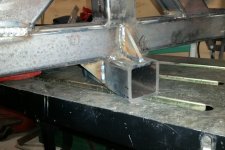
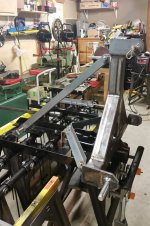
I wanted to use the guide wheels I made for the York Rake on the Dethatcher. Based on the height difference between the dethatcher and york rake, I had to build in an offset to raise the wheels.
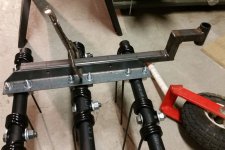
Now I just have to grab a few 1/2" and 3/8" bolts and it should be ready to try out tomorrow. I'll worry about painting later. The assembly will be in the tractor garage so I can get to it when I can.
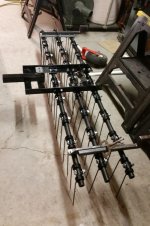
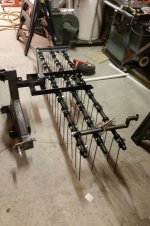
I'll follow up with some "in-use" pictures and let you know how it works out.

The 3 point hitch frame is the same basic design I used for the york rake. I had all the materials available so it was pretty quick to assemble.
Next was to find the tines I wanted to use. I found these... harrow drag coil tine. I ordered 3 just to make sure they were what I was expecting, and figure out what I wanted for spacing and offset. One thing I found when they arrived was the spec stating that they fit over a 2" round pipe was wrong. The inside diameter was just under 1.5". It really wasn't a big deal as I could save some money buying a smaller diameter pipe. I ended up using Black Schedule 40 pipe which has an OD of 1.315". There was no need for the spring tines to fit flush around the entire pipe, as they are bolted in place. I drilled 1/2" holes in the pipe and used 2 1/2" bolts, washers and lock washers to secure the tines in place.

I decided to go with a 70" width for the rake and use three rows of tines. The tines legs are 10" in length and have 4" of spacing at the spring end and a little wider at the bottoms. I spaced the tine assemblies at 8" OC giving me ~ 4" spacing between each tine leg. I offset the center bar tines 2" from the front and rear to create an offset pattern. That ends up being 9 tine assemblies on each pipe for a total of 27 which ends up being 54 fingers scraping the ground. The tines ended up being a little over $100 with shipping.
Next concern was to make the tine bar assemblies serviceable in case a tine needs to be replaced. Seeing the Schedule 40 pipe isn't a standard OD dimension, I had no choice but to use 1 3/8" round Guillotine Clamps to secure the pipe. I welded the guillotine body to some angle and drilled the holes for the u-bolts. I decided to space the tine bars at 6" OC. Didn't see any need to space them out further than that. Here is the outer pipe bracket assembly that position the pipes at the ends.


The main bracket assembly for the tine assembly is made from 2" angle 1/4" thick with supports for the hitch receiver tube (Receiver Extender). There are 6 clamps that fasten the unit to the tine bars. The receiver connection makes the tine assembly a quick connect/disconnect unit. This way if I have another brainstorm idea for an implement/attachment, I can design it around using the 2" hitch coupler concept and reuse the 3 point mount.


Once I welded the receiver hitch tube to the 3 point assembly, I welded 3 gussets to insure the receiver tube wasn't going anywhere. I also welded tabs to attach vertical and horizontal braces to stabilize the tine assembly to the 3 point hitch. This also required mounting points on the tine mounting assembly.


I wanted to use the guide wheels I made for the York Rake on the Dethatcher. Based on the height difference between the dethatcher and york rake, I had to build in an offset to raise the wheels.

Now I just have to grab a few 1/2" and 3/8" bolts and it should be ready to try out tomorrow. I'll worry about painting later. The assembly will be in the tractor garage so I can get to it when I can.


I'll follow up with some "in-use" pictures and let you know how it works out.
Last edited:
