daugen
Super Star Member
Over three years ago I had to put aside a partly finished renovation due to family problems.
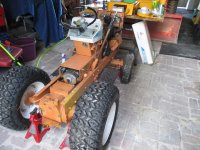
Now I'm finally restarting this project, and have quite a bit done, but a long way to go.
The engine was rebuilt shortly before I got it, by a mechanic in a shop, and has only a few hours on it. It ran fine, and the
hydro trans shifted fine. And then it went to sleep.
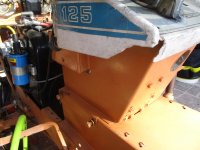
My initial question is with the Kohler engine color. A K301 12 hp flat head. I think the oem color was black
and this poor thing has had black paint slathered all over it.
Need some major TLC. But I've seen these old CC's with yellow engines too, with black
circular cooling air intakes. And I've seen the air cleaner painted
a variety of colors.
Yellow paint means you can see what's going on in there. Black paint means it's a dark hole.
Anyone know if CC ever did paint their engines yellow, or part yellow or are these all owner mods?
And yes, of course, does it matter?...this isn't going to the Grange Show but I also would like it somewhat authentic.
This tractor will be a lawn queen, I have two others, so I kept with the original period skinny front tires, which should do fine for a water cart puller.
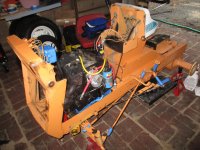
New Bosch coil and condenser, new spark plug wires, new battery cables, decals, throttle and choke cables, fuel line, carb fully redone. And tires. No intentions of messing with the hydrostatic drive other than
changing oil and filter. Would likely do more harm than good and there are some unusual instructions on these first gen hydrostatic adjustments.
And for sure I have some fiberglass work to do.
So, black engine or yellow? Which would you choose?
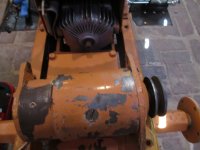
tomorrow's project is taking off the motor generator and giving that some separate TLC.
Now I'm finally restarting this project, and have quite a bit done, but a long way to go.
The engine was rebuilt shortly before I got it, by a mechanic in a shop, and has only a few hours on it. It ran fine, and the
hydro trans shifted fine. And then it went to sleep.
My initial question is with the Kohler engine color. A K301 12 hp flat head. I think the oem color was black
and this poor thing has had black paint slathered all over it.
Need some major TLC. But I've seen these old CC's with yellow engines too, with black
circular cooling air intakes. And I've seen the air cleaner painted
a variety of colors.
Yellow paint means you can see what's going on in there. Black paint means it's a dark hole.
Anyone know if CC ever did paint their engines yellow, or part yellow or are these all owner mods?
And yes, of course, does it matter?...this isn't going to the Grange Show but I also would like it somewhat authentic.
This tractor will be a lawn queen, I have two others, so I kept with the original period skinny front tires, which should do fine for a water cart puller.
New Bosch coil and condenser, new spark plug wires, new battery cables, decals, throttle and choke cables, fuel line, carb fully redone. And tires. No intentions of messing with the hydrostatic drive other than
changing oil and filter. Would likely do more harm than good and there are some unusual instructions on these first gen hydrostatic adjustments.
And for sure I have some fiberglass work to do.
So, black engine or yellow? Which would you choose?
tomorrow's project is taking off the motor generator and giving that some separate TLC.
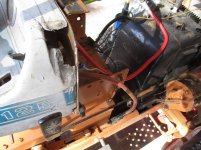

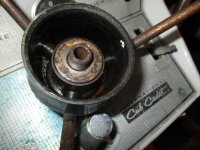
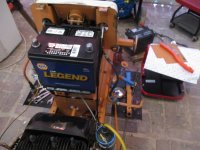
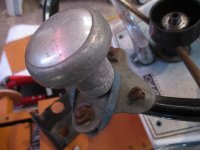
") ... On the new batt, would get it load tested if possible and do make sure that the post polarities are not reversed from your old batt. as to the rusty spinner screws, not a good thing - a clue that the old girl spent too much time out in bad weather.... chk all yer elect connections for corrosion while you've got it all opened up.
... On the new batt, would get it load tested if possible and do make sure that the post polarities are not reversed from your old batt. as to the rusty spinner screws, not a good thing - a clue that the old girl spent too much time out in bad weather.... chk all yer elect connections for corrosion while you've got it all opened up.