Woods 1012 FEL mount problem

   / Woods 1012 FEL mount problem
  • Thread Starter
#11  
Okay, I have changed the bolts. Documenting the prosses is new to me so here goes.
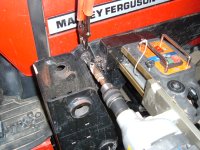
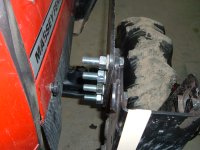
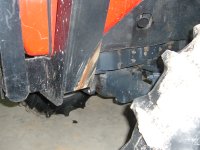
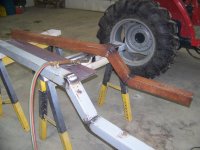
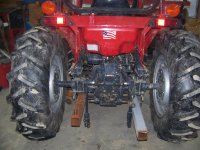
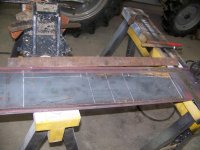
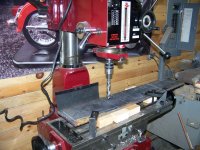
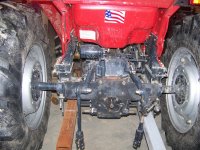
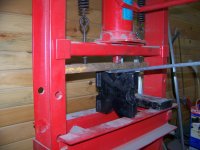
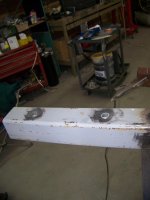
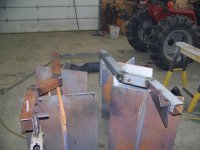
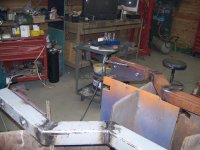
(Pic 1) bolts removed and measured. The holes are .700" The bolts were .610 because there was no shoulder. Only one bolt looked like it was crushed and the holes were not elongated. (Pic 2 )Next was to setup the mag drill, that was a pain because once you turn on the base it dosen't move. So I made a template to clamp to the steel and this gave me the position to be centered on the exsiting hole. Drilling was a piece of cake. (Pic 3) Drill hole, insert and tighted the new shouldered .750 bolts and repete. Project time about 1 Hr (Pic 4) I cut off the xtra bolt past the nut. My fel hoses are in this space on the right side. (Pic 5) the second reason that I don't like the front brace when turning the tires rub. This is no longer a problem because the preveous owner just chewed the tire instead of adjusting the turn stops . The setup is all tight and seems to be okay. I will continue to post the process of the sub frame to the back of the tractor.
Phil
 

Attachments

  • DSCF2205.JPG
    DSCF2205.JPG
    457.7 KB · Views: 725
  • DSCF2211.JPG
    DSCF2211.JPG
    468 KB · Views: 539
  • DSCF2212.JPG
    DSCF2212.JPG
    462.4 KB · Views: 520
  • DSCF2215.JPG
    DSCF2215.JPG
    463.7 KB · Views: 476
  • DSCF2209.JPG
    DSCF2209.JPG
    477.7 KB · Views: 543
   / Woods 1012 FEL mount problem #12  
Looks good. Looking at your pic of the brace, that'll work as well. I didn't understand that you were going to attach the brace above the bottom height, I thought you were just going to brace the already cracking bottom part.
whodat
 
   / Woods 1012 FEL mount problem
  • Thread Starter
#13  
I started on the subframe today. First pic Lazer measurement from back to front fel frame.( I turned out the light so you could see the line) This gave me an offset of 4-3/4" so I did the layout full size on paper(pic 2) then to the 3" sq tube.
I used my portaband to cut the tubes then the torch to heat and bend the back side.(pic3) This method left a gap of about 1/8" so no bevel was needed to weld.
The last pic show the back of the tractor with the frames sticking out long for more measurements. My goal is to have the new subframe stay on the tractor and not take away from the current ground clearence.

Technical Question
Can I move the top link assembly back 1/2"? I would like to put a 1/2" thick cross the back support plate sandwiched between toplink plat and trans.
Thanks in advance
Phil

PS contruction contiues tommorrow.
 

Attachments

  • tractor subframe lazer.JPG
    tractor subframe lazer.JPG
    100.9 KB · Views: 481
  • tractor subframelayout.JPG
    tractor subframelayout.JPG
    111.4 KB · Views: 470
  • tractor subframebend.JPG
    tractor subframebend.JPG
    160 KB · Views: 441
  • tractor subframeback.JPG
    tractor subframeback.JPG
    223.3 KB · Views: 458
   / Woods 1012 FEL mount problem
  • Thread Starter
#14  
Okay today brought more progress.
I started with the back support bracket it will be located behind the top link assembly. a few obstical to avoid. I lowered the 3pt lift arms now i know that the bracket won't be in the way. Also had to notch the bottom of the plate to clear pto output shaft.
Next was to fab the Fel attachment gussets that I will weld to the arm support.
Bottom bracket to bolt subframe under the back axle.
Drilled subframe rails and added compression sleves to bolt frame to the new fel support gussets.
tack welded all parts to check fit.

I will have to assemble onto the tractor to dry fit and do a more solid tack weld to remove it and do the final welds.
Then Paint red or black?
 

Attachments

  • tractor subframeback plate layout.JPG
    tractor subframeback plate layout.JPG
    176.3 KB · Views: 459
  • tractor subframedrill setup.JPG
    tractor subframedrill setup.JPG
    226 KB · Views: 355
  • tractor subframe2 fitted backplate.JPG
    tractor subframe2 fitted backplate.JPG
    299.1 KB · Views: 510
  • tractor subframe flatbar bend.JPG
    tractor subframe flatbar bend.JPG
    160.2 KB · Views: 405
  • tractor subframe hole bushings.JPG
    tractor subframe hole bushings.JPG
    109.2 KB · Views: 365
  • tractor subframe mockup.JPG
    tractor subframe mockup.JPG
    153.1 KB · Views: 406
  • tractor subframe gusset plates.JPG
    tractor subframe gusset plates.JPG
    173.1 KB · Views: 452
   / Woods 1012 FEL mount problem
  • Thread Starter
#15  
Sorry but I stopped taking pics of the proccess. the job is now complete and works great. here are a few more completion pics.
The subframe getting painted
pond6 16 07 042.jpg

The frame on the tractor
pond6 16 07 046.jpg

The BH mounted to it's new frame and attached to the subframe.
The design allows me to leave the 3pt arms inplace. Also I acheaved my clearence goal I only lost 1.5"
BH installed.jpg
Phil
 
   / Woods 1012 FEL mount problem #16  
So how is everything working? I'm installing a Woods FEL and would like to avoid problems.
 
   / Woods 1012 FEL mount problem #17  
Nice job. Looks like you took care of all of your problems.
 
   / Woods 1012 FEL mount problem
  • Thread Starter
#18  
Bill,
All is great! The frame to the back has taken all the strain off of the deck mounts. I also think that the clay type soil here was hard on the FEL.
Tooth bar in in the future.

Jerry,
Thank you and all the others with input. My biggest obstacle was me. I didn't want to loose any ground clearance and that was the hard part. The lowest point on the tractor is the back hitch. Now I also have a place to add skid plates in the future.

Phil
 
   / Woods 1012 FEL mount problem #19  
Phil,
Your BH subframe looks fantastic. I'm currently building one for my tractor.... problem is, mine LOOKS like i'm building it. I'm thinking about inviting myself over (with a twelve pack, or whatever you prefer) so you can help me with mine !! Looks like we may have to start over from scratch on mine !! Yours looks factory built. Congrats ! You did a beautiful job !!


Scott
 
 
Top