jimgerken
Veteran Member
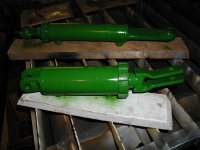
I will use this thread to document all the hydraulic additions to my 2520. I will append as I get stuff done enough to show it. I wish to show enough detail so someone could follow along if desired. I will show all the plumbing, and provide the fitting types where it would be helpful, especially when interfacing to the tractor existing hydraulics (DSCV loader valve and three-point lift). I do not intend to use the John Deere Power Beyond kit if I can avoid it. At this point I am assuming the system will be identical to the JD 4100 hydraulics, to which I added similar options in 2001 or 2002. This system will have three additional spools, with couplers available to the back of the tractor, but one of the spool circuits will "T" and hose-route to the side of the tractor where the existing loader couplings are made. Later I will add a set of hoses and coupler nipples to route this circuit along the loader frame to the front crossbar where it can have mounted couplers to allow use with a grapple. And of course, Top and Tilt cylinders will be chosen, mounted and plumbed for the 3-point.
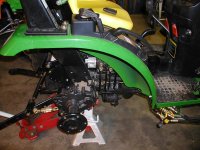
The first part of this process is to mount everything so the plumbing can then be planned and performed.
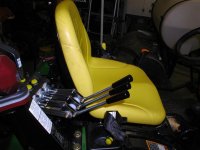
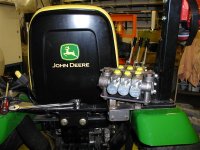
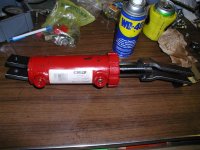
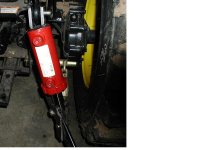
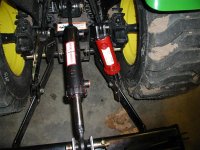
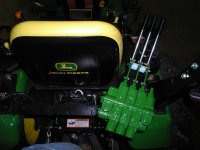
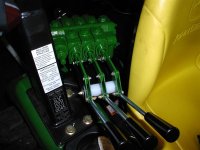
Starting now with the 3-spool Prince sectional valve mounting. I wanted it mounted on the right side, behind the seat, up 2.5 inches, at a 7 degree angle (so the back is lower than the front for ergonomic reasons and so maybe the inevitable spilled oil drops will run off the back and fall to the ground instead of running down the tractor fender and 3-point area). When you order a Prince sectional valve, you configure whatever you want. I chose the basic three spools for double acting cylinders, no float or regen, spring return to center, open center, and no power beyond (PB could be added later). In addition to the three working sections, there is an input and an output section. Overall the thing is about 8.5 inches wide, so it's kind of big for this small tractor, but it fits. Of course, the normal lever position on these is "lever straight up" on the front of the valve. Once mounted in the place there is room for it on my tractor, to operate it I would have to turn halfway around and still it would be a tough contorsion. So I designed and built a "forward control" set for it. This takes the standard levers and positions them out in front of the valve, laying forward at about a 30 degree up from horizontal (position and angle chosen to allow the important drink-holder to stay accessible and the 3-point position control still works fine). I chose to extend the length of the Forward Control set by about 4 inches, to put the lever handles right under my hand when seated and facing forward. Time for a few pics, and more to come of course...
The first part of this process is to mount everything so the plumbing can then be planned and performed.
Starting now with the 3-spool Prince sectional valve mounting. I wanted it mounted on the right side, behind the seat, up 2.5 inches, at a 7 degree angle (so the back is lower than the front for ergonomic reasons and so maybe the inevitable spilled oil drops will run off the back and fall to the ground instead of running down the tractor fender and 3-point area). When you order a Prince sectional valve, you configure whatever you want. I chose the basic three spools for double acting cylinders, no float or regen, spring return to center, open center, and no power beyond (PB could be added later). In addition to the three working sections, there is an input and an output section. Overall the thing is about 8.5 inches wide, so it's kind of big for this small tractor, but it fits. Of course, the normal lever position on these is "lever straight up" on the front of the valve. Once mounted in the place there is room for it on my tractor, to operate it I would have to turn halfway around and still it would be a tough contorsion. So I designed and built a "forward control" set for it. This takes the standard levers and positions them out in front of the valve, laying forward at about a 30 degree up from horizontal (position and angle chosen to allow the important drink-holder to stay accessible and the 3-point position control still works fine). I chose to extend the length of the Forward Control set by about 4 inches, to put the lever handles right under my hand when seated and facing forward. Time for a few pics, and more to come of course...