Bolens G154 / Iseki tx1300f

   / Bolens G154 / Iseki tx1300f #231  
I bought mine from "HydraPak Seals, Inc" out of Utah. They struggled a little with the O-rings as they specialize in regular hydraulic cylinder seals but they seemed to work fine. The three rings you are interested in are the following:

1.) Cylinder cover o-ring which is a "G55". I didn't take my cover off as I worked from the rod end so I didn't need this. HydraPak P/N 054.40X3.10-N70
2.) Main piston o-ring is a "P50A" - HydraPak P/N 049.60X5.70-N70
3.) Backup ring is a "P50A backup ring" - HydraPak P/N MBT-49X3X1.25. These are Teflon and do not have a split so you have to cut one with scissors so you can get it over the piston crown and into the groove. You'll need two of these to make the same thickness as the original from what I have seen. General recommendation is you cut the slit at and angle kind of how you do wood baseboard seems. Not sure how much better this is but I'll continue to do it this way until I see a reason not to. Keep the seams 180 degrees apart when installing.

I'm guessing most o-ring suppliers can get these, I just happened to pick HydraPak. I had good experience with their regular cylinder seals also and their pricing seems reasonable.
 
   / Bolens G154 / Iseki tx1300f
  • Thread Starter
#232  
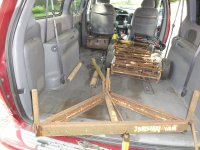
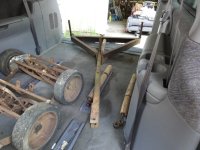
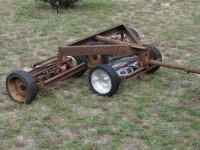
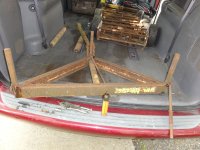
I bought a new to me attachment for Bolseki a few weeks ago.
Its a Sun Mastr 3 gang mower. Its old and was stored outside
which has caused some heavy rust but it is still solid.
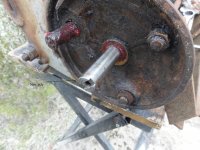
The one mower must have had an axle or the bushings
in the one wheel go bad. someone made a makeshift
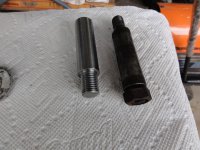
axle out of an old wrist pin and a long bolt. I made
a new axle out of 4140 heat treated steel. The axle
screws into the the cast iron side frame and then a nut
is screwed onto the end of the axle that threads out
of the other side of the frame. The size of the thread is
9/16-16 which is an old size. the normal sizes are 9/16-18
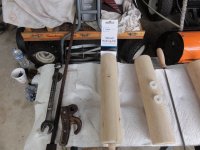
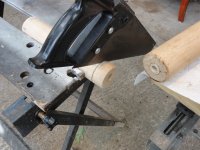
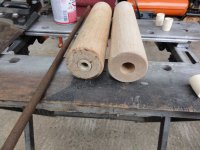
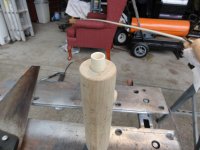
or 9/16-12. I am making new wooded rollers because
the one mower is missing the rollers and the ones on the
other two mowers are old and rotting away. I want to
just get everything sorted out and see how well it
mows. If everything works and it mows good then
this winter I may then take all of the mowers apart
and clean them and through some paint on them
and the main frame.
 

Attachments

  • DSC01179.JPG
    DSC01179.JPG
    3.8 MB · Views: 162
  • DSC01180.JPG
    DSC01180.JPG
    4.1 MB · Views: 150
  • DSC01181.JPG
    DSC01181.JPG
    4 MB · Views: 137
  • DSC01183.JPG
    DSC01183.JPG
    3.8 MB · Views: 155
  • DSC01242.JPG
    DSC01242.JPG
    3.9 MB · Views: 143
  • DSC01263.JPG
    DSC01263.JPG
    3.9 MB · Views: 142
  • DSC012652.JPG
    DSC012652.JPG
    910.2 KB · Views: 152
   / Bolens G154 / Iseki tx1300f
  • Thread Starter
#233  
I bought mine from "HydraPak Seals, Inc" out of Utah. They struggled a little with the O-rings as they specialize in regular hydraulic cylinder seals but they seemed to work fine. The three rings you are interested in are the following:

1.) Cylinder cover o-ring which is a "G55". I didn't take my cover off as I worked from the rod end so I didn't need this. HydraPak P/N 054.40X3.10-N70
2.) Main piston o-ring is a "P50A" - HydraPak P/N 049.60X5.70-N70
3.) Backup ring is a "P50A backup ring" - HydraPak P/N MBT-49X3X1.25. These are Teflon and do not have a split so you have to cut one with scissors so you can get it over the piston crown and into the groove. You'll need two of these to make the same thickness as the original from what I have seen. General recommendation is you cut the slit at and angle kind of how you do wood baseboard seems. Not sure how much better this is but I'll continue to do it this way until I see a reason not to. Keep the seams 180 degrees apart when installing.

I'm guessing most o-ring suppliers can get these, I just happened to pick HydraPak. I had good experience with their regular cylinder seals also and their pricing seems reasonable.

Thank you for the info. I appreciate it.
 
   / Bolens G154 / Iseki tx1300f #234  
No problem. Good luck with the mower. I'm looking at building a Gravely attachment adapter for the front of a TX1500, mainly for the sickle mowers they make as I have a use for one of those. Unfortunately it may be a while before it gets accomplished, if at all. I'll post the results if I ever complete it.
 
   / Bolens G154 / Iseki tx1300f #235  
Parts are hard to find for the KE70, Has anyone tried boring the KE70 to fit affordable pistons from another diesel engine. The toughest part would be finding a wrist pin the same size.
 
   / Bolens G154 / Iseki tx1300f
  • Thread Starter
#236  
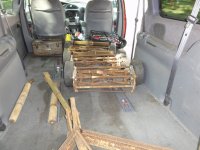
I finished making two new rollers for the mower that didn't have any and I
finished sharpening the blades on that one also. I cleaned the rust
off of the wheels and I also cleaned all of the old grease from inside
of the wheels. I sprayed the wheels with silver put everything
back together and mounted the mower back into the main
frame with the other two. I gave the gang a test around the
back yard and it works pretty good. I need to clean the junk
and grease out of the other two and give them a good
sharpening also. I will make new rollers for those two because
the rollers on there now are old and rotting. I made the rollers
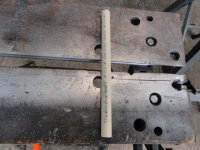
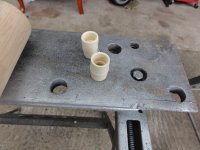
out of rolling pins I bought at Wal-Mart. I used 1/2" CPVC pipe
and couplings to make bushings for the new rollers.
here are a few pictures.
 

Attachments

  • DSC01283.JPG
    DSC01283.JPG
    4.2 MB · Views: 200
  • DSC01274.JPG
    DSC01274.JPG
    4.1 MB · Views: 168
  • DSC01273.JPG
    DSC01273.JPG
    4.1 MB · Views: 155
  • DSC01275.JPG
    DSC01275.JPG
    3.5 MB · Views: 155
  • DSC01280.JPG
    DSC01280.JPG
    4.2 MB · Views: 162
  • DSC01271.JPG
    DSC01271.JPG
    3.9 MB · Views: 154
   / Bolens G154 / Iseki tx1300f #237  
A vey helpful thread, I have worked my way through most pages and will be back to refer to the relevant pages once I get the the rebuild stage with mine,
Thanks for taking the time to photo all your work, you have a great looking tractor now.
I have pm'd you regarding your manual offer.

regards Chris
 
   / Bolens G154 / Iseki tx1300f
  • Thread Starter
#238  
A little update, Bolseki has been running good and is fun to drive.
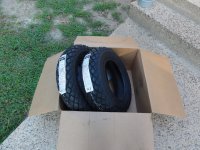
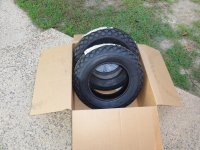
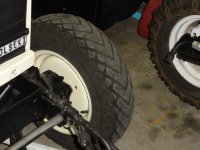
The front tires are shot and have been since I got the tractor.
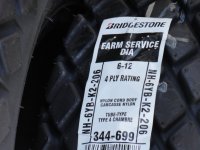
I have been looking at new tires that are direct replacement
for the ones on the front. I finally decided to buy new
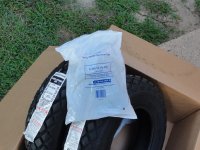
ones and they arrived today. I will be installing them this
weekend. I also bought new tubes to go with new tires.
 

Attachments

  • DSC01519.JPG
    DSC01519.JPG
    4.3 MB · Views: 90
  • DSC01520.JPG
    DSC01520.JPG
    4.2 MB · Views: 102
  • DSC01521.JPG
    DSC01521.JPG
    3.5 MB · Views: 113
  • DSC01524.JPG
    DSC01524.JPG
    4.1 MB · Views: 100
  • DSC01528.JPG
    DSC01528.JPG
    3.6 MB · Views: 111
Last edited:
   / Bolens G154 / Iseki tx1300f #239  
You've don't a great job on your tractor, I am in the process of rebuilding a project tractor myself and am looking for some help regarding the clutch, I read you did a lot of work in there, I have reassembled the 2 half's and unsure how much clearance there should be on the pedal, how much travel before the pedal engages, how much travel once the pedal engages to lift the pressure plate and if there is a know size of gap that should be achieved and measured through the inspection hole,

I have not adjusted anything apart from the pedal linkage to bring the pedal to lift the pressure plate but the travel does not seem very far and it feels as if I would like the pedal to travel further to give more clearance, I have not adjusted the stop bolt where the safety switch is which would give me more travel, I have not go a manual so have nothing to refer to,

thanks in advance if you can help,
 
   / Bolens G154 / Iseki tx1300f
  • Thread Starter
#240  
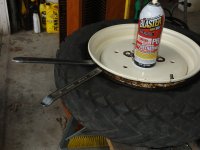
I took one tire off of the tractor to change the tire.
I used PB Blaster to loosen the bead on the rim.
It worked good to my surprise and using my tire
spoons I was able to get tire off of the rim.
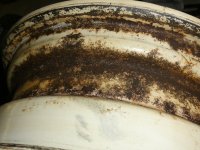
I was surprise by how little rust was on the inside
of the rim. I cleaned the rust off and primed the rim.
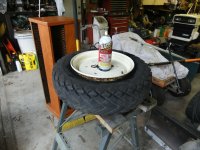
I sprayed one coat of antique white on rim and I have the rim
on a saw horse in my back yard. I put a tarp on the rim
because of rain but when the sun hits it I hope it
gets hot under the tarp and bakes on the paint.
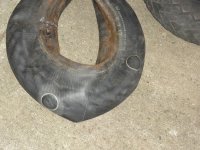
Also I didn't know if the tire had ever off of the
rim but the two tire patches on the tube would indicate
that the tire was off before.
 

Attachments

  • tire spoons.jpg
    tire spoons.jpg
    1.3 MB · Views: 99
  • rusty rim.jpg
    rusty rim.jpg
    1.2 MB · Views: 105
  • pb blaster.jpg
    pb blaster.jpg
    1.2 MB · Views: 109
  • tube.jpg
    tube.jpg
    1.3 MB · Views: 89
 
Top