jsygrovehpi
Bronze Member
- Joined
- Mar 22, 2010
- Messages
- 68
- Location
- Central Connecticut
- Tractor
- John Deere 2305 & John Deere 425
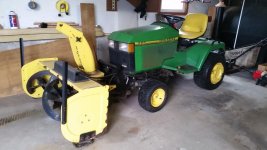
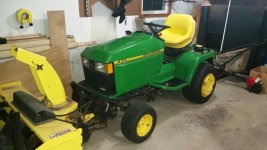
Hey y'all. I've been slowly rebuilding my father's old 1994 JD 425. He bought a used JD 2305 back in 2010 with 130 hours on it and I got his hand-me-down JD 425 with the 54" MMM and 47" snowblower. The tractor is now 22 years old with just under 1,000 hours and is starting to show it's age.
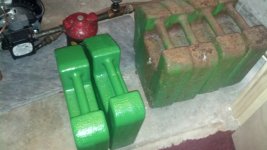
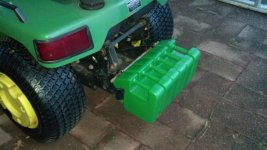
So far I've replaced the mower deck's belt since it was cracking pretty badly and I wanted to avoid a sudden failure. The tractor tires were also pretty well dry-rotted so I replaced them with the factory turf tires. I've also repainted the suitcase weights and most recently the side screens on the hood since they were starting to rust.
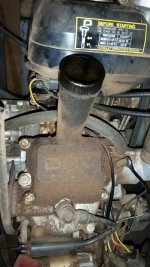
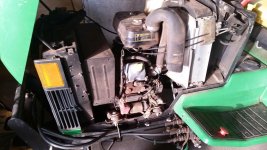
I also replaced the plastic factory valve covers for the aluminum valve covers that JD replaced them with for several reasons. For one, the o-ring style seals were starting to leak again and would have needed attention anyways, plus the oil fill cap was only a friction fit whereas the new covers have a screw style cap which should resist leakage better. The seals are also not the rubber o-ring style and should last longer.
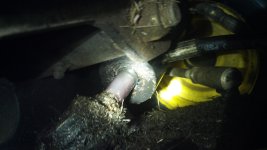
The power steering hydraulic ram was leaking pretty badly, especially when the fluid was cold, so I replaced it with a new ram.
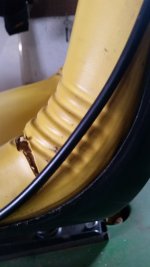
I picked up a factory seat and cushion and plan on replacing my slightly ripped seat. I didn't want to replace the entire seat since the bottom of the metal pan has the date produced by the factory (Jul 22, 1994). My plan is to cover the date with tape and sandblast or sand the rest of the pan and hit it with a fresh coat of black paint and install a new JD seat-back sticker I bought. Anyone have any experience with the plastic/vinyl seat edging? Mine seems to have shrunk since it "rounds" the corner between seat bottom and back (see picture)
I'm praying that I don't have a plastic cam gear failure but it sounds like it's not worth doing the work as a precautionary measure and only deal with it if/when it finally goes.
What do you guys think of my progress? Not lookin' too bad for 22 years old, ehh?
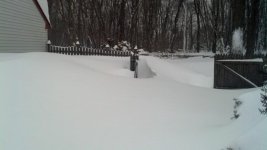
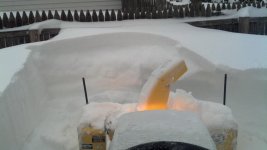
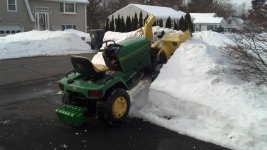
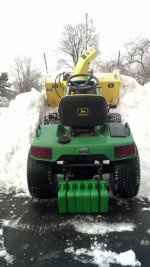
P.S. Check out some of those snow pictures. That fence is 42" high and in 1 storm the snow was nearly up to the top of the fence!
So far I've replaced the mower deck's belt since it was cracking pretty badly and I wanted to avoid a sudden failure. The tractor tires were also pretty well dry-rotted so I replaced them with the factory turf tires. I've also repainted the suitcase weights and most recently the side screens on the hood since they were starting to rust.
I also replaced the plastic factory valve covers for the aluminum valve covers that JD replaced them with for several reasons. For one, the o-ring style seals were starting to leak again and would have needed attention anyways, plus the oil fill cap was only a friction fit whereas the new covers have a screw style cap which should resist leakage better. The seals are also not the rubber o-ring style and should last longer.
The power steering hydraulic ram was leaking pretty badly, especially when the fluid was cold, so I replaced it with a new ram.
I picked up a factory seat and cushion and plan on replacing my slightly ripped seat. I didn't want to replace the entire seat since the bottom of the metal pan has the date produced by the factory (Jul 22, 1994). My plan is to cover the date with tape and sandblast or sand the rest of the pan and hit it with a fresh coat of black paint and install a new JD seat-back sticker I bought. Anyone have any experience with the plastic/vinyl seat edging? Mine seems to have shrunk since it "rounds" the corner between seat bottom and back (see picture)
I'm praying that I don't have a plastic cam gear failure but it sounds like it's not worth doing the work as a precautionary measure and only deal with it if/when it finally goes.
What do you guys think of my progress? Not lookin' too bad for 22 years old, ehh?
P.S. Check out some of those snow pictures. That fence is 42" high and in 1 storm the snow was nearly up to the top of the fence!
Attachments
-
 Weights 1.jpg708.8 KB · Views: 525
 -
 Weights 2.jpg73.3 KB · Views: 1,237
 -
 Before 1.jpg77.1 KB · Views: 613
 -
 Before 2.jpg70.5 KB · Views: 425
 -
 After 1.jpg74.1 KB · Views: 4,533
 -
 After 2.jpg86.1 KB · Views: 663
 -
 Steering.jpg918.3 KB · Views: 431
 -
 Seat.jpg679.5 KB · Views: 582
 -
 Valve Before.jpg158.1 KB · Views: 479
 -
 Valve After.jpg108 KB · Views: 1,200
 -
 Blizzard 0.jpg54.3 KB · Views: 381
 -
 Blizzard 0.5.jpg55.1 KB · Views: 318
 -
 Blizzard 1.jpg49.4 KB · Views: 372
 -
 Blizzard 2.jpg80.9 KB · Views: 2,074
 -
 Blizzard 3.jpg141.4 KB · Views: 493