k0ua
Epic Contributor
I would like to start by saying this is not my idea, I "stole" it from grsthegreat and muph1244. And grsthegreat gave me the part numbers for the 1/2 inch steel tubing 36 inches long with 1/16 walls. Store SKU # 468490 and the 3/8 solid rod 48 inches long, (mine might have been 36) Store SKU # 476623 . Anyway look for them in the expensive little metal bin near welding.
The goal here is to add about 4 inches of height to the existing Selective Control Valve (rear remote) lever so that the grapple is just a tad easier to operate by dropping your hand down a bit from the joystick.. Now I can really keep my hand on the stick and operate the lever with my long fingers!
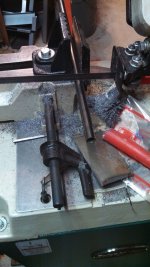
To start with you need to cut 3 inches of the tubing and 4 inches of the rod on your trusty bandsaw or whatever you got.
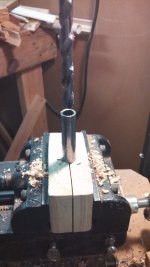
 Then select a 13/32 drill bit (.406) and ream out just half (1.5 inch's) of the 3 inch length of tubing to this diameter. I made some wooden pillow blocks to hold the tubing securely. Be sure to use lube when drilling out this tubing as it could easily get stuck on your bit, and then you would be in a mell of a hess.
Next is to insert just a bit less than 1.5 inches of the rod into the tubing and TIG weld and grind smooth the joint.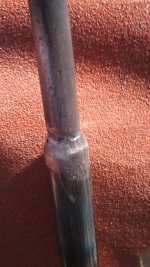
Now for some shiny black paint!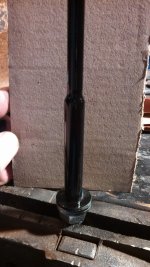 Notice the tubing is setting on a bolt to prevent the rod from falling too far down into the tubing, and allows me to rotate the assembly for TIG welding. A welding fixture. ha ha.
Now we are ready to remove the knob from the original rod. Easier said than done. I tried to pull at first, and it just seemed to stretch the knob a bit and get tighter. So I took an adjustable wrench and adjusted it to just clear the rod, and used it flat edges to "push" off the knob, and it came off very easily. I think we are looking at a variation of the Chinese finger stall principal here.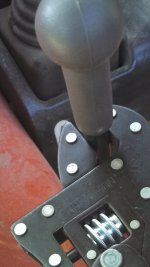
We now install the reamed out tubing onto the existing rod, and tap it a bit with a small hammer, as the original rod is now going to go into the tubing just a bit more than 1.5 inches it starts to meet with the restriction of the non reamed out portion of the tubing, from placing the new 4 inch rod just a bit less than the 1.5 inches into the center. The idea is that the rods meet just off center, with the restricted area of the tubing holding on to the original rod nice and snug. Of course the new 4 inch rod which was a easy slip fit into the tubing, is not going anywhere as it is welded. now put a single wound layer of scotch 33 electrical tape on the top 1.5 inches of the new rod, and push and twist the original knob down over the new rod/tape. It will be very snug. Be sure to wind the tape with overlapping joints, one direction and twist the knob the same direction so as to not ball up the tape.
And there you have it. Enjoy your lengthened rod
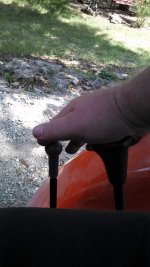
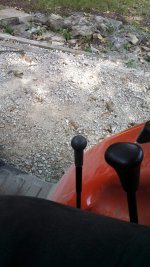
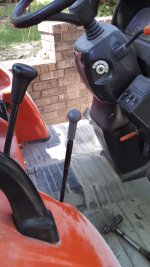
James K0UA
The goal here is to add about 4 inches of height to the existing Selective Control Valve (rear remote) lever so that the grapple is just a tad easier to operate by dropping your hand down a bit from the joystick.. Now I can really keep my hand on the stick and operate the lever with my long fingers!
To start with you need to cut 3 inches of the tubing and 4 inches of the rod on your trusty bandsaw or whatever you got.
 Then select a 13/32 drill bit (.406) and ream out just half (1.5 inch's) of the 3 inch length of tubing to this diameter. I made some wooden pillow blocks to hold the tubing securely. Be sure to use lube when drilling out this tubing as it could easily get stuck on your bit, and then you would be in a mell of a hess.
Next is to insert just a bit less than 1.5 inches of the rod into the tubing and TIG weld and grind smooth the joint.

Now for some shiny black paint!
 Notice the tubing is setting on a bolt to prevent the rod from falling too far down into the tubing, and allows me to rotate the assembly for TIG welding. A welding fixture. ha ha.
Now we are ready to remove the knob from the original rod. Easier said than done. I tried to pull at first, and it just seemed to stretch the knob a bit and get tighter. So I took an adjustable wrench and adjusted it to just clear the rod, and used it flat edges to "push" off the knob, and it came off very easily. I think we are looking at a variation of the Chinese finger stall principal here.

We now install the reamed out tubing onto the existing rod, and tap it a bit with a small hammer, as the original rod is now going to go into the tubing just a bit more than 1.5 inches it starts to meet with the restriction of the non reamed out portion of the tubing, from placing the new 4 inch rod just a bit less than the 1.5 inches into the center. The idea is that the rods meet just off center, with the restricted area of the tubing holding on to the original rod nice and snug. Of course the new 4 inch rod which was a easy slip fit into the tubing, is not going anywhere as it is welded. now put a single wound layer of scotch 33 electrical tape on the top 1.5 inches of the new rod, and push and twist the original knob down over the new rod/tape. It will be very snug. Be sure to wind the tape with overlapping joints, one direction and twist the knob the same direction so as to not ball up the tape.
And there you have it. Enjoy your lengthened rod


James K0UA
Last edited:
