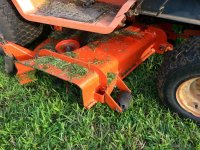
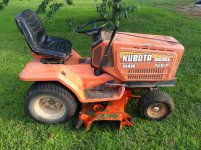
Here are some pics and a description of the deck restoration. I've never done anything like this before, but I was inspired by the various posts on this forum and others (especially the guy that had to weld in patches for about 1/3 of the deck). Seeing what others had done helped A LOT. So, I'll detail my experiences and some links from my research here for others in case they might be helpful.
[Some of this might not make sense unless you have the parts in your hand.]
The work was done by me and my two sons (15 year old and a almost 9 year old). The 9 year old and I did the bearing work. The 15 year old did most everything else. My wife even helped with the painting. The whole process too several weeks, most of which was waiting on paint to dry. It was very rainy and humid during most of the time.
The project started when the middle spindle broke the drive pulley shaft key. The shaft key way on both the shaft and the pulley were all woggled out and had to be replaced ($200! :shocked

. In the process of diagnosis, we had to use some heat to get some of the bolts off, which toasted some paint. Since it now needed painting and I wanted to replace all the spindle bearings, I just decided to do a total restoration while it was apart. Every bolt had its threads cleaned with a wire brush on the angle grinder and had anti-size put on it before it went back on (might fall out, but it won't rust in :laughing: -- I HATE rusted bolts and retapping, and broken off easy-outs and such, better to avoid them).
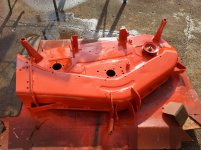
We noticed that a weed-burner type of propane torch does WONDERS for this kind of thing. It reduces concrete-like grass debris to dust in no time. It does the same to paint. Made it much easier. I know you don't want to do this everywhere, but for the deck it seems like it wouldn't hurt. Here's the cleaned off deck (click to make bigger):
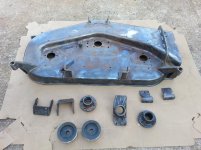
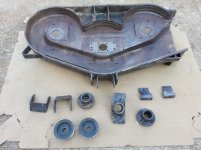
After the torch, all the stuff comes right off with a steel brush on an angle grinder. In the picture it looks kind of black, but this is from the OSPHO, a phosphoric acid rust converter product -- turns iron oxide into hard black iron phosphate (sort of like parkerizing on a gun barrel). We let the OSPHO sit overnight and the next day it was dry. Various stuff was flaking off, so we went over it with the angle grinder again. That's what it looked like before paint.
Next, we put 2 coats of
Miracle Paint on it. It's kind of like POR-15 in that it is meant to stop and prevent rust. I used Miracle Paint instead of POR-15 because I read in a few places that it is less picky about prep and such than POR-15. See
THIS and
THIS video. We used the silver paint because that's what they recommended if you use it as a primer (following instructions with paint is important).
[Be careful with Miracle Paint though, when it dries it is VERY hard and it will be on your hands for a long time if you don't wear gloves. Also, pay attention to the instructions for opening the lid. Consider foam brushes disposable and buy extras because they start to deteriorate.] I got a quart and had about half of it left over (I think).
Over the Miracle Paint, I used
Majic Tractor, Truck & Implement Spray Enamel from Tractor Supply -- Kubota Orange, of course. I always seem to put spray paint on too thick. MUCH BETTER TO SPRAY VERY THIN COATS THAT DRY QUICKLY -- EVEN IF IT DOESNT COVER COMPLETELY ON FIRST COAT. Thicker coats seem to take at least 10 times as long to dry. I did better with thin coats this time, but my last coat was a little on the thick side. The Miracle Paint dries quite fast, but the spray enamel takes much longer. After it's no longer tacky, sitting it out in the sun helps a lot. After it was orange, we put 2 coats of
Majic Clear Coat High Gloss Lacquer Spray which is made to go over the implement paint. This dries much quicker than the spray enamel and make it really shiny, but it says to let the implement paint cure for 7 days before applying. :muttering: So, we waited ... And the grass grew. The main reason to use it though is to keep the implement paint from fading in the sun. Many people found this to be a problem if they didn't clear coat it. Here's what it looked like painted with 1 spindle installed:
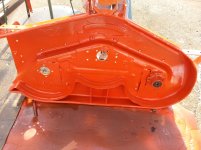
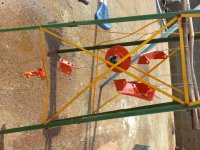
On to bearings... The
Kubota Illustrated Parts List is very helpful. Search for "RC44" for the various configurations of the 44" deck. Don't waste money on the Work Shop Manual for the deck. I got one and it's useless. Just says things like "Install bearing 1. Install bearing 2.", etc. Diagrams are not as good as parts manual either.
We took everything apart with a
3 jar puller set from Harbor Freight. Has been a really useful tool on several projects. Worked well for pushing out shafts and bearings and such.
Here's "Spindle 2", the two side spindles. This was the hardest one to do. The center one is pretty self explanatory.
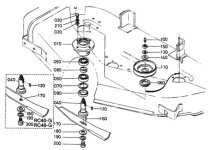
You have to put the bearings into the spindle housing first. These go in pretty easy. First, clean out the inside of the housing thoroughly. Makes the bearings go in better. I used a red Scotch Bright pad. Worked well. Hose it out with carb cleaner and then lube it up with grease. I put a very thin coat of anti-sieze on the surface and then grease, but I have a feeling that this may have made it harder. Just grease may be a better idea. I made a pounding tool from PVC. The OD of an 1 1/4" coupler is just the right diameter.
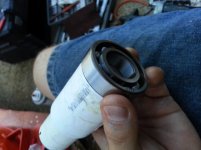
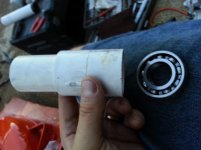
I just put this on top of the bearing and pounded it in with a rubber hammer. Some of them took a little ... ahem ... persuasion. But the bearing race is fully supported so I think it's fine. Shop press would be better. (I used the same PVC thingy for the idler pulley bearings, but I used the 1 1/4" pipe side and I had to grind down the OD a little so it would be slightly less than the OD of the bearing. The steel brush on the angle grinder worked for grinding away the PVC a little. Not shown on pic, did that later.)
Now comes the really icky part. It seems that to put the side spindle bearings ("spindle 2") in right requires a shop press and a special jig. I think that the spacer (part 80) between the two bearings is also to support the inner race of the bottom bearing while the shaft is being pressed in from the bottom ("bottom" relative to parts diagram, of course you have the parts off the mower when you do this, and probably upside down). But you would need another "spacer" or two to put on the other side to support the inner race of the top bearing while doing the pressing. You could probably make one out of the right size pipe welded onto a round plate with a hole in it -- then you could just use a 3 jaw puller to push it in. I pounded on the first one with a rubber hammer way too much and ended up pushing it through with a 3 jaw puller. On the second side spindle I just used the 3 jaw. But both times, there was lots of popping and stuff as it was going it. :worried: Not good. If I were going to do it again (and not be in a hurry) I would either take it to a shop somewhere and have the shafts pushed in, or make the jig I was talking about, or get a proper shop press (but a jig would still be required).
But, everything seems to have worked out OK. The spindles were tight and smooth with no grinding feel and no discernible wobble in any direction. They were actually a bit harder to turn than I imagined, but they are well packed with grease (packed the bearings by hand). Maybe just new grease or something. We'll see sometime today I think.
Here it is with all the deck parts back on (taken late last night).
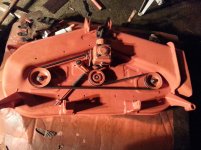
16 year old will put the rest back together and put on mower. Will post if it works or not. Not sure how hot spindle housing are supposed to get, but I want to feel them. I would think that they should not get untouchably hot.
Gotta go.


