Firstly to Radioman thanks for the reply I,ll have to get some better still send some to me via air mail because I have'nt worn hairpin clips for years

After doing research on this forum some time ago and speaking to Richard at Bro-Tek on several occasions it came quite apparent that the wheel spacers would definitely be a must as my terrain is steep, hilly, rocky and has plenty of dips that destabilzers the tractor and gives me never ending freckle contractions
In the previous post I mentioned that it was a 30% better ride 2 inches makes a big difference
either side.
Installation is simply Richard at Bro-tek sent me a link on how he installs the wheel spaces. My way might be slightly different here we go. Safety first ,parking break on sturdy wood blocks at the ready for under the tractor. I loosened off one wheel first before lifting the wheel off the ground with the back hoe stabilizes 3-4 inches max. You will need a 20mm socket (long body) and an extension to get the original wheel nuts off. Once off the Bro- tek wheel spacer will take the place of the wheel ,put back the original wheel nuts into the spacer once again using the 20 mm (long body) socket making sure the nuts are snug and tight at this stage Richard recommends using a torque wrench . With the wheel spacer in place now put back on your wheel this time you will need a 19 mm socket as Richards nuts are slightly smaller
Repeat for the other wheel.
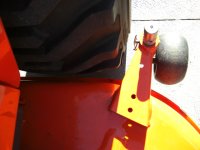
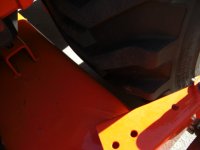
Fitting 60 inch MMM did require a bit of extra maneuvering to get it on but all in all it went on the same as before the wheel spacers were fitted. Getting it off I did have a little conflict with one of the scalp wheels it must have been the key ring thing ! Hey Radioman
That was my first time I will perfect the technique and I"ll take some more photo's but dont let that put you off purchasing .
Front wheel spaces have been spoken about on this forum before may be Richard at Bro-Tek can enlighten us on this subject no doubt there is some technical issues that have to be looked at so over to Richard.