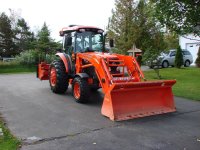
BX25D. Mod #1 and continued.

   / BX25D. Mod #1 and continued. #11  
Excellent job with the ripper tooth! I really like the design and wish I had one for my backhoe.

While I don't own a BX, it makes me want to buy one knowing all the really cool mods you have in store for it! Again, nice job and keep up the great job of posting all your work!
 
Last edited:
   / BX25D. Mod #1 and continued. #12  
I can't wait until you put some video of that puppy in action on YouBoob.
I might expect Sigourney Weaver to come out of the corner, battling that thing.
Nice job.
 
   / BX25D. Mod #1 and continued.
  • Thread Starter
#13  
Excellent job with the ripper tooth! I really like the design and wish I had one for my backhoe.

While I don't own a BX, it makes me want to buy one knowing all the really cool mods you have in store for it! Again, nice job and keep up the great job of posting all your work!

Thank you very much. I'm happy to know your enjoying it. I'm like all you guys in the way that I enjoy seeing photo's so it's nice to know at least a few of you are enjoying it :thumbsup:

I can't wait until you put some video of that puppy in action on YouBoob.
I might expect Sigourney Weaver to come out of the corner, battling that thing.
Nice job.

:laughing: Good one. When I get all the mods done the vids will start pouring in. Promise. :)
 
   / BX25D. Mod #1 and continued.
  • Thread Starter
#14  
I'll call these lot of photo's a mini mod.

Don't worry. It will start to get more interesting in the next few pictures I post.

The one thing I see a lot of in the shop are guys wearing out the lip of there bucket due to the lack of a cutting edge. It's much cheaper to install a cutting edge than it is to repair a bucket and if installed properly you can reverse the cutting edge when the outer edge wears to the point of uselessness.

I couldn't get the right length of cutting edge so I went with this one and cut it to fit. As you can see I used a horizontal and saw and kept the cutting fluid on while it was doing the cutting. it was the only way to save the blade. I could have used a cut off saw but I don't find them to be very actuate and the band saw is dead on and clean as you can also see in the photo's. You'll notice I put a rubber gasket on the bottom of the bucket before I installed the cutting edge. It really wasn't necessary to do that but I had the rubber in the shop plus It will keep any debris from getting between the edge and the bottom of the bucket. I also didn't show drilling the holes in the bucket. I figure you've all done similar things to that before plus drilling is really "boring" lol.

This is just the start to the bucket mods and I'll be posting more in the coming week. At least now I won't be wearing out my bucket.
Hope you enjoy the photo's.


bu1_zps00dc138a.jpg


bu2_zps4dd38ce2.jpg


bu3_zpsa77f450d.jpg


bu4_zps2f23ecdf.jpg


bu5_zpse7c0625d.jpg


bu6_zpsb0f9e8c4.jpg


bu7_zpsc719efa5.jpg


bu8_zps15297c14.jpg


bu9_zps1f5a27b2.jpg
 
   / BX25D. Mod #1 and continued. #15  
It's beautiful work but I would be concerned about all those bolts sticking up. I use my bucket to haul around stuff like air conditioners etc. and this would be pretty hard with those bolts. Plus, if you're moving around big rocks or other such stuff I could foresee damage to the bolts. Well, just my opinion anyway!

Sent from my iPad using TractorByNet
 
   / BX25D. Mod #1 and continued.
  • Thread Starter
#16  
It's beautiful work but I would be concerned about all those bolts sticking up. I use my bucket to haul around stuff like air conditioners etc. and this would be pretty hard with those bolts. Plus, if you're moving around big rocks or other such stuff I could foresee damage to the bolts. Well, just my opinion anyway!

Sent from my iPad using TractorByNet

For me its not an issue because I use a fork lift or the QC forks on the tractor. It's hard to avoid bolts on a bolt on cutting edge and when the time comes to turn over the cutting edge I usually just cut the bolts off and replace them so daae to the bolts are a given and is expected. It takes about 20 minutes to remove the bolts, turn the cutting edge around and install new bolts. I still think its much better than wearing out the lip of the bucket which will take a day to repair and repaint. Even our 5740 has a bolt on cutting edge.
 

Attachments

  • image.jpg
    image.jpg
    387.8 KB · Views: 931
   / BX25D. Mod #1 and continued. #18  
Wow- I was going to post some photos of my new Harbor Freight 4x8 trailer assembly and the little additions I made, but Paul's work is so fine, I am embarrassed to waste people's time with my junk. Not only are the welds perfect, but the photos are really good, too, which makes the posts even better. Keep up the sweet work! I have bolts/nuts in my bucket from attaching the tooth bar, and I think I would have used flat head allen bolts, threaded into the bucket's thick lip, if I had to do it again. I think that would work?
 
   / BX25D. Mod #1 and continued. #19  
4shorts-
All of the mods you have made on your tractors are extremely creative, innovative, etc. They are well thought out and not just "bling" that serves no purposeful function. Your creativity and ingenuity are enviable. Your fabrication skills are outstanding also. From the materials you use to the impeccable craftsmanship your mods are amazing. I wish I lived close enough to you to see if I could get you to do some mods on my L3200 HST. I would like to have my tractor "tricked-out" with some of your mods (tool box, lighting, cutting edge, etc.). I could follow your lead, but I don't have the craftsmanship or tools to complete them as accurately and neatly as you do. Your improvements are professional and factory quality.

Keep up the good work and keep the photos and videos coming.
 
   / BX25D. Mod #1 and continued. #20  
What bucket size and model tractor was the cutting edge from? Also what were the original dimensions of it? If i had to guess I'd say it started off as 54" x 6" x 1/2" but not positive.

Great job once again!
 
 
Top