mf135engine overhaul

   / mf135engine overhaul #21  
So far I have bought new semi finished liners, oil pump top and bottom gasket sets, rope seal and all new mains and big ends and thrust bearings as well as pistons and rings.MY end play is 0.4 mm on the crank and the spec is maximum 0.38. Can I fix this with oversize thrust bearings? tHE BOOK SAYS THEY ARE SOLD IN SETS OF 010,020,AND 030. I dont get this . How thick is 010? If I was aiming for 0.2 what size would I use and is there a specific way a thrust washer goes ( like forward for example Also I took the rope seal bearing holder out but dont know which half is on top or bottom. If you look at the halves one has a half moon scroll.Does the half with the half moon scroll go up or down?

.010 .020 and .030 are inches. .010 is approximately .25 miillimeter. millimeter = inches X 25.4 or millemeter = inches divided by .03937 so .2 millimeter is about .0078 inches. So your endplay is .4 millimeter, take .4 divided by 25.4 and you get .0157 inches. using the .010 shim, you should have a maximum end play of .0057 inches or .14 millimeter, well within the spec of .4 millimeter. I'll do some investigating on the rope seal bearing holder.

namyessam

I really can't tell from agcopartsbooks.com which way this is assembled. Is there a visible stain on the block to indicate which way this came off? I have a feeling the part with the notch on the inside diameter is the top, I cannot be sure though. Did some more looking at the parts book and saw that +.007 sets of shims are available from agco. I now see that you will have to measure end play without the standard washers and recalculate the needed amount of washers since you need to keep the crank centered so you need equal amount in front and in back.
 
Last edited:
   / mf135engine overhaul
  • Thread Starter
#22  
I hope to start putting this engine together on the week end.I would like to start this motor on the bench before i travel to the farm but did not bring the radiator or exhaust and diesel tank with me. I am sure if I just use the garden hose pipe I can get around this. How much chance is there that if I start this thing on its sump that it might run away from me? Would I need to tie the motor down ?.
I don't have any gauges with me like the pressure gauge and temp gauge. If I start it how long would a motor like this run before damage set in if there was low oil pressure for example?
Also this is Africa and the labourers are illiterate. It doesn't matter how many times you tell the guys to check the water and oil every day you can bet your last dollar that if the gauges go off the dial that tractor will be driven until it seizes. Is there a fail safe that can be simply built in like a solenoid cut off to the injector pump.? Should this be done on temp or oil pressure or both. Any ideas on this one?
 
   / mf135engine overhaul #23  
G'day plunger if you want to run the engine the minimum I would have would be an oil press gauge ( even a cheap one from an auto parts store) as far as it moving around yes it will want to do that, low or no oil pressure will start damage to the bearings within seconds, for the shutdown you used to be able to buy Murphy watchdog systems designed for pumps/gensets etc that had an inline fuel solenoid that shut fuel flow in the event of low oil press/ high water temp and they are adj so you can set your own limits they were a very good and reliable system.

As for your rear main I looked in our parts book and it shows it sitting up the way you have in the photo.


Jon
 
   / mf135engine overhaul
  • Thread Starter
#24  
Jon if you know anyone familiar to the 135 would you please ask them if you are correct with this orientation as someone on a different forum thought it should go in upside down to my photo. Many thanks Eugene
 
   / mf135engine overhaul
  • Thread Starter
#25  
Well I am going to try and put this engine together . I have received it from the automotive machinists. A crank polish and cylinder head skim and valve job using the existing valves. It has new liners that have been bored to size and the block has been skimmed and conrods have new small end bushes.It looks like they did a good job. This site seems quiet Is there a better site to ask questions on a engine rebuild as I am taking a chance.
So far I have installed the new main bearings and torqued the bearing caps.The new pistons have been licked up to compensate for the block decking. I now have to try and install the pistons in the block without breaking the rings. I tried doing this with the old rings and one broke immediately. I also need to learn the orientation of where the rings go in relation to each other.What would happen if I used a simple jubilee clamp instead of a ring squeezer and did each ring at a time. When I try to use the ring squeezer I cant see if all the rings are properly located and this is why I bust the ring. I tried buying a ring pliers but no one in S Africa seems to use these things. I have been told they just use their fingers to pry open the rings and to put them in place
 
   / mf135engine overhaul #26  
I've had good luck wrapping a thin sheet of brass stock around the ring package and using a worm style hose clamp to hold the rings in the groove. Dose everything in oil and either put rubber hose over the crank end rod studs or wrap the crank with cardboard before you slide them in.

An 15psi oil pressure switch with a 'start' bypass to the ignition works wonders on gas motors. I'm not sure how the Perkins shuts itself off.
 
   / mf135engine overhaul
  • Thread Starter
#27  
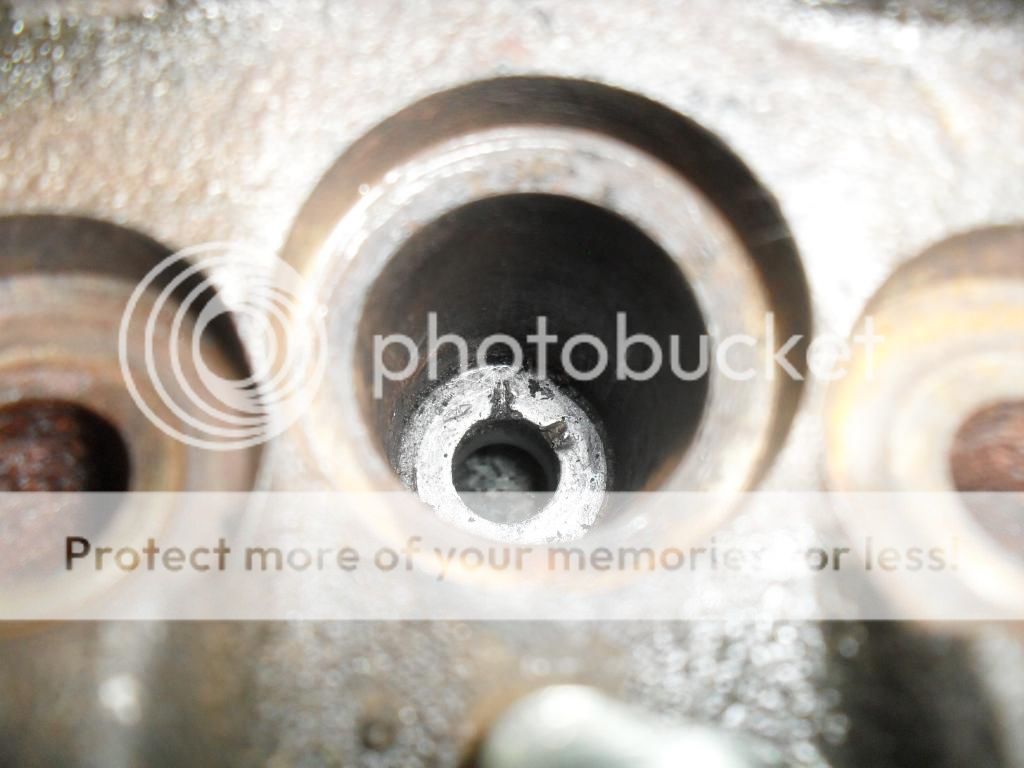
Some concerns I am having. I notice the atomiser seats are damaged. Only one is clean. How would I clean these up without sending it back to the machinists.Also what could cause this damage? A copper washer goes in here first so I wonder if the washer would not just deform enough to fill in this crack. How important is it that this thing seals off properly? Would it not have a chance of blowing compression past this crack. The book says that on no ]circumstances should shim be used under the atomisers and that the copper washers are special washers I cant see what could be so special about them?
 
   / mf135engine overhaul
  • Thread Starter
#28  
I am not sure my threads are being read ,maybe because I am replying from S Africa?. Is there any suggestion to this problem of my cracked seats Thanks
 
   / mf135engine overhaul #29  
You would think its a heat problem.
 
   / mf135engine overhaul
  • Thread Starter
#30  
I made a homemade tool to put in a drill to clean up the seat. Hope I am not going to stuff things up here. I had to take 1mm off to almost clean it up so I have made thicker copper washers to compensate for the difference.The engine when I assembled it was giving me a vertical scratch .I assumed this was piston ring no 2 and turned it 180 degrees from where the gap was originally. This was a big job as I already put on the sump and had to redo it. I got an even bigger scratch and then honed the ring gap with a stone and scratch dissapeared .The gap was 0.45mm so I am still confused what caused it.I hope I got my rope seal in okay.I could not find graphite grease so I just put it in using oil.
 
 
Top