Loader Don't let this happen to you.

   / Don't let this happen to you.
  • Thread Starter
#21  
The kit has a tap, t-handle insertion tool mandrel. and what I first thought was a tapping fixture to help get the tap started straight, but after reading more online about HeloCoils, I think it is a prewinder.

Like I said, I have never used Helicoils before.

Instructions on the package are sparse. From what I gather, the coil is placed in the slot in the prewinder and wound into the tapped hole with the mandrel while holding the prewinder still, is that right?
 
   / Don't let this happen to you. #22  
G'day the kit should have a tap, insertion tool with collar, and sometimes a tang break off tool ( looks like a straight bit of rod). After you tap the hole put the tang of the helicoil in the slot of the insertion tool ( 'T' shaped handle ) and slide the collar down so the tang cannot sit right in the bottom of the slot as you have to put slight pressure into the hole to get the insert started, if you are pushing on the tang and not the top it is possible for it to jump a thread and give you a bad thread to screw into.
When you have got the insert just under flush in the hole then take the insertion tool out and get the tang remover tool and put it down the hole until you rest on the tang then give it a sharp rap on the end to break the tang off, if you haven't got a removal tool then you can use the insertion tool just put it down the hole with the slot at 90 deg to the tang and do the same thing. Do not try to wind backwards as you will not break it off that way and you may damage the tool.

Good luck with it

Jon Merry Christmas HO HO HO
 
   / Don't let this happen to you.
  • Thread Starter
#23  
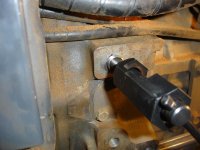
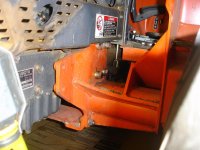
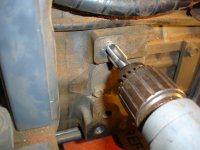
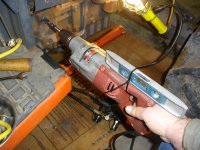
Well, it's done. The bolts were ruined. Had a hard time finding replacements. Ended up with 50 mm long instead of 40, so I added flat washers.

The cast iron was drilled and tapped dry. I stopped every few seconds and blew out the swarf.


Thanks, everyone, for all your help.
 

Attachments

  • DSC01700 (Large).JPG
    DSC01700 (Large).JPG
    136 KB · Views: 496
  • DSC01706 (Large).JPG
    DSC01706 (Large).JPG
    107.6 KB · Views: 465
  • DSC01723 (Large).JPG
    DSC01723 (Large).JPG
    113.3 KB · Views: 514
  • DSC01702 (Large).JPG
    DSC01702 (Large).JPG
    101.8 KB · Views: 441
   / Don't let this happen to you. #24  
Thanks, Jon, I'll look into that. I thought HeliCoil was only for small sizes but I just checked and they go up to 1 1/2" / 39mm.

But watch out for the price of those helicoil taps when you get over 1".
You can make an insert tool from a bolt if need be.
 
   / Don't let this happen to you.
  • Thread Starter
#25  
But watch out for the price of those helicoil taps when you get over 1".
You can make an insert tool from a bolt if need be.

Let's hope we never break anything that big!
 
   / Don't let this happen to you. #26  
Funny thing is i just looked at mine the other day and said to myself... I should check those. But then I got lazy and said i'll do it later.
Thanks for the posting and inspiring me to schedule this for first thing tomorrow morning!
 
   / Don't let this happen to you. #27  
Funny thing is i just looked at mine the other day and said to myself... I should check those. But then I got lazy and said i'll do it later.
Thanks for the posting and inspiring me to schedule this for first thing tomorrow morning!
Me too! I will go out first thing in the A.M. and do mine. Wheel nuts, too.
 
   / Don't let this happen to you. #28  
Never even thought of checking mine but I got a 1/2" Milwaukee 18v impact wrench for Christmas so I went around checking everything. Nothing was loose but it's probably wise to check them every so often.
 
   / Don't let this happen to you. #29  
Glad your repair worked! Can't tell from your great close-ups but are the diagonal reinforcements running from the top of the loader mount to the front of the tractor still on the tractor? I could see someone removing them to make working under the hood easier, but that would put severe loading on the bracket mount and might explain why they worked loose so badly.
 
   / Don't let this happen to you.
  • Thread Starter
#30  
Glad your repair worked! Can't tell from your great close-ups but are the diagonal reinforcements running from the top of the loader mount to the front of the tractor still on the tractor? I could see someone removing them to make working under the hood easier, but that would put severe loading on the bracket mount and might explain why they worked loose so badly.

Grandad4,
there are no braces going from the loader frame to the front of the tractor, just the two underneath going to the rear end. I don't remember the loader type, but I'll check and see if it should have the front braces also.

Thanks for the heads up.
 
 
Top