New Holland TC35D Top End

   / New Holland TC35D Top End #31  
john_bud said:
When I did the head on my last 172 diesel, there was the largest casting flash in 2 of the 4 intake ports and 1 exhaust. One was about the size of a dime sticking out. It's the hot rod in me, but that had to go! Probably did nothing but make me feel better....

The size of a dime?! That's huge, and the head was cast steel, right? Yeah,
that would have to go if I saw it, too.

The last JD pistons I bought were just over $100 for a complete one with
rings. A set of 3 rings with no piston was even more.
 
   / New Holland TC35D Top End
  • Thread Starter
#32  
Well here's today's work. Slowly getting there.

PICT0048_edited-3.jpg


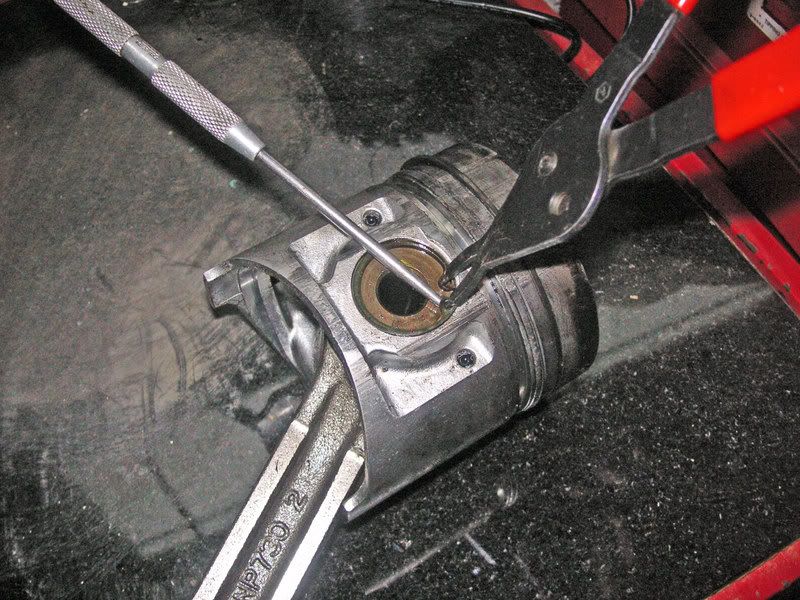
Taking apart the galled up piston. Used snap ring pliers to get the pin started out, then a pick to work it the rest of the way. The pins were tight in the cylinders, although not bad in the rod. When I re-assembled, I stuck the wrist pin in the freezer and the piston in the oven at 300. When I put them back together, the pin just dropped in. Eliminated having to use an arbor press.

PICT0049-1.jpg

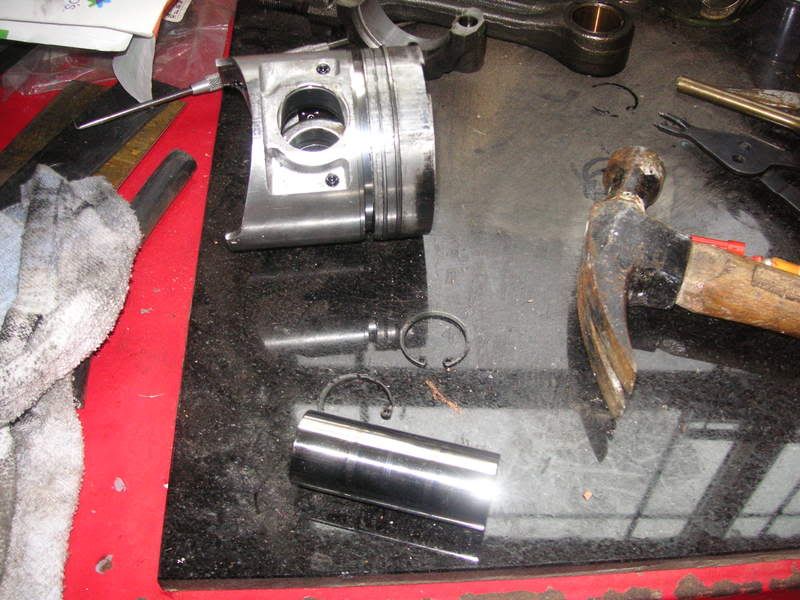
Here's a shot of the components of the piston laid out.

PICT0050_edited-2.jpg

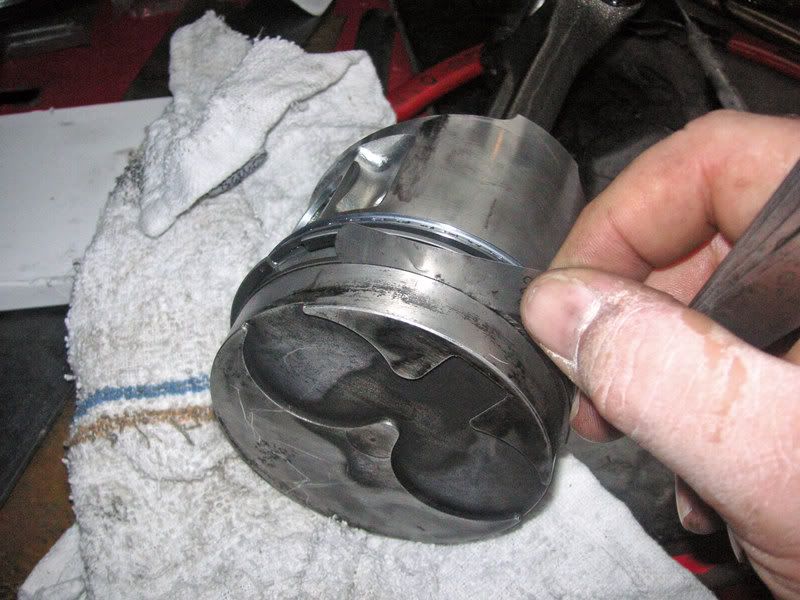
Also checked the side gap of the rings. If they bounce around in there long enough, it will make the gap between the ring and land too large, requiring replacement of the piston. The used ones here were at .002, which again, is fine.


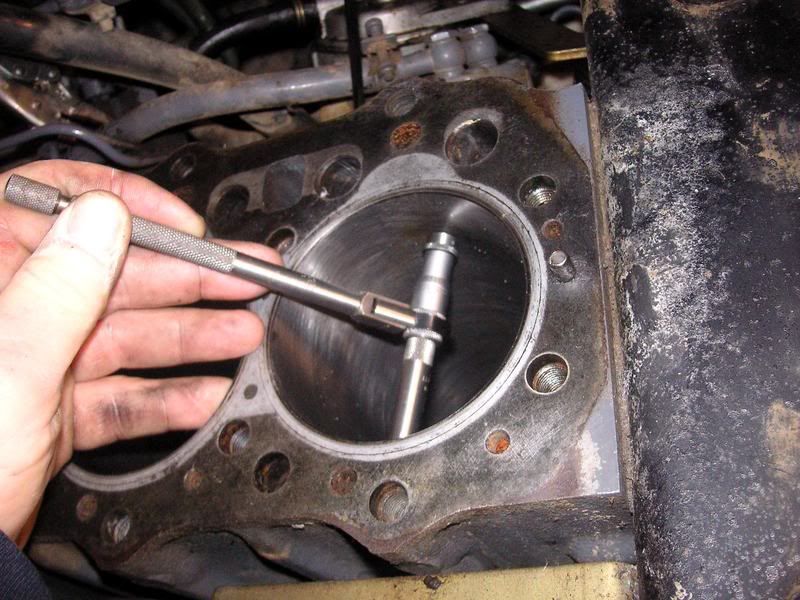
Using a bore gage to check the cylinder. I normally check it at 90 degrees in 2-3 different locations, top to bottom. Here, everything was not more then a couple tenths taper and nice and round. All three nearly identical. The two old pistons went in with .002 piston to cylinder wall clearance; the new piston was .0015. New piston was coated, old ones were not.

PICT0051_edited.jpg


PICT0052_edited-1.jpg


Checking the ring gap. Here I had just about .010, which was fine.

PICT0053.jpg


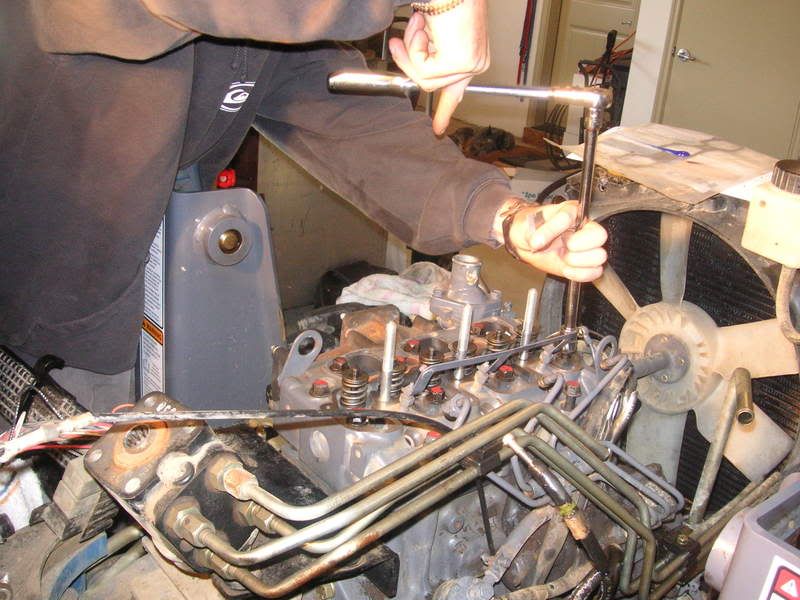
Bolting and torquing the head down. It called for about 80 ft/lb of torque, so we did it in increments of 10, 25, 75 and 80. Then let it sit for a bit and re-checked. Cast iron parts don't move as much as aluminum, but its always a good idea to re-check torque.

PICT0054.jpg


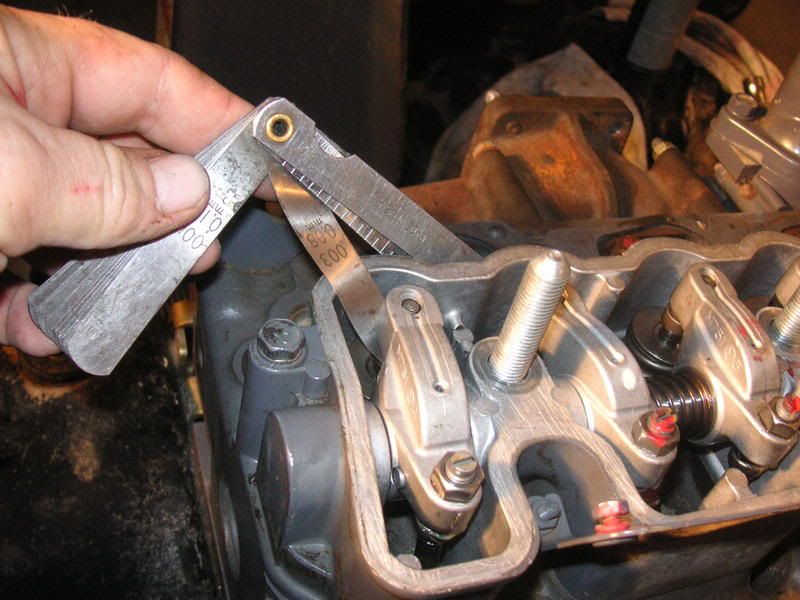
Time to set the valves. They set almost like and old VW; .008 clearance.

PICT0055.jpg


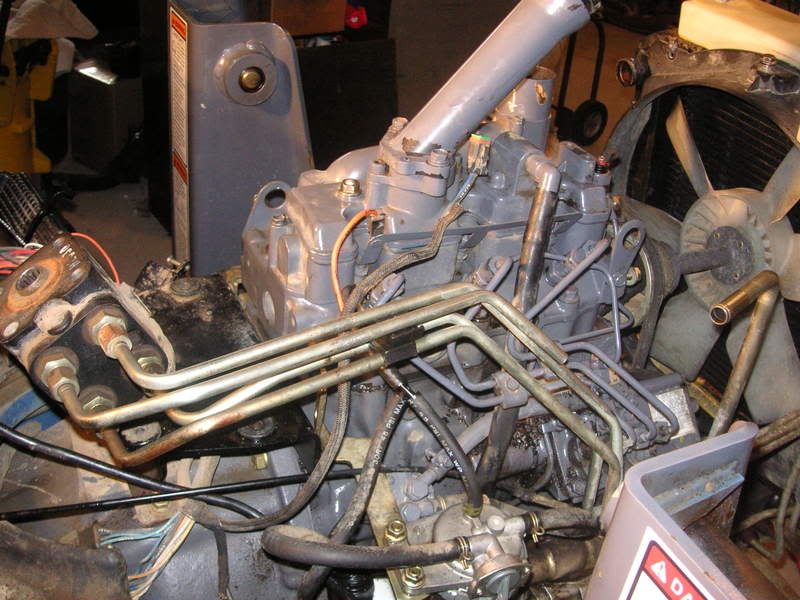
Engine back together.

pict0056.jpg


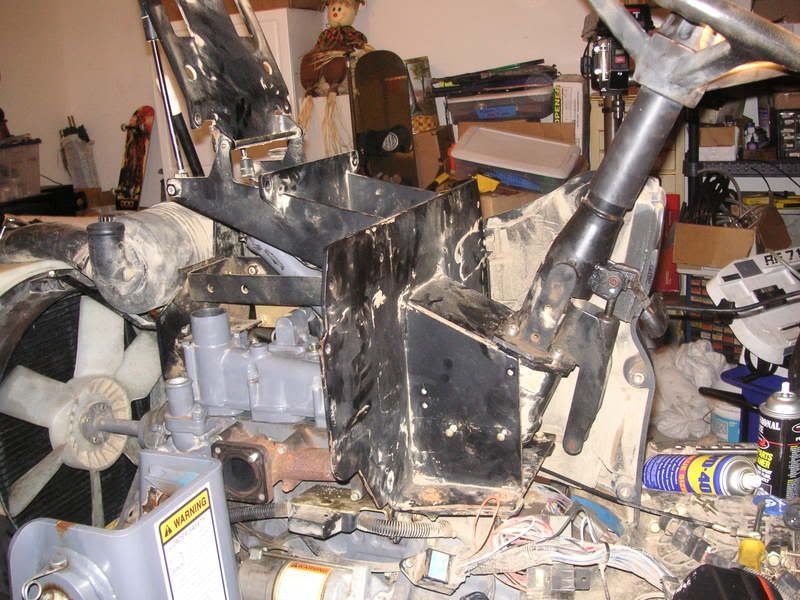
Cowling, steering wheel and side covers starting back on.
That about did it for today. Had a couple glitches. Broke one air intake bolt off. Had to drill it and use an EZ out to remove. Its an odd one so will have to pick one up at Fastenal tomorrow. Also pulled a real boner when I bolted the rocker box down. I ended up putting the nuts on after I stuck the valve cover on..don't ask. Had to pull that back apart and re check everything.

Should finish up with the assembly tomorrow.
 
   / New Holland TC35D Top End #33  
Good progress!

Should be humming soon.

jb
 
   / New Holland TC35D Top End #34  
Due to the overheating, I would have been very hesitant of reusing a set of rings that may have had their tension against the cylinder walls compromised due to loss of spring tension.
 
   / New Holland TC35D Top End
  • Thread Starter
#35  
I can't disagree with that. I looked as closely as I could, and pulled and tugged at the rings and checked them with a magnifying glass for signs of wear etc. The edges were still good and they still sprung away from the piston until compressed with a ring compressor. They didn't have any of the obvious signs of wear, like taper or score marks. They were also almost identical in terms of end gap to the new sets, so I took the risk. One of the big things I looked at was how the piston was wearing in the cylinder. One was obviously galled badly. Another had just the beginnings of scuffing. The one I re-used the rings on was still relatively spotless; no wear signs on the piston or cylinder walls. I would have preferred to get another set, but patience is NOT one of my virtues. I'll just have to see whether it was a dumb mistake on my part. Wouldn't be the first time. I figure that taking a few risks just adds to the excitement when you get ready to fire it up for the first time. What's the fun in doing everything perfect? :D
 
   / New Holland TC35D Top End
  • Thread Starter
#36  
VAROOOOMMMMMM!!!!

[SIZE

It lives, doesn't smoke, idles nice and seems to be happy....so far. And way cool...here's the only parts left over.

PICT0048.jpg


Only thing I notice is a slight 'ticking' from the area of the injector pump. I'll sort that out tomorrow.

Its been a fun project, even if it was my own dumb fault that it happened in the first place. If its still running a week from now, I'll be braggin it up in the neighborhood.
 
   / New Holland TC35D Top End #37  
I roll the dice also sometimes with engines. I usually win, seldom lose. It will be running better a week from now after break in. Good job! That was quick!
 
   / New Holland TC35D Top End #38  
I must say, you jumped on it and got 'er done. Nice job.

You help the neighbors out like that too? (Wanna move ?) Wisconsin is just like Washington in the winter, only the rain falls in it's more natural solid state. No? Oh well...worth a try.

jb
 
   / New Holland TC35D Top End #39  
ctjstr said:
VAROOOOMMMMMM!!!!

[SIZE

It lives, doesn't smoke, idles nice and seems to be happy....so far. And way cool...here's the only parts left over.


OH MY GOD.......ctjstr, don't you know what the function is of that small washer with the knurled face on it. Your going to be bummed big time. That washer is a critical spacer between the tappet cover & rocker panel which keeps the flywheel from rubbing up against the differential transfer case......had you going did'nt I. I know, I did'nt, just could not resist when I saw the left over parts.

Incredible job. I envy guys like you. Must be nice & an incredible feeling of satisfaction when you first start her up.

Thanks for taking the time to take the photos & share here on TBN.

Vic
 
   / New Holland TC35D Top End
  • Thread Starter
#40  
kozak said:
OH MY GOD.......ctjstr, don't you know what the function is of that small washer with the knurled face on it. Your going to be bummed big time. That washer is a critical spacer between the tappet cover & rocker panel which keeps the flywheel from rubbing up against the differential transfer case......had you going did'nt I. I know, I did'nt, just could not resist when I saw the left over parts.

Incredible job. I envy guys like you. Must be nice & an incredible feeling of satisfaction when you first start her up.

Thanks for taking the time to take the photos & share here on TBN.

Vic


You DID have me going with the words tappet cover. Here's the deal. The way this engine is set up has three long studs sticking up from the head. The rocker box (thing that holds the rocker shaft and rockers) slides down over those three studs, which come up through the rocker shaft. You then use three rather thin nuts, sort of like jam nuts, to thread down on those studs and hold the rocker arm down onto the head. You adjust everything and then slide the valve cover down over the same three studs. Its then held in place with acorn nuts.

Well, when I was first putting it togehter, I slipped on the rocker arm, then slid the valve cover down directly on top, forgetting the three jam nuts. I ended up realizing what I'd done, and had to go back, disassemble things (by this time I had a bunch of junk added on top of everything) take off the cover, nut down the shaft and put it all back together. So here I am reading this mess a couple days later and some wiseacre kids me about something missing between the tappet cover and rocker panel. Pretty near spit coffee all over the keyboard on that one.

Thanks for the compliment though.
 
 
Top