mjncad
Super Member
It's a John Deere Christmas! At least until the Discover card bill comes due.
The only thing rivaling that box of goodies is an order from McMaster-Carr!
It's a John Deere Christmas! At least until the Discover card bill comes due.
OK, now the engine is on its stand and the head is off. This one is very
different from the pre-EPA engine (also a 3TNE84) from my last JD955. The
oil pan is a heavy cast stressed member that the subframe bolts to. The
955 was a full frame tractor with sheet metal pan. The front gear case had
a crap-catcher plate bolted to it....that is why it looks so nasty...it was
packed with dirt.
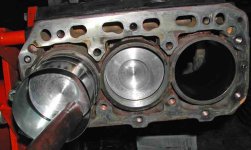
The water jacket design results in a fairly thin-walled cylinder. So only a
.25mm (0.010") oversize piston is offered by Deere. All three 955s I did
were bored for 0.5mm O/S pistons. Since I do not have a 3-4" inside
micrometer, I made a guage from a steel rod ground down to a point at
each end, and made to the wear limit of the O/S piston bore. At the worst
wear areas, I am right at the limit. Boring for liners would be the only other
option to save this block, if I can not make do with .25mm.
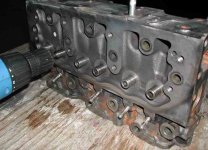
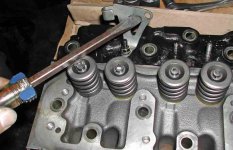
The head is pretty nasty, so I had it hot-tanked after removing the valve
train. I will be lapping to clean up the seats, but no seat cutting. The
valves are in nice condition. Getting the injectors out is often very hard.
One gave me particular trouble, so I removed one stud for better gripping
access. I will reuse these very expensive FI units.
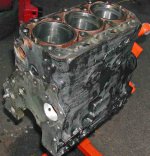
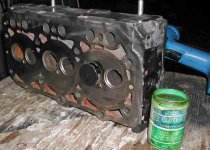
The first photo shows the block, bored and honed. You can see that the
wear did not completely clean up in the bore/hone process. The lighting
shows lots of contrast (see arrow), but you can not feel any differences in
level there. The ridge is still detectable, however, but I think I will be OK.
We will see. (I sure wish I could have gone with the .50mm oversize!)
.
")
Dave you note on the first block pic that the honing process did nor entirely clean up the cylinder wall, Im just curious if you or the engine service took the time to put an inside mic on that section of the cylinder wall ? If its only .0005 then probablly not an issue, but if its more then its worth thinking about, just an observation on my part !