o2batsea
Platinum Member
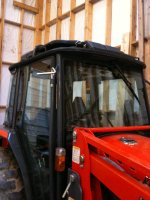
I posted this in the Kioti section. I hope it helps others. Tractor is a 2006 DK45 Cab.
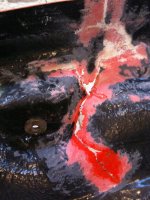
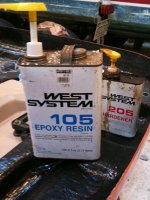
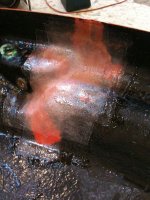
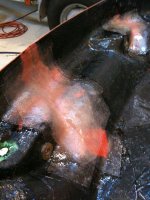
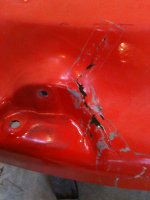
I spent some quality time repairing a serious crack that i created when a partial wall fell on the tractor about a year or so ago ( long story ). I first had to get the cab top off and down where I could work on it. The cab is held in place with 4 12 mm bolts. Once undone ( the frigging lights are so in the way) the top has to be lifted slightly so as to unplug the wires for the lamps. With these loose the top lifts off. It isn't heavy, just darn cumbersome especially when standing in the loader arms. I managed to get it down without killing myself. On the sawbucks, the first thing to do was strip the hardware. Next I ground out the cracks from the inside with an angle grinder fitted with a 50 grit sanding disk. I feathered the cracks back about two inches each side. Next was an acetone wipe down to get any oil, wax or contaminates cleaned up. I cut glass cloth in two and four inch strips. I mixed West System epoxy and painted the entire area with resin. This helps to wet the cloth when laid across the cracks. I use a throwaway paint brush and work the resin into the cloth. I did about six layers. It took about three hours to set. I flipped the top over and ground out the cracks in order to get rid of the ragged edges so I could fill with bondo. Once filled and sanded I finished with orange Hard Nose paint from POR 15. Installation was a reverse of removal. Fun!
I spent some quality time repairing a serious crack that i created when a partial wall fell on the tractor about a year or so ago ( long story ). I first had to get the cab top off and down where I could work on it. The cab is held in place with 4 12 mm bolts. Once undone ( the frigging lights are so in the way) the top has to be lifted slightly so as to unplug the wires for the lamps. With these loose the top lifts off. It isn't heavy, just darn cumbersome especially when standing in the loader arms. I managed to get it down without killing myself. On the sawbucks, the first thing to do was strip the hardware. Next I ground out the cracks from the inside with an angle grinder fitted with a 50 grit sanding disk. I feathered the cracks back about two inches each side. Next was an acetone wipe down to get any oil, wax or contaminates cleaned up. I cut glass cloth in two and four inch strips. I mixed West System epoxy and painted the entire area with resin. This helps to wet the cloth when laid across the cracks. I use a throwaway paint brush and work the resin into the cloth. I did about six layers. It took about three hours to set. I flipped the top over and ground out the cracks in order to get rid of the ragged edges so I could fill with bondo. Once filled and sanded I finished with orange Hard Nose paint from POR 15. Installation was a reverse of removal. Fun!