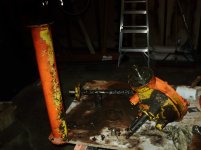
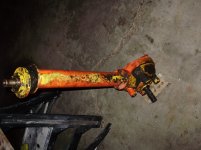
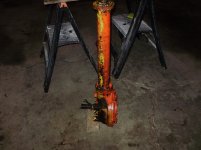
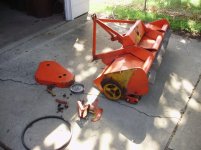
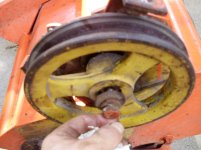
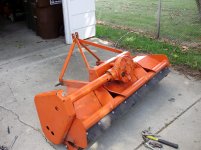
The start of restoring an old Mott flail mower

   / The start of restoring an old Mott flail mower #1  

Gordo 56

Silver Member
Joined
Mar 26, 2011
Messages
199
Location
Park Forest, IL
Tractor
Kubota L3000 DT
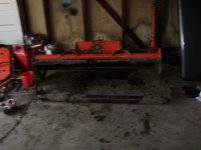
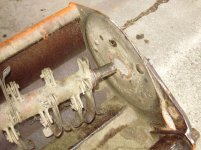
Today I am going to start replacing parts on my Mott model 72, 5ft flail mower.

I am posting it here, to maybe help someone with a old Mott flail, have the confidence and know how to do the job. When I was looking for help there wasn't much on this site with the actual putting in parts.

First, I am not a writter, and words don't come easy to me. Some time my sentences are not going to be put together right, and you may have a hard time understanding what I am writting. I am just an old country boy that should have paid better attention in school. if you don't understand about something, please email me and I will try and explain it better. I have never worked on a flail mower before and will post all of the the things that go right and wrong. I hope I remember how it all goes back together.

I have just recieved the Parts from Montage Enterprises, and I want to thank
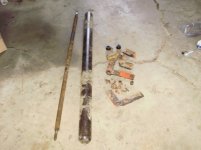
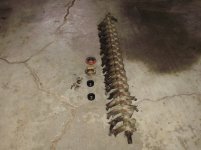
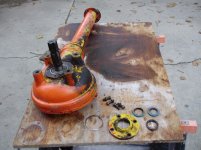
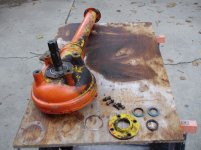
Tara from Montage, who was a big help, and was very pacient, when helping me first to identify the mower and then helping me order all the parts I needed. I am going to replace the belt, both bearings in the cutting shaft, both bearings in the roller shaft, the tension pully wheel, and replace the seals in the gearbox. flail mower parts 001.jpg.
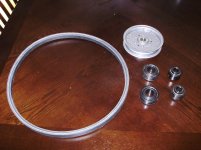
The the only thing I am going to do today because i have to go to work this afternoon is replace the bearings in the roller shaft. So I will be back later to day with an update on how it went.
 

Attachments

  • flail mower 001.jpg
    flail mower 001.jpg
    499.6 KB · Views: 1,857
   / The start of restoring an old Mott flail mower
  • Thread Starter
#2  
Day one,

I put the roller shaft back together today and it went in pretty good. I first had to put a new grease gun together, the one where you put in a grease cartrage. I have used a grease gun before, but not one with the cartrage. It took me about 10 mins of wrestiling around with that before I got it.

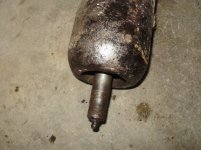
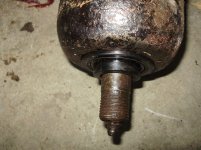
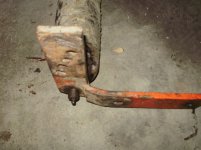
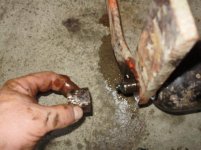
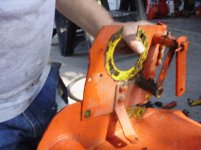
The first thing I did before putting the tie rod in the rollerputting back parts 001.jpg was I put some grease in the grease zerks on the tie rod to make sure they were good and to push out any grit or dirt. They were good, so I put tie rod in rollerputting back parts 002.jpg, after the tie rod was in roller, I put in both bearings, these slide in easly and are not the pressed in type.putting back parts 003.jpg, after this was done I put on the roller bracketsputting back parts 004.jpg. After you slide the brackets on you put on the retainer nut on that holds the brackets and the bearings in placeputting back parts 005.jpg. I always spray a little WD 40 on the treads and nut. Once that is on then you can attach brackets to mowerputting back parts 006.jpg. The only thing left to do on the roller is to put the retainer nut guards on, It is a metal guard that protects the retainer nut. When taking the roller off I had broken 2 of the carriage bolts off that were very rusted and I had forgot to order those, so they will go on when I get them in.

This Roller part of the retoration was pretty easy.

Tomorrow I will attempt to put the cutting roller back together.
 
   / The start of restoring an old Mott flail mower #3  
Great documentation of the process.
If you put "enter" before and after your photos (so that they are on their own lines) it would make it much more readable.

Aaron Z
 
   / The start of restoring an old Mott flail mower
  • Thread Starter
#4  
I will try that, thanks for your advise.
 
   / The start of restoring an old Mott flail mower
  • Thread Starter
#5  
Day 2,

Today I put the cutting shaft back in, I wished I could say it went as smooth as the roller, but it didn't. I still got it in and I will explain what I screwed up on so when someone does theirs, they will not make the same mistake. The shaft works like it should now, but I will probably have to replace one of the bearings some time down the road
cutter shaft parts 001.jpg

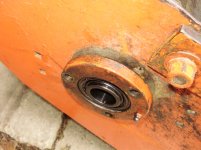
The first thing I had to do before getting started with the installation was to use my grease gun and put some grease in the grease zerks on the bearing housings to see if they worked and to get out any grit or dirt . The second thing was to get the bearings in the bearing housing. These bearings are pressed in bearings and I had no way of getting them in, so I went to Firestone Auto repair and asked if they had a bearing press and if they would press them in for me. The Mangager said yea he would do it for $20.00.

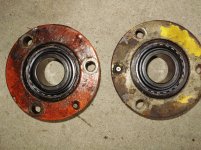
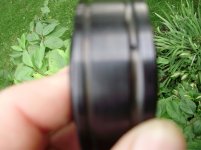
Now there is something very important when putting in the bearings in the housing. They have to be put in the right way so when you put grease in the grease zerks it gets grease to the actual bearings. I know some of you about now are thinking this is where I screwed up, but its not. I knew enough to have the bearings going in the housing the right direction and I instructed the Manager how to put them in. On the out side casing of the bearings there are 2 groves that go all the way around the bearing, and in one of the groves there are several pin holes for grease to enter the bearing. That grove has to be lined up with the grease zerk when it is pressed in, and you can see how it goes just by looking at it. I forgot to take a picture before I took the bearings to Firestone.

I got the bearings back from Firestone
cutter shaft parts 002.jpg
Then I put the shaft washer on the shaft,
cutter shaft parts 003.jpg
and then put the shaft pully side in first to the body of the mower
cutter shaft parts 004.jpg
The next thing was to put the housing with bearing on the non pulley end of the shaft.
cutter shaft parts 007.jpg
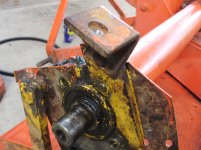
This is where I screwed up, as you can see from the above picture the housing for some reason was tight fitting on this side of the mower body and it needed a little persuasion to get it tight on the mower body so I could put the bolts in. I used a 2 by 4 and placed it flat across the bearing housing and bearings and I gave it a good wack with a hammer. Do not do this, as you can see the bearing sticksout a little more then the housing and when I hit it with the hammer I bent the back seal on the bearing. I did not know it happened and found out when I put the pulley side on and tightned everthing down and tried turning the cutting shaft and found it to be very tight and would not turn easely. I took it all apart and and found the problem and removed the back seal of the bearing. The good news is, the washer that was put on the shaft fit perfectly into the bearing housing on the back and acts like a seal for the bearings. I know it wont seal as well as the bearing seal does, but at 71.77 dollars each, I am willing to see how long it will last before replacing it. I think if I grease it before every use it may last awhile.

After getting the bearing housing on the pulley side on and everthing seemed to turn easely, it was time to put on the cutter pulley.
cutter shaft parts 008.jpg
I put the metal wedge into the shaft
cutter shaft parts 009.jpg
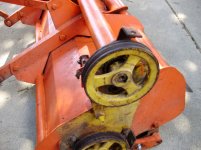
and then lined up the pulley well onto the shaft and gently taped it on. I then put the washer, lockwasher, and bolt onto the end of the shaft that holds the pulley wheel on, and the job was complete. All in all it went pretty easy except where I screwed up the bearing.

The next thing up is to put new seals in the gearbox and put that all back together. I am still waiting for those to arrive in the mail and once they come put those in. I am not as confident with this task as the other two, so we will see how it goes.
 

Attachments

  • cutter shaft parts 010.jpg
    cutter shaft parts 010.jpg
    560.6 KB · Views: 995
   / The start of restoring an old Mott flail mower #6  
Hello Gordo,

Great work so far on your new to you flail mower.

If the rear roller nuts are not Castle Nuts you may want to take them off clean them with hand cleaner and use blue loctite to secure them as the rear roller is spinning faster than your tractor tires in use and the vibration will loosen them and they will fall apart on you. The Blue Loctite allows you to remove the bolts when or if you need to replace the bearings again.


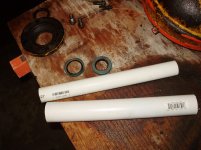
On the gearbox seals a neat way to slip the new seals in is to use some white pvc pipe the diameter of the PTO stub and driven shaft and this eliminates the possibility of tearing the seals. Just be sure to use some very fine grit sand paper to smooth over the edge of the pieces of PVC pipe that you will be slipping the seals over.


We welcome you to the Flail Mower Nation as a new lifetime member.


_________________________________________________________________
Once you go flail you never go back:thumbsup::licking::drool:
 
   / The start of restoring an old Mott flail mower
  • Thread Starter
#7  
Thanks Leon,

I will do that with the roller nut and the pvc pipe for the seals.

Gordo
 
   / The start of restoring an old Mott flail mower
  • Thread Starter
#8  
Day 3,

The seals arrived yesterday, and I took a vacation day today from my job to put the seals in. When I got the seals I didn't remember seeing anything like that in the gearbox when I took off the cover plate and took a peek. So I emailed leonz, who is a member here on TracktorByNet and told him I have no Idea how these seals go in and if he could posibly tell me how to do it. Remember in the begining of this tread I said this was the first time restoring a flail mower. Leonz pretty much reiterated what he had said in this tread about using a pvc pipe the diamter of the gearbox spindle and slidding the seal over that (look at his reply). With the seals Montage sent me, I couldn't see how to do it.

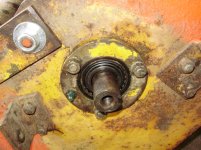
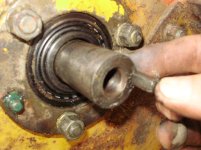
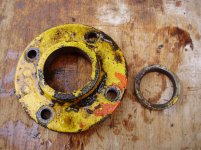
So I took off the cover plate off the input shaft of the gearbox and started looking things over and I was able to see where the seal was and how it came out. The reason I couldn't figure it out before, is because they sent me the wrong seals.
gearbox 003.jpg
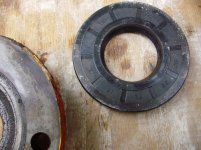
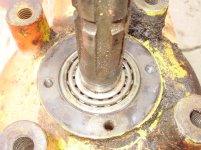
The picture above is a picture of the seal Montage sent. As you can see from the next picture, there was noway to put it in.
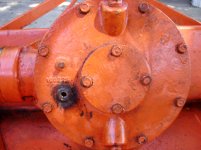
gearbox 001.jpg
Now take a look at the old seal, it was pressed into the cover plate, I had to tap it out.
001.jpg
Now what Leonz said makes perfict sense.

I called Montage and talked to Tara and she had got the model # mixed up and had sent the wrong ones. She credited me for the wrong seals and is sending the right ones today. While I ordered the right seals I also ordered a new cutter bearing for the one I screwed up. I will do business with Montage again, they are a creditable company.

When I get the new seals, hopefuly I will be able to finish the job.
 
   / The start of restoring an old Mott flail mower
  • Thread Starter
#9  
Day 4,

Got the right gearbox seals and the new cutter bearing, but before I got started I went to ace hardware, to pick up 2 different peices of pvc pipe to help put in the new seals.

The very first thing I did was replace the cutter bearing that I screwed up.
Here is a picture of the outter bearing to show the grooves and pin holes for the grease to get in. I had forgot to take a picture of it last time.
002.jpg
The changing of the bearing only took a few mins and for some reason after taping the old bearing out, the new one went in by taping in gently with a hammer.

Next, I set up for the seal replacement.
003.jpg004.jpg
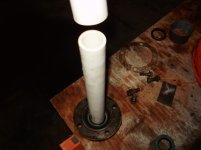
First I started with the input seal housing placing on table with outside of housing face down and then put pvc pipe that is the same size as gearbox spindle in the housing and then place the seal over the pvc pipe and sliding it down and getting it started level in the housing. Make sure both ends of pvc pipe are cut straight and you finely sand the end you put the seal over to take off any sharp edges that could tear your seal.
005.jpg

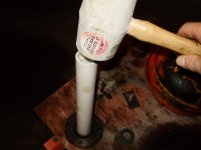
Next take your next peice of pvc pipe that is the next size bigger and slide that over the other pipe.
006.jpg
and make sure it is level and gently tap end of pipe until seal is seated all the way to front of housing
007.jpg
This worked real slick and I got this idea from Leonz reply to this thread.
I put the output seal in the same way.

Next comes putting out put shaft and housing onto gearbox.
009.jpg
First I sat gearbox on the floor and put a brick under it to make gearbox level, and then I put female coupling that has the grease zerk ( it is in picture above next to shaft) onto the output shaft and then put shaft into shaft housing and then put the whole thing onto gearbox.
010.jpg
It is tricky getting the output shaft onto the gearbox spindle, because the end is in the shaft housing and you can't see it. I used my fingers with my right hand while holding the shaft and housing with my left and felt around to help guide it in.
012.jpg

This part of the restoration was probibly the most difficult. Thats all I have time for today, I have to get cleaned up to go to work, next time hope to put gearbox back onto mower body.
 
   / The start of restoring an old Mott flail mower
  • Thread Starter
#10  
Day 5, job complete.

today I finished putting in the rest of the parts, attached the gearbox assembly, tension pulley, V belt, the belt housing, and then filling gearbox with oil.
flail mower pics finish 002.jpg

The first thing I put on was the bracket that holds the gearbox output shaft and housing.
flail mower pics finish 003.jpg
You attach it and put in the bolts, but you don't tighten bolts yet, leave it loose until you put in gearbox assembly.

Next put on gearbox assembly.
003.jpg
Slide end of output shaft into bracket that I just put on and then put input shaft into the mower body and then put in the 4 bolts that hold gearbox to mower body. Now tighten the bracket down.
flail mower pics finish 006.jpg

Next put on output shaft pulley.
flail mower pics finish 008.jpg
Put in pulley bolt.
flail mower pics finish 009.jpg
Next put on tension pulley and bolt.
flail mower pics finish 010.jpg
Then put on V-belt and belt housing.
flail mower pics finish 012.jpg

Almost finished, time to fill gearbox with gear oil.
I used 85-140 all purpose gear oil. first take out sight plug. there are 2 sight plugs on face of gearbox, unscrew lower one.
flail mower pics finish 011.jpg
As you can see from the picture above I had to heat sight plug to get it off the gearbox front cover, I took gearbox front cover off to do this so I wouldn't over heat the gears and bearings.
Make sure mower is level like it would be when it is hooked up to tractor, fill until oil starts coming out of site plug. put plug back in and your done.

It took me about eight days to take apart and assemble back together with 3 of those days trying to get PTO yoke off of gearbox spindle. I only worked about 2 hrs a day. Now that I have done this once, I think I could do it all in 1 eight hour day.
 

Tractor & Equipment Auctions

2006 GENIE GTH6622 TELESCOPIC FORKLIFT (A51242)
2006 GENIE GTH6622...
UPDATED INTERNET BUYER'S PREMIUM TERMS (A50774)
UPDATED INTERNET...
2021 FORD F-150XL CREW CAB TRUCK (A51406)
2021 FORD F-150XL...
2023 Ford F-150 4x4 Crew Cab Pickup Truck (A50323)
2023 Ford F-150...
2010 INTERNATIONAL DURASTAR 4300 CARGO TRUCK (A50854)
2010 INTERNATIONAL...
(INOP) VOLVO L110H WHEEL LOADER (A50459)
(INOP) VOLVO L110H...
 
Top