dfkrug
Super Member
- Joined
- Feb 3, 2004
- Messages
- 7,174
- Location
- Santa Cruz Mtns, CA
- Tractor
- 05 Kioti CK30HST w/ Prairie Dog backhoe, XN08 mini-X
This is my second one of these 4300 ex-rental repair projects, and as I
wind it up, I will be posting the process here. Unlike the last 4300
I did, I will start new threads for the different major repairs, and link them
here. That way, a particular repair is not buried deeply in such a long thread:
http://www.tractorbynet.com/forums/parts-repairs/146974-john-deere-4300-complete-rebuild.html
I will try to post some links to 4x00 repairs done by other TBN members,
too.
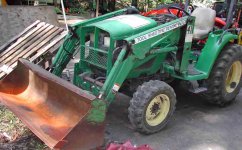
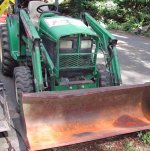
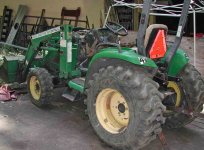
I got this tractor more than a year ago, and it had many of the common
problems these units have, but the engine ran quite well. It came with
2018 hours on it. It needed:
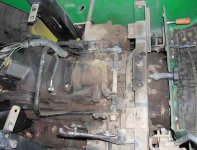
> gear box repairs, including PTO and range shifter
> new body panels, and body panel repairs
> extensive 420 loader repairs
> engine valve lash check and adjustment
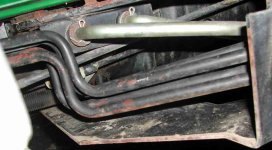
> backhoe hydraulic plumbing and subframe
> turn signal/hazard switch and lights
....and other minor things, including front wheel repair, new fuel door
hinge, jumpering some interlock switches, full hyd oil and
filter service, modification of the grille guard, inspection of the
common 4300 weak spots, etc.
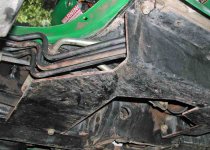
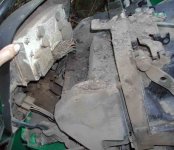
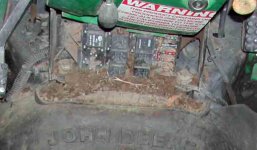
The first pix are the 'before' pix, to get an idea about the scope of the
project. After multiple passes with the pressure-washer and removal
of the FEL, the tractor just sat for several months. Moving it around
and removing the FEL was quite easy since the tractor still ran. The
trans was stuck in LOW range, so towing or pushing the tractor with
the engine off can be very hard on the HST, since there will be little
lubrication. If this happens to you, it is prob better to lift the rear of the
tractor off the ground when moving it if you can't start the engine (in
2WD). Also removing loaders is hard without hyd power. BTDT.
wind it up, I will be posting the process here. Unlike the last 4300
I did, I will start new threads for the different major repairs, and link them
here. That way, a particular repair is not buried deeply in such a long thread:
http://www.tractorbynet.com/forums/parts-repairs/146974-john-deere-4300-complete-rebuild.html
I will try to post some links to 4x00 repairs done by other TBN members,
too.
I got this tractor more than a year ago, and it had many of the common
problems these units have, but the engine ran quite well. It came with
2018 hours on it. It needed:
> gear box repairs, including PTO and range shifter
> new body panels, and body panel repairs
> extensive 420 loader repairs
> engine valve lash check and adjustment
> backhoe hydraulic plumbing and subframe
> turn signal/hazard switch and lights
....and other minor things, including front wheel repair, new fuel door
hinge, jumpering some interlock switches, full hyd oil and
filter service, modification of the grille guard, inspection of the
common 4300 weak spots, etc.
The first pix are the 'before' pix, to get an idea about the scope of the
project. After multiple passes with the pressure-washer and removal
of the FEL, the tractor just sat for several months. Moving it around
and removing the FEL was quite easy since the tractor still ran. The
trans was stuck in LOW range, so towing or pushing the tractor with
the engine off can be very hard on the HST, since there will be little
lubrication. If this happens to you, it is prob better to lift the rear of the
tractor off the ground when moving it if you can't start the engine (in
2WD). Also removing loaders is hard without hyd power. BTDT.