Photo Posting How To

   / Photo Posting How To #1  

Grrrr

Platinum Member
Joined
Jul 17, 2007
Messages
801
Location
Devon, UK
Tractor
John Deere!
Having seen many threads come up about the various different ways to post pictures and how to do it I thought I would try to create a thread that showed how to do all the different methods.

When posting pictures you have to remember that not all TBN'ers will have a broadband connection as fast as yours or even broadband at all. Some members are still on dialup :mad:

To post pictures you have to upload them from your computer to a server somewhere on the internet. This is because if your computer is turned off people will still need to be able to see your pictures. You can use the TBN servers or an Image Hosting Company, as mentioned later.

There are two distinct different ways to insert pictures into posts:
  • Have the filename of the picture at the bottom of the post that you can click on to take you to the picture.
  • Have the image appear inside the post itself. It can be in the middle of text.
Both methods have their downfalls:

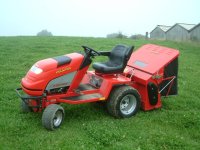
Having the picture appear as an attachment is probably the easiest because you just have to go to manage attachments at the bottom of the Reply to Thread box. Then you simply select the photo you want to show and click upload.

The problem with this method is it is not that easy to see what the picture is of and the user has to click on the hyperlink to see the picture. If you are on dialup you have no choice but to either download all of it or nothing.
You use the TBN servers to host these pictures but you are constrained by how big it can be.

Inserting the picture in the middle of the post makes it easier to see the picture for the reader and you can write around the pictures. But it is also a bit more complex to insert the picture in this way because you have to use a separate hosting company, like Photobucket or Imageshack, to host the image for you. You then past some code they give you in the place where you normally type the image.

This method is great for describing pictures and for people with fast broadband; it shows them the pictures straight away.
The problem comes though when you show a big picture. This will often distort the page that the thread is on and cause the page to take a long time to load making reading the page hard as it will constantly move as the photos load.

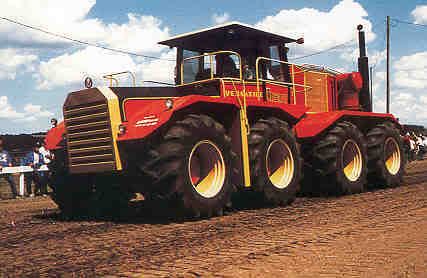
This is a standard inline image:

versatile.jpg


This can be solved by making the picture a clickable thumbnail; Photobucket and Image Shack both allow you to do this. I think that Photobucket is the better one because it does not put any advertising on the page.

This is a clickable thumbnail :


I will now describe in more detail how to post the photos ...
 
Last edited:
   / Photo Posting How To
  • Thread Starter
#2  
   / Photo Posting How To
  • Thread Starter
#3  
Resizing Pictures


Before you can upload pictures you must make sure they are within the require file size so as the server can upload them and they don稚 take too long to download.


If you have a program like Photoshop you can use this to resize your image. You are aiming to make the picture about 640 x 480 pixels. There is some useful information here about using Photoshop.

If you do not have Photoshop, there are many free image resizes available freely on the internet.

I have found one of the best to be PixResizer. It is very simple to use, can do more than one photo at once and is very easy to install.


Go to the download link that is about half way down the page under Free Download.

Click on that and then when it has downloaded to your desktop click on the icon to install it.

Once it is installed there are good instructions for it in the readme which is found in the start menu under PixResizer.


It has a useful feature that allows you to be able to do a batch of photos at one time if you are going to be uploading a few pictures. The readme tells you how to do this.

Once you have managed to resize the pictures you can start to upload them.
 
   / Photo Posting How To
  • Thread Starter
#4  
Inserting pictures as attachments using the TBN servers (recommended)

The end result will be like the one at the bottom of this post.
  1. Once you have resized your pictures it is sensible to put them on your desktop or somewhere else where it is easy to find them again.
  2. You then need to write the post that you wish to put the photos in with. Write out the message and then go down to the bottom of the text editor past where it says Submit Post to Manage Attachments.
  3. This will open up a popup. This popup gives you options for uploading your photos. You need to go to the box where it says Upload Files from Your Computer.
  4. In this box, click browse and find the photo on your desktop you want to upload. Then click Open. This will close the box and the path will now be in the text box.
  5. The last step is to click upload. The picture you chose will now be copied to the TBN server.
Thats it, you have uploaded your first picture. If you wish to post more than one picture in the same post you can repeat steps 4 and 5 to upload as many photos as you want.


Once you have finished, you can click on Close this window at the bottom of the popup.

Then click submit as you normally would.
 

Attachments

  • Lawnmower pics 013.jpg
    Lawnmower pics 013.jpg
    92.9 KB · Views: 988
Last edited:
   / Photo Posting How To
  • Thread Starter
#5  
Inserting pictures in line with the text using Photobucket

You can use Photobucket to host your pictures for you instead of the TBN servers. This frees up TBN resources and allows you to upload bigger and more files.

The end result will look like this:

versatile.jpg


First of all, make sure you have made the picture the right size, as previously mentioned here. This picture can be 640 x 480 PX or 960 x 720 PX. It does not really matter but the larger the picture is, the longer it will take to load.


Then, you need to set yourself up a Photobucket account. I have taken the following instructions from another website:

1. Go to the website, Image hosting, free photo sharing & video sharing at Photobucket

2. On the top left side of the screen, there is a button that says, REGISTER NOW! Click it. You are on your way!

3. You will be prompted to enter a username and password. When you come up with one that is not already in the system, they will take you to the next page.

4. Once you have picked your username and password you will be asked to enter your first and last name, a valid email address, gender, birthday, country, zip code, and a prompt type in some random letters for security purposes. It says right under the box where you enter your email address "No spam! We hate that stuff," and they mean it. I have been a member for over a year and have never received ANYTHING from them in my email account.

5. They may have an advertisement next that asks you to enter info, but DON'T DO IT! Photobucket doesn't send you spam, but since it's free the ruthless ad wizards will try to get you. Just click the word "here" where it says, "Thanks for registering for Photobucket. Click HERE to go to your album."

6. When you get to your album, there will be a box on the left side of the page that lets you browse your library for pictures you want to upload. The maximum image size is the size of a 17 inch screen (1024 X 768 megapixels).

Once you have your account created, you can start to upload your photos. You need to be in your album to start with. It will not have any pictures in it at the moment.
  1. At the top of your album, there are several boxes. These are where you select the photos you want to upload. Click Browse next the top box. Find the photo you want to upload and then click Open.
  2. This will put the path to the image in the box. If you want to upload more than one photo, redo step 4. Just use the next empty box each time. You can get more boxes by clicking on add more.
  3. If you wish, you can add a title to the pictures where it says click to add title.
  4. Once you are done, click Upload Now.
  5. It will upload the file and you will now be able to see it in your gallery further down the page.
You have now finished the uploading part of the pictures. You now need to go back to TBN and write out your message.
  1. Once you have finished writing out the message you need to go back to Photobucket and find the pictures you uploaded earlier.
  2. Once you have the image you want to put in the post, look under it for the box that says IMG Code.
  3. Click on this and it will automatically copy to your clipboard.
  4. Then go to the message at TBN again and click in where you type the message out. Click roughly where you want the photo to appear.
  5. Then right click and click paste. [FONT=&quot]
    eg.jpg
    [/FONT]
    [FONT=&quot]
    eg.jpg
    [/FONT]
  6. The code is telling TBN where the photo is located. It does not look like a photo at the moment but if you click on Preview Message you will see it will appear as a photo.
Once you have done one photo successfully, you can go back and do more.
Then, once you are done, click Submit Message as normal.

The pictures should now come up in your post. Thats all there is to it :D
 
Last edited:
   / Photo Posting How To
  • Thread Starter
#6  
Inserting Pictures as clickable thumbnails using Photobucket (recommended)


This will insert a picture like this:


You can click on it to make it bigger. Try it. You will see the image will open in a new window. I think it is the easiest way to see the photos as you can have a preview of each one and see which one you want to look at.

To do it you need to have already resized the pictures as here. It is not as important to have it small this time as the reader can chose whether to view it or not but it still must be below 1024 X 768 PX.

You also need to have created a Photobucket account, described how to here.

Lastly, you must have uploaded a picture already you want to show.


Once all this is done you can post the image
  1. Find the picture(s) you want to show and click the little tick box underneath them on the left.
  2. Then go down to the bottom of the page where it says Generate HTML and IMG Code.
  3. This will generate a load of different codes. You are looking for the one that says IMG clickable thumbnails for message boards recommended
  4. It is the third box down. Click on it and it will automatically copy it.
  5. Then go back to Tractor By Net and write out your message.
  6. Then right click roughly where you want the picture to go and click paste.
  7. Then click on Preview. You will see your picture come up and you can click on it to enlarge it.
You can fiddle around with moving it by using enter the centre, left and right buttons and the spacebar.

Thats all there is to it. Not too bad at all.


You can put more than one picture in at a time if you want by selecting more than one check box back in Step 1. You can then move these pictures around by pressing enter in between the code.

You will have to do some experimenting.
 
   / Photo Posting How To #7  
This positively needs to go inthe FAQ or be stickied.
 
   / Photo Posting How To #8  
Very good info Grrr, thanks for posting. One of my pet peeves with pics is when someone posts a 600 or 700 kb monster, I never get to see them because our phone line is bringing in downloads at 26.4 kbps.
 
   / Photo Posting How To
  • Thread Starter
#9  
Another thing I find really useful to use with Photobucket is the ability to use the Publish these files to the web feature of Windows XP.

It allows you, after a brief download, to upload whole folders full of photos to Photobucket.

A really good tutorial and more information can be found here :
Desktop Publisher - Publish content with XP Publisher: Photobucket.com
 
   / Photo Posting How To
  • Thread Starter
#11  
Inserting Pictures as clickable thumbnails using Imageshack

ImageShack can also be used to host photos that are clickable. It is very easy because you don't even have to register.
  1. Just fill in the boxes on the home page with your photo location and your email address if you want.
  2. Imageshack can even resize the photo for you, it reccomends 640 x 480 PX.
  3. Clicking on remove size/resolution bar from thumbnail will make the little bar that tells you how big an image is go away.
  4. Then click host it.
  5. You then need to take the box at the top of the screen that says Thumbnail for Forums. It is the second one down.
  6. Select it, then right click and click on copy.
  7. Then paste the code in where you would write your message; like with Photobucket.
This is what it ends up looking like (without the banner at the bottom) :


With the banner at the bottom :


If you register with them by giving them your email address, you will be able to find the pictures you uploaded before and use them again in another message.

The problem I find with ImageShack is that it is hard to keep track of all the pictures and they put advertising on the page when you click on the thumbnail.

There is a FAQ sheet here.
 
   / Photo Posting How To
  • Thread Starter
#12  
The last thing I was going to explain was uploading things other than photos like Word Documents, PDF's and Zip's.

For Word Documents (.doc) you can do it through manage attatchments. Just select a word document instead of a photo.

The word document has to be a Word 97 - 2003 document, not a Word 2007 document.


You can easily save a Word 2007 document as a Word 97 - 2003 by clicking save as and then under where you type the filename click the down arrow and choose Word 1997 - 2003.

I have included and example in this post. (It is my first draft of this thread!)

To post PDF's it is very much the same, but this time you select the PDF instead of a picture.

To do ZIP's it is the same as PDF's.

A word of warning. People can ZIP up malicious files so as they appear harmless. TBN will not allow these harmfull files but it cannot guard against ZIPS's. Ensure you perform a virus scan before unzipping anything.
 
   / Photo Posting How To
  • Thread Starter
#13  
I was told last night after posting the bulk of this thread about a way to attatch pictures inline with the post using the TBN Servers :)

So they come out like this :

MF135.jpg

The reason I had ommitted this way from the tutorial is it sometimes makes threads impossibly slow to read if someone posts a massive image. But, as long as the photo is resized, there is nothing wrong with doing it. Here is how to resize pictures.

Here is how to do it:
  1. Write out the message as you normally would at TBN.
  2. Make sure you have resized the picture to 640 x 480 PX.
  3. Then click on manage attatchments.
  4. Upload a photo as you normally would by selecting the photo on your computer and then clicking upoad. Do this for as many pictures as you want to display.
  5. Then close the little popup for manage attachments.
  6. Click roughly in the message where you want the photo to appear.
  7. Then go to the little paper clip button in the menu at the top of the wiriting box and click on the down arrow.
  8. Click on the photo you want to display.
  9. This will put a short bit of code in your message using the Attatch tag.
  10. Then post your message as normal and the photo should appear inline.
This way is probably the easiest if you want to display your photos inline. But you cannot make the thumbnails and it is important you resize the images first.

There is a limit to how many photos you can store on TBN. It will also use up resources ont he TBN servers so it is probably better to use another hosting company, as previoulsy mentioned.


One other thing that was pointed out to me is you can see all the attachments you have uploaded by going to your Home and going to the bottom of the menu on the right hand side and then clicking attachents.
 
Last edited:
   / Photo Posting How To #14  
I posted this on another board a year or so ago, but since this post is here, I feel it bears repeating here.

How to resize pics using "Paint" which comes bundled with Windows XP:

Resizing & cropping pics with "Paint":

Open the folder containing the pic you wish to edit. Right-click on the pic, scroll down to "send to" & then click on "my documents." This will send a copy of the pic to "my documents."

Go to "my documents" & open the pic. It will open in Windows pic & fax viewer. At the bottom of the page is a set of icons. Setting your cursor on an icon will bring up what that icon does. The next to far-right icon will close the pic viewer & open the pic in Paint to edit it.

When the pic opens in Paint, you will notice tiny blue dots along the edges of the pic. By left-clicking & holding on a blue dot you can crop (or cut) that edge of the pic. When you release the left-click the pic will be that size. You can only crop the bottom & right side of the pic.

To crop the top & left side, click on "image" at the top of the page, then click "flip/rotate" & flip the pic to crop the other side. When done, flip the pic back to normal.

To resize a pic: Click on "image" then click on "stretch/skew" & change the numbers in the top boxes from 100 to something smaller (90, 80, or whatever). Make sure you change BOTH numbers to the same value, otherwise the pic will be distorted.

Now, if you're happy with the pic, or if you make a mistake at any time, close the page. You will be asked if you want to save the changes. If you click yes, the pic in my documents will be changed. If you click no, the pic will be unchanged & you can open the pic again then open it in paint & start over.

After you've changed the pic to your satisfaction, you'll need to rename the pic to move it back to the folder it came from (otherwise you may lose the original pic). Right-click on the pic in my documents, select "rename" & either rename it completely or add something like "small," or "edit," or "sig" to it's name/number. When it's renamed, you can just "cut & paste" the pic back to it's original folder.

This is not very difficult to do, just a little involved in the description. All Windows machines have Paint installed, so there's really no need for an expensive editing program for simple resizing & cropping. Do it a couple times & it becomes fast & easy (I figured this all out in an afternoon just fooling around with it, who says an old dog can't learn new tricks).
 
   / Photo Posting How To #15  
BrahmaBullOldBluebody.jpg

Grrr just testing that last way to post the pictures. Sure is easy and fast.
 
   / Photo Posting How To
  • Thread Starter
#16  
Jimbrown said:
View attachment 85386

Grrr just testing that last way to post the pictures. Sure is easy and fast.
Yeah, I had forgotten about this way but it is a pretty good way of doing it. Thanks to California for reminding me about it :)

I also like the way that the pictures go away when you quote. Saves having them load twice.
 
   / Photo Posting How To #17  
Grrr, you beat Tony the Tiger when it comes
GRRRReat!
Thanks for this grrreat lesson in pic posting.
Here is my Superwoman in her tomato patch.

Toms07Janet.jpg
 
   / Photo Posting How To #18  
gotrocks said:
Grrr, you beat Tony the Tiger when it comes
GRRRReat!
Thanks for this grrreat lesson in pic posting.
Here is my Superwoman in her tomato patch.

View attachment 85463

I am just so jealous that I can't see straight. There is no way I can get tomatoes to grow like that and even if I did the birds would eat everyone before I could get to them.
 
   / Photo Posting How To #20  
Jake,
A great and informative thread. Thank you for taking the time to post all the research and detailed explanations.
I have been asked many times how to post clickable thumbnails using Photobucket and have thought about posting the instructions. But you have done it for me so thank you.
 

Tractor & Equipment Auctions

KUBOTA KX057-4 EXCAVATOR (A59823)
KUBOTA KX057-4...
2020 Chevrolet Silverado 1500 (A55315)
2020 Chevrolet...
2016 26ft T/A Dovetail Flatbed Equipment Trailer (A59228)
2016 26ft T/A...
1985 John Deere 540B Skidder (A56438)
1985 John Deere...
CAT 289D3 (A58214)
CAT 289D3 (A58214)
2014 MERCEDES 2500 CARGO VAN (A59904)
2014 MERCEDES 2500...
 
Top