New Mods to Loretta's 284 Jinma

   / New Mods to Loretta's 284 Jinma #1  

3RRL

Super Member
Joined
Oct 20, 2005
Messages
6,825
Location
Foothills of the Giant Sequoia's, California
Tractor
55HP 4WD KAMA 554 and 4 x 4 Jinma 284
We are finally getting around to making some more improvements to Loretta's 284 Jinma.
On the list are several items which include (not necessarily in order):

-Add tool box(es) (including the ones Larry gave me a couple years ago).
-Add a Filter Minder gauge for the air filter.
-Add FEL stabilizers from the uprights to the rear end.
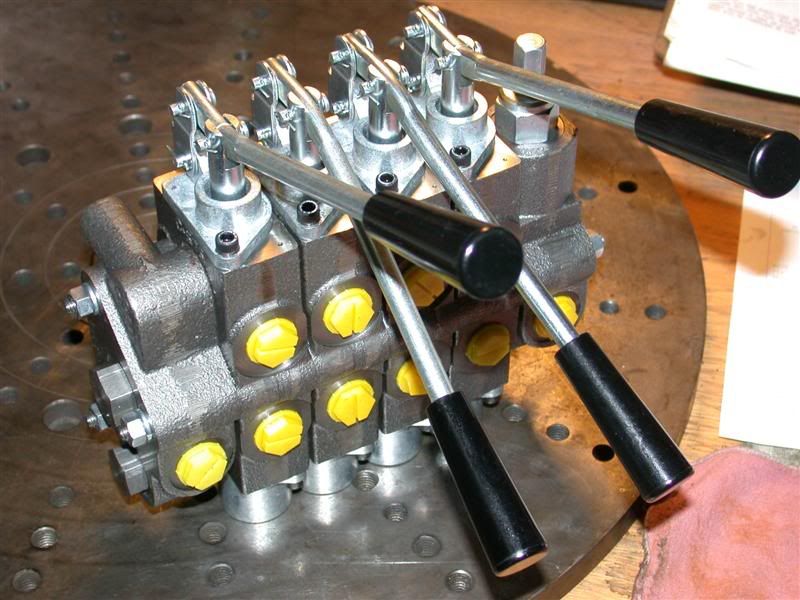
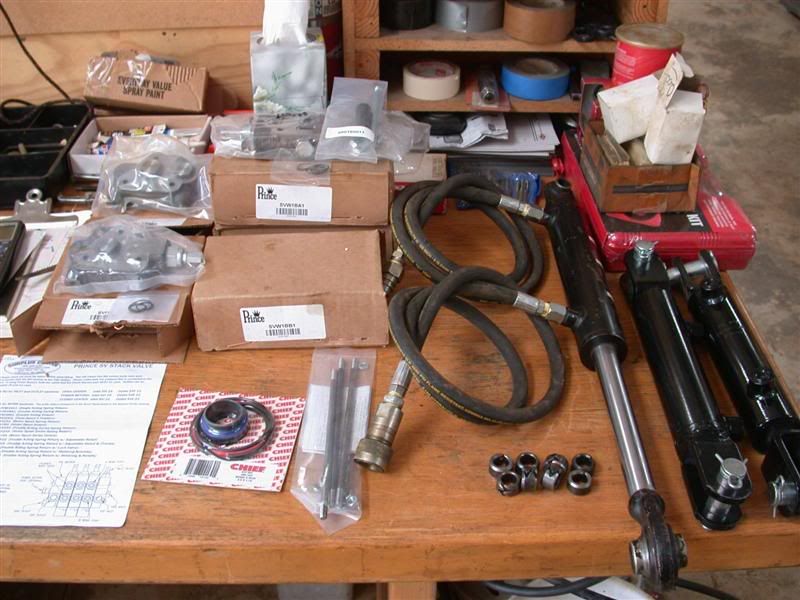
-Replace all the Chinese hydraulic valves with a new 4 spool Prince SV.
-Add Top and Tilt with 2 hydraulic side links and DPOCV's on all cylinders.
-Add 2 new rear remotes (replacing one that doesn't work)
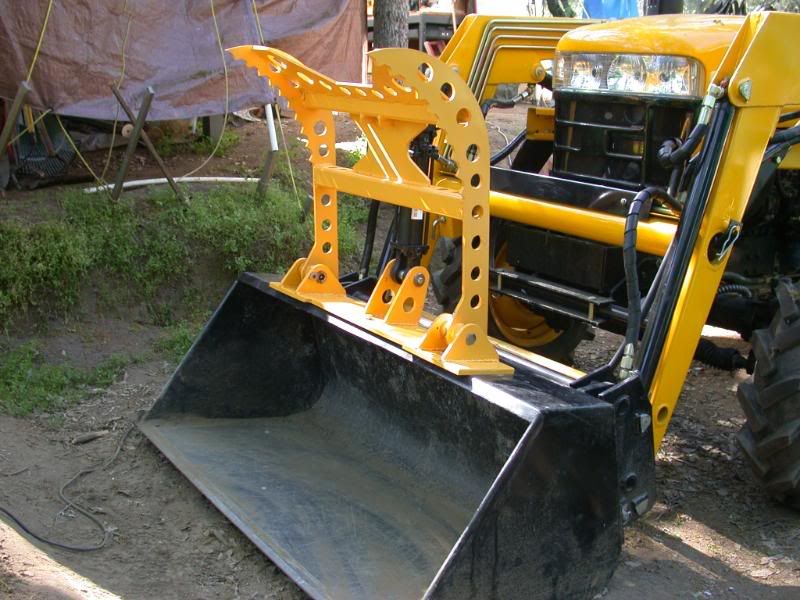
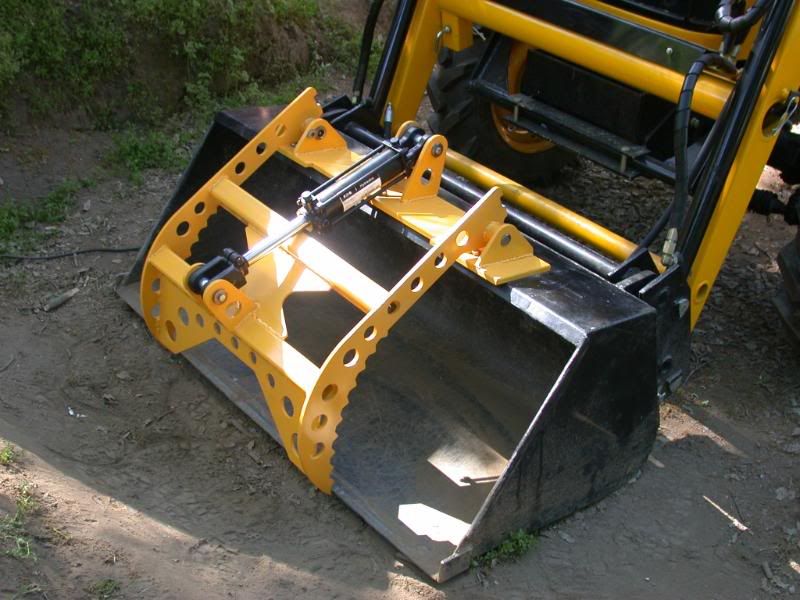
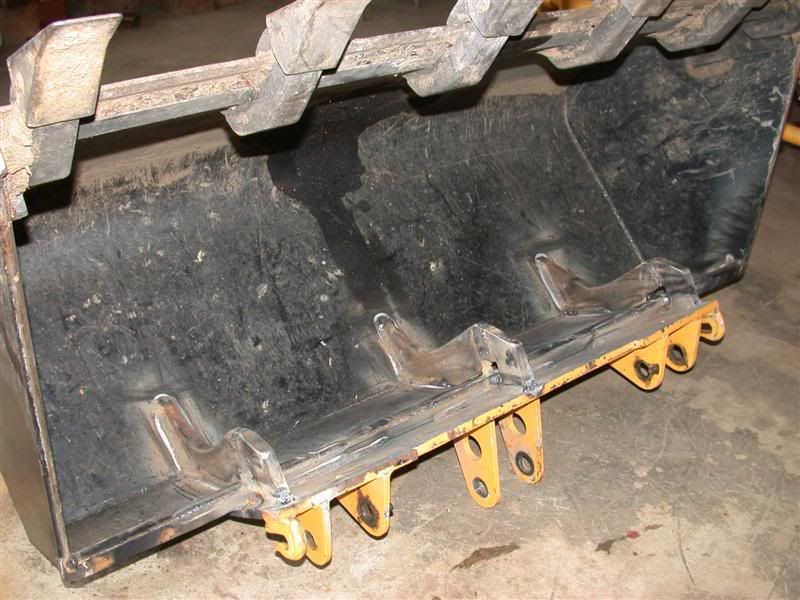
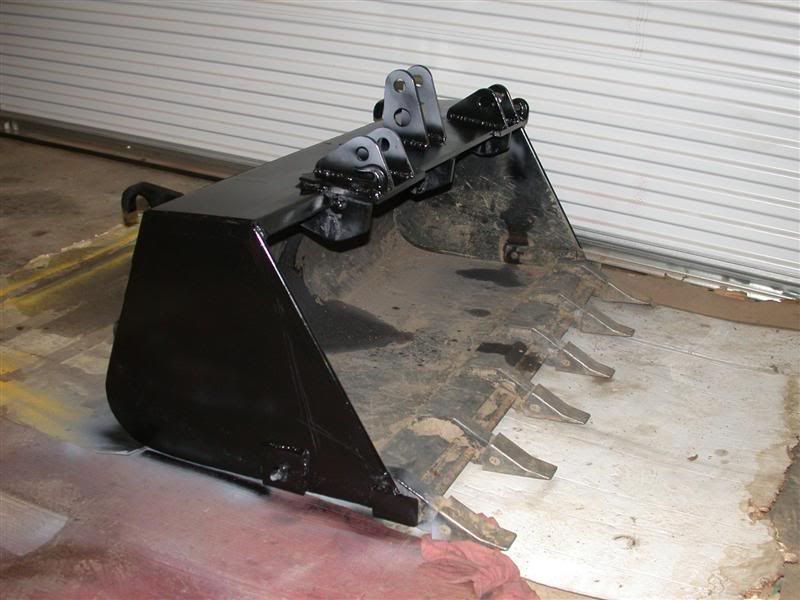
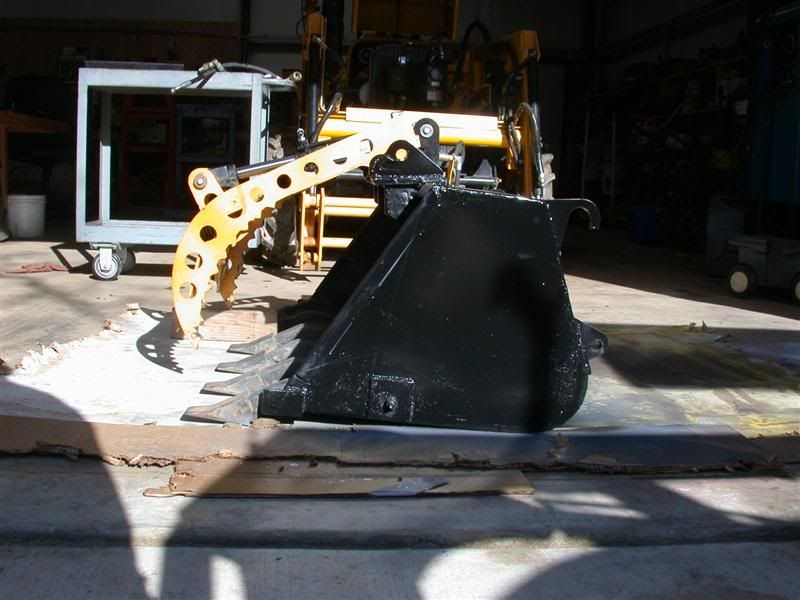
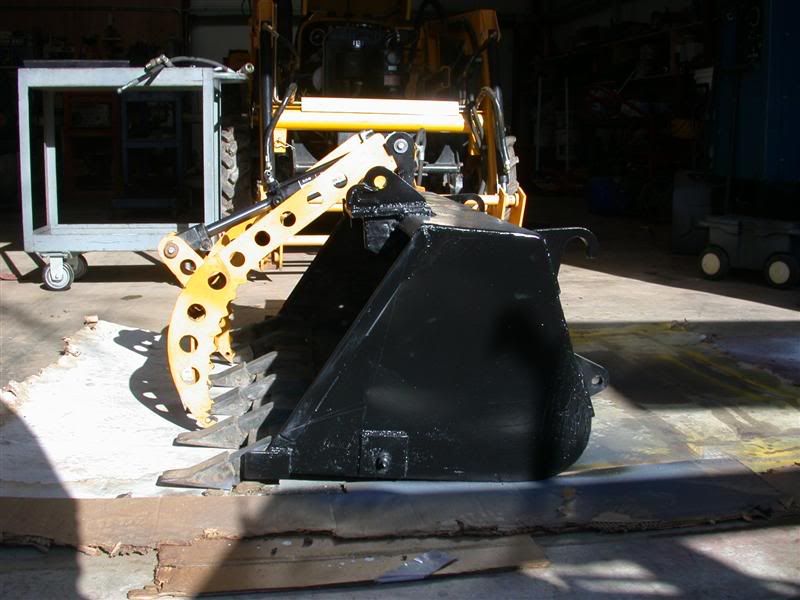
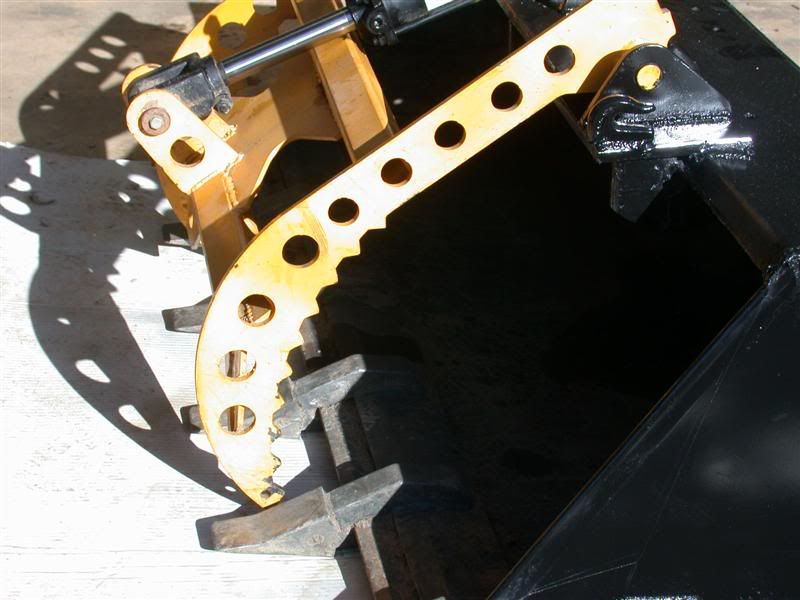
-Reposition her grapple on the bucket so it will shut better and also move it forward to the tooth bar tips.
-Whatever else we can think of ... lol.

I know it's a big list and some of the mods will take a lot of time and work so it might drag out a bit. I'll use this thread to document when I get around to doing each of them and I promise not to bore you with every milling cut or every fabrication detail. I want to show you only some of the building process and of course, the results.

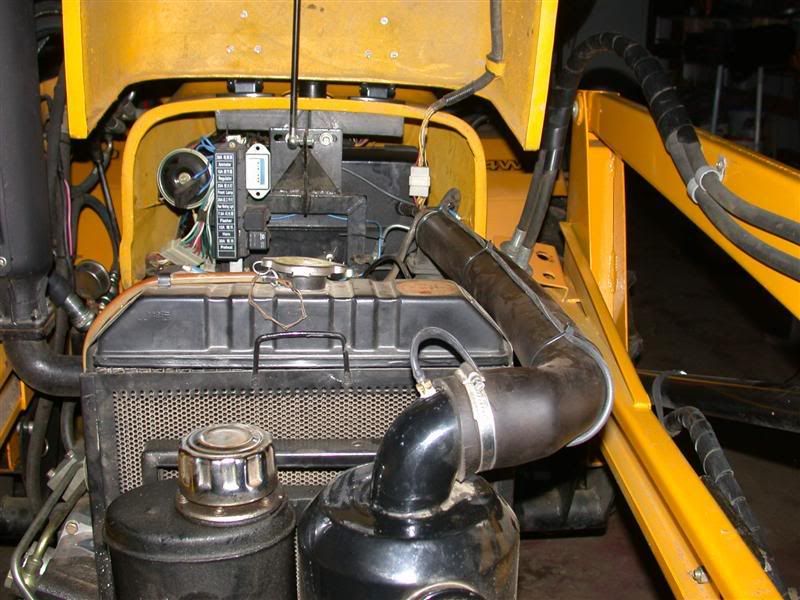
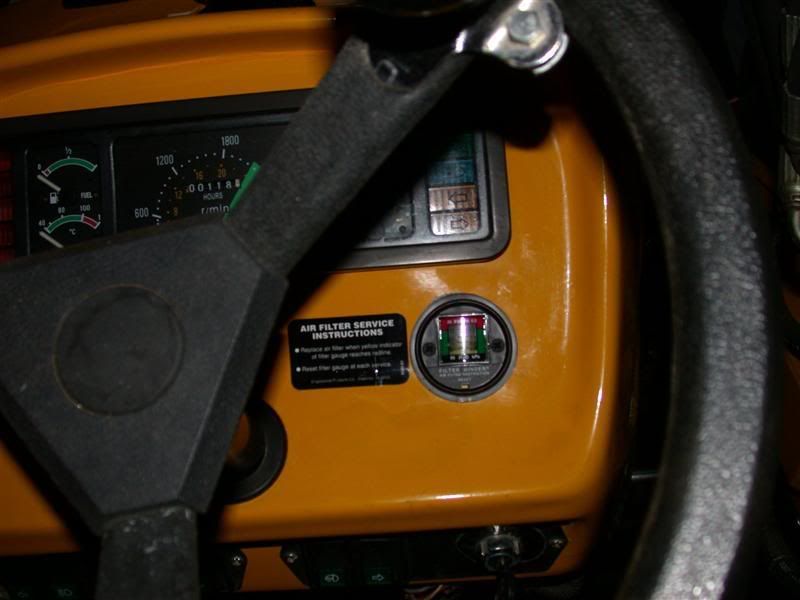
For example, I already got the Filter Minder installed. I must have bought it about a year ago when Larry installed the one on my Kama. It's a gauge that tells you when the air filter gets plugged up. Here is where I put the vacuum tube on the intake just before the air filter. The other photos shows the gauge mounted in her dash.
Notice she's already got 118 hours on her Jinma.
Rob-

 
   / New Mods to Loretta's 284 Jinma #2  
Rob, The one on your KAMA, has it shown yet that you need to clean or replace your filter? Can you see the vacuum increase? Richard
 
   / New Mods to Loretta's 284 Jinma
  • Thread Starter
#3  
Rob, The one on your KAMA, has it shown yet that you need to clean or replace your filter? Can you see the vacuum increase? Richard

Hi Richard,
Yes, it's warned me already and the gauge clearly indicates restriction when the filter clogs up.
There's a blurb on it in my Log Home thread on the other forum where I tried washing out the air filter.
 
   / New Mods to Loretta's 284 Jinma
  • Thread Starter
#4  
Now that the filter minder installation is done, I started working on the grapple relocation.
The problem was the OEM bucket bowed and tore at the top corners. The grapple tips ended up too far away from the bucket bottom of the bucket. The other thing was when we made the grapple, it was designed for a bucket without a tooth bar. So the grapple jaws are a little short to reach out to the tips of the toothbar. Loretta does not move much dirt with her tractor but it's used more for brush and log moving and maybe some compost. Her key is to be able to pick up stuff clam shell style or driving into a pile/log/rock and grasping it.

I moved the grapple base about 4 or 5 inches forward.
Instead of just cutting the jaws and adding a section to them, I needed to beef up the bucket anyway so this is what I came up with. I also spent a couple hours re welding the entire bucket top lip inside and out and all the corners. But you can see what I want to do and the problem I will have since it is now cantilevered out over the top bucket lip. There are comparison photos of it's original location showing it sitting back farther and also of the teeth up from the bucket lip.

 
   / New Mods to Loretta's 284 Jinma #5  
Rob, The welds are nice to look at, good penetration. Have you made the bucket removable so you can work on it or to instal other tools? I also saw your movable thumb on another thread, great. You and Larry do some really interesting things. Richard
 
   / New Mods to Loretta's 284 Jinma
  • Thread Starter
#6  
Rob, The welds are nice to look at, good penetration. Have you made the bucket removable so you can work on it or to instal other tools? I also saw your movable thumb on another thread, great. You and Larry do some really interesting things. Richard

Thanks Richard,
The bucket is a quick attach stock from the factory. At this time we have no other implements to swap with. I was thinking a set of forks but Loretta says she doesn't need them. I have a set ready to make up but they will go on the Kama.

You can see the problem with moving the grapple forward is that now there will be even more pressure trying to pry the bucket open. I'm going to try gusseting the inside of the bucket. Along the back side of the bucket, where the top QA hooks are, there is a 1/4" thick plate about 6" wide that runs across the entire back. I figure if I make the inner gussets heavy duty enough, and if I can attach them to that back plate, then the entire top lip would be tied into the back of the bucket.

So here's my plan.
I got some old busted up scarifier shanks that are 3/4" thick x 2-1/2" wide. (I never threw them away) Then I sawed them into a shape to fit the inside of the bucket. I had to weld some pieces together to get the shape I wanted. What they do is attach to the underside of the grapple mounting plate, to the inside of the bucket top and also to the inside of the bucket back.


Burning the weld through to the back plate took a little more heat than I thought.
When I tried to pry the grapples backward, they were pretty stiff. Before when I did they I could feel the bucket flex. Now it's better. I think it should hold the back and top together now, but of course I will test it out first.
Rob-

 
   / New Mods to Loretta's 284 Jinma
  • Thread Starter
#7  
OK, now you can see the grapple jaw tips are closer to the toothbar tips when open.
When closed they actually "interlock" with the toothbar. I believe this position will make it easier for Loretta not only to clam shell pick stuff up, but also drive into logs or rocks and the grapple jaws should snag the object. BTW, if the bucket still flexes, I will add a tube all the way across the top lip and and use angle iron at the ends to weld it to the bucket sides. I'll try this way first.
Rob-

 
   / New Mods to Loretta's 284 Jinma
  • Thread Starter
#8  
Next thing I got started on was the Top and Tilt.
I ordered a 4 spool stack valve from Surplus center with power beyond. Of course they sent me the wrong outlet section so they are shipping me the power beyond sleeve. But here is the assembly of that new valve. You lay it down on the side with the tie rod bolts sticking up and place each section in the order you want. I got 3 sections that are spring loaded returning to center and one that is detented. Then you place the "O" rings between each section and torque it up to 150 inch pounds.

 
   / New Mods to Loretta's 284 Jinma #9  
Rob, you made me laugh! I also never throw out what I think I may be able to use again. The big difference here is, you turn it into something useful and professional looking.
Nice work, well done!
 
   / New Mods to Loretta's 284 Jinma
  • Thread Starter
#10  
Here is the other stuff for the project.
A hydraulic top link and two hydraulic side links. The hydraulic top link is originally off the Kama but I replaced it with a heavier larger one. So Loretta can use this one. It's from CCM and has a DPOCV that goes on it. The photo does not show it on because when I first tried it through her stock OEM rear remotes, it didn't work so I took it off. Turns out that wasn't the problem, it was the stock rear remote valve was crap. I couldn't get more than 1,100psi out of it no matter what I did to the pressure relief valve. That's one of the reasons for the new valve.

The second photo show that Loretta took all my hydraulic fittings and sorted the out for me.
She put them all organized into a rolling cart. Now I can choose from what I've collected over the years. There are all kinds of SAE, NPT, Metric and BSP fittings in there. The last photo shows what came off the tractor. Her old valves, rear remotes and hoses. The old FEL is being mailed to Mariner and the hoses to Red because they asked me for them. They are going to refund the shipping charges.

There are still hoses and fittings coming from Discount Hydraulics but they haven't arrived yet.
I'm going to use all "Re-usable" fittings on this project so I can make up my own hoses in the shop.


Top