Johnbro
Gold Member
Last winter the lack of decent work lights on our new L4240 was a real problem, as I needed to load pallets of snow melt into the back of our plow truck in the dark. So, having procrastinated all summer, I finally got around to installing some a few weeks ago.
My goals were to spend as little money as possible, and do the minimum work necessary. I am fundamentally lazy by nature so I was looking for a simple solution. By the same token I didn稚 want something I would have to re-do later. I also wanted the lights to be switched so as to not just be on all the time.
So having read many threads and posts on TBN about hooking up aux lighting, I decided to use the wires provided by my friendly tractor factory that terminate beneath my seat. First I checked the manual to find out what their capacity was. Now here's where I made my first mistake. I mis-read the chart in the manual and thought they had a 15A fuse (they actually all share a 10A fuse).
I picked up three of these Harbor Freight halogen lights: 12 Volt Halogen Vehicle Work Light
They list for $12.99 each but are on sale sometimes. They run about 4 amps each (checked by clipping them to a 12v battery and using a clamp-on multimeter). I wanted two lights forward and one back, so at 4 amps each I should be under the 15A threshold of my fused circuit (of course, in reality 2 amps over the capacity since I only have a 10a fuse, not a 15A one, but I hadn't realized this yet).
The goals for mounting the lights were as follows: drill the minimum number of holes (zero if possible), mount them so they don't get knocked off by tree limbs, mount them so they don't bash me in the head when I get on and off the tractor, and mount them where the sunshade won't overly interfere with the illumination they provide.
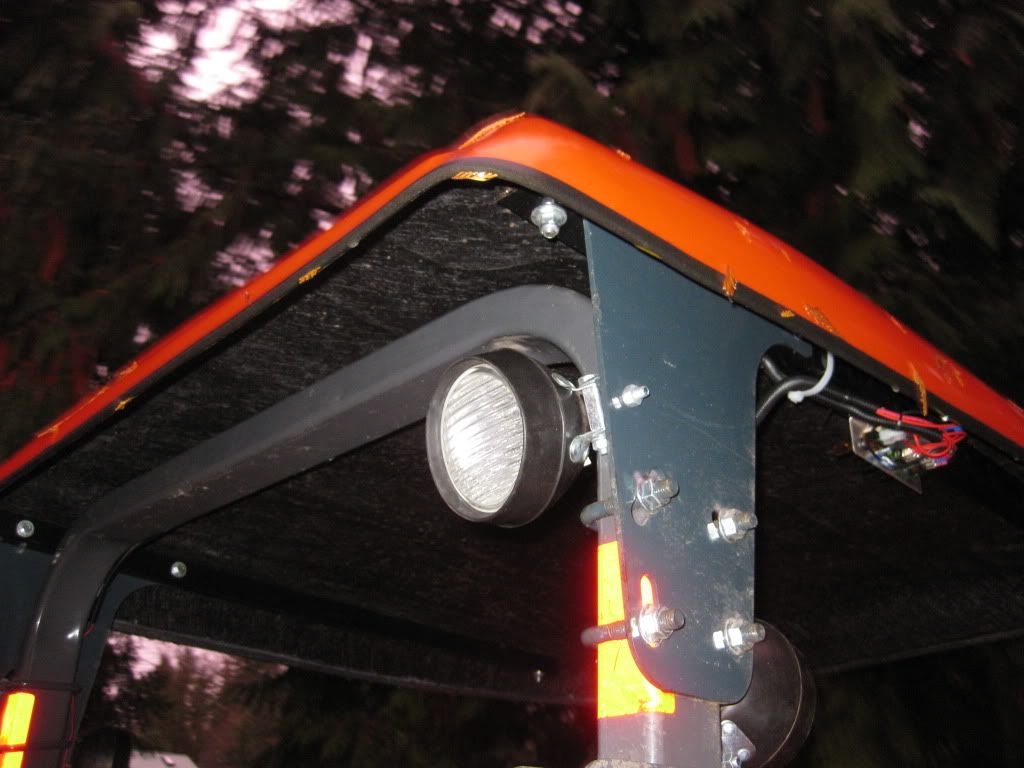
My initial idea was to mount them at the forward ends of the support arms for the sunshade, sort of the same place as if I had a cab. But unfortunately when I modeled this mounting I realized sooner or later I would bump into the one on the left side as I dismounted the tractor (more on this later). I decided to mount them at the back corner of the ROPS at the hinge brace because there's a pre-tapped hole. They would be out of the way but not ideal for illumination.
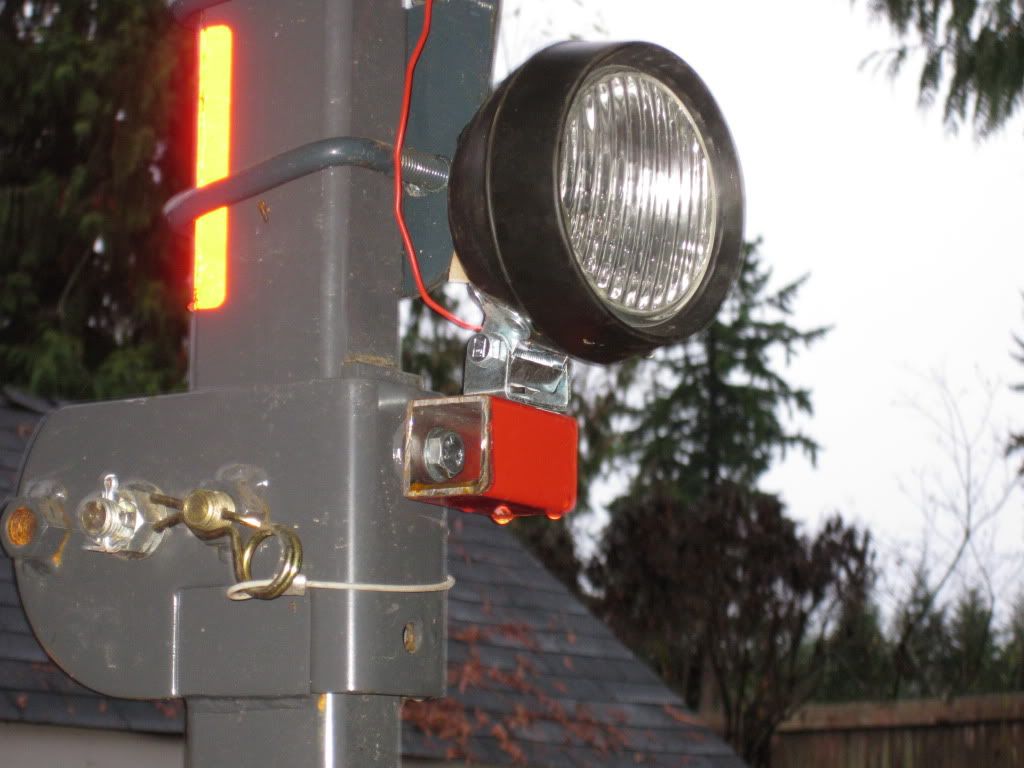
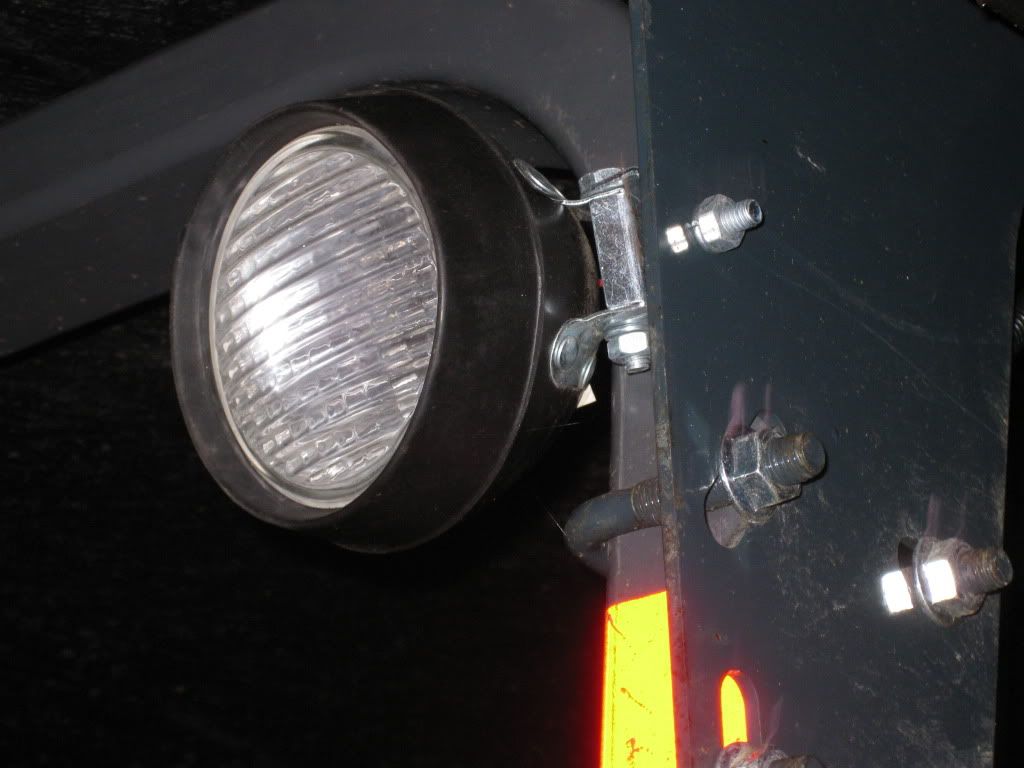
The next problem was how to mount them? They come with a mounting stud but it is designed to attach to a horizontal surface, not a vertical one (unless you want it to shine straight down at the ground). I had some 1.5 square tubing from a trailer accessory that was unused. So I cut a couple of small sections of that, drilled one large hole to bolt to the pre-tapped hole and a smaller hole for the light's mounting stud. The only downside was that the tubing was bright red and I didn't have any Kubota gray paint around (sigh). Note: I could have used L bracket here, but all I had on hand was aluminum and I didn't believe it would be sturdy enough to keep the lights from flopping around while the tractor was moving.
The rear light required me to drill one hole and I will say that the steel Kubota uses is pretty stout. I used my PC 1/2" monster drill and it took quite a while to punch through.
Now for switches. I had looked at waterproof switches at West Marine and elsewhere and decided they violated my minimum cost requirement. I picked up three very cheap illuminated toggle switches at the local auto parts store instead. I got two green switches for the front lights and one yellow switch for the rear light. Since they were not weather proof I decided to mount them under the sunshade for rain protection and also for the super-cool factor of reaching over head to flip toggle switches like in a B52 or the space shuttle.
I had some aluminum L bracket for a different project lying around so I whacked off a piece about 6 inches long and drilled three holes to mount the switches. Two holes on the other side of the bracket to mount upside down to the sunshade support rail, which was drilled and tapped (also hard steel (those people don't quit, do they?). Ideally the wiring would all be enclosed but you can see it's actually tucked inside the sunshade pretty well.
 +
+
Now for the wiring. Fortunately I was able to determine with a few seconds testing with a continuity checker that the ROPS is nicely grounded the chassis so the lights would only need one wire: for 12v. Kubota provides 3 wires: I used one for each light. To connect to their funky T connector I just used a spade connector and slipped in the slot that was hot (not ground). Again, a circuit tester or multimeter will tell you what痴 hot and what痴 ground.
The illuminated switches have three male spade connectors: one for supply, one to the light itself, and one to ground. I took all the grounds back to the mounting screw into the sunshade rail (having determined that it was perfectly grounded as well). All the wires ran through that black loom stuff, and frankly that was the hardest part of the whole project* used some skinny stuff instead of fatter stuff and it was tough to get the wires in until I learned the secret (I'd tell you but then I'd have to you know what).
With everything wired up I gleefully fired up the tractor, turned on the lights and promptly blew my 10A fuse
That got me back to the manual to discover my initial mistake. So I can have both front lights on , or one front light and the rear light, but not all three. Eventually I will swap at least one light for an LED unit (violating my minimum $ goal) that only draws about 1 amp. For now I found that the forward lights spill a lot of light into the cab but also light up the area in front of the tractor quite well, not as well as if they were in front. They also sort of blind me because they are right behind my head. I'm not completely satisfied with the location and may elect to move them to the front of the sunshade and just start wearing a motorcycle helmet when I get on and off the tractor.
My goals were to spend as little money as possible, and do the minimum work necessary. I am fundamentally lazy by nature so I was looking for a simple solution. By the same token I didn稚 want something I would have to re-do later. I also wanted the lights to be switched so as to not just be on all the time.
So having read many threads and posts on TBN about hooking up aux lighting, I decided to use the wires provided by my friendly tractor factory that terminate beneath my seat. First I checked the manual to find out what their capacity was. Now here's where I made my first mistake. I mis-read the chart in the manual and thought they had a 15A fuse (they actually all share a 10A fuse).
I picked up three of these Harbor Freight halogen lights: 12 Volt Halogen Vehicle Work Light
They list for $12.99 each but are on sale sometimes. They run about 4 amps each (checked by clipping them to a 12v battery and using a clamp-on multimeter). I wanted two lights forward and one back, so at 4 amps each I should be under the 15A threshold of my fused circuit (of course, in reality 2 amps over the capacity since I only have a 10a fuse, not a 15A one, but I hadn't realized this yet).
The goals for mounting the lights were as follows: drill the minimum number of holes (zero if possible), mount them so they don't get knocked off by tree limbs, mount them so they don't bash me in the head when I get on and off the tractor, and mount them where the sunshade won't overly interfere with the illumination they provide.
My initial idea was to mount them at the forward ends of the support arms for the sunshade, sort of the same place as if I had a cab. But unfortunately when I modeled this mounting I realized sooner or later I would bump into the one on the left side as I dismounted the tractor (more on this later). I decided to mount them at the back corner of the ROPS at the hinge brace because there's a pre-tapped hole. They would be out of the way but not ideal for illumination.
The next problem was how to mount them? They come with a mounting stud but it is designed to attach to a horizontal surface, not a vertical one (unless you want it to shine straight down at the ground). I had some 1.5 square tubing from a trailer accessory that was unused. So I cut a couple of small sections of that, drilled one large hole to bolt to the pre-tapped hole and a smaller hole for the light's mounting stud. The only downside was that the tubing was bright red and I didn't have any Kubota gray paint around (sigh). Note: I could have used L bracket here, but all I had on hand was aluminum and I didn't believe it would be sturdy enough to keep the lights from flopping around while the tractor was moving.
The rear light required me to drill one hole and I will say that the steel Kubota uses is pretty stout. I used my PC 1/2" monster drill and it took quite a while to punch through.
Now for switches. I had looked at waterproof switches at West Marine and elsewhere and decided they violated my minimum cost requirement. I picked up three very cheap illuminated toggle switches at the local auto parts store instead. I got two green switches for the front lights and one yellow switch for the rear light. Since they were not weather proof I decided to mount them under the sunshade for rain protection and also for the super-cool factor of reaching over head to flip toggle switches like in a B52 or the space shuttle.
I had some aluminum L bracket for a different project lying around so I whacked off a piece about 6 inches long and drilled three holes to mount the switches. Two holes on the other side of the bracket to mount upside down to the sunshade support rail, which was drilled and tapped (also hard steel (those people don't quit, do they?). Ideally the wiring would all be enclosed but you can see it's actually tucked inside the sunshade pretty well.
Now for the wiring. Fortunately I was able to determine with a few seconds testing with a continuity checker that the ROPS is nicely grounded the chassis so the lights would only need one wire: for 12v. Kubota provides 3 wires: I used one for each light. To connect to their funky T connector I just used a spade connector and slipped in the slot that was hot (not ground). Again, a circuit tester or multimeter will tell you what痴 hot and what痴 ground.
The illuminated switches have three male spade connectors: one for supply, one to the light itself, and one to ground. I took all the grounds back to the mounting screw into the sunshade rail (having determined that it was perfectly grounded as well). All the wires ran through that black loom stuff, and frankly that was the hardest part of the whole project* used some skinny stuff instead of fatter stuff and it was tough to get the wires in until I learned the secret (I'd tell you but then I'd have to you know what).
With everything wired up I gleefully fired up the tractor, turned on the lights and promptly blew my 10A fuse
That got me back to the manual to discover my initial mistake. So I can have both front lights on , or one front light and the rear light, but not all three. Eventually I will swap at least one light for an LED unit (violating my minimum $ goal) that only draws about 1 amp. For now I found that the forward lights spill a lot of light into the cab but also light up the area in front of the tractor quite well, not as well as if they were in front. They also sort of blind me because they are right behind my head. I'm not completely satisfied with the location and may elect to move them to the front of the sunshade and just start wearing a motorcycle helmet when I get on and off the tractor.