Fallon
Super Member
I was all set to copy number9L's sweet looking install on his L3800 (same tractor as mine, just 6 more HP) until he came to the realization that his valve stucked. At any rate I liked the concept.
After pestering Mr. FitRite, he dug up a nice Bucher valve with a joystick & 3rd function from his usual sources. He seems to think highly of Bucher & everybody seems to think highly of him, hopefully it will be worth the money.
Got the valve & QC manifold in today, so started in on getting things mounted
Pulled the fender which is pretty straight forward, undo all the nuts/bolts (12mm) between the fender & tire. Most of the nuts are welded onto something, so are pretty easy to remove, a couple require a wrench on each side. A couple didn't have enough clearance between the fender & tire for a ratchet so I had to just use a box wrench. It took me under 20 minutes to pull the fender. I couldn't be bothered to jack it up to pull the tire & don't think that would have been worth the effort.
I undid the 4 bolts (10mm) holding on the tail lights so I could easily undo the zip tie holding wires loom on after I unplugged it & also to make the fender lighter. The PTO lever also had to come off, just 2 more bolts & it dangles out of the way & doesn't seem like it will need any readjustment when I reattach it. As I put a bigger toolbox on the strut across the back, I pulled that off so I don't bend it when it's just dangling there.
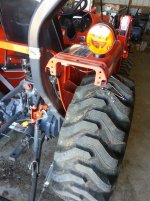
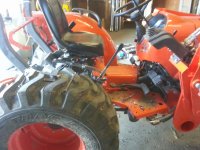
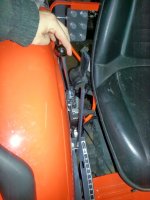
I pulled off the metal bracket that wraps around the 3pt lever. Getting the rubber knob off the end of the 3pt lever was a pain, but I loosened it up jamming a screwdriver between rubber & metal, then finally wiggled it off. Cut off the slot behind the 3pt slot (draft control I guess). I may have to come back & put a bracket on the end of the shield around the 3pt lever as it's only bolted down at 1 end now & dangles a bit.
After playing with the valve a bit I ground off the 2 brackets under the draft control slot.
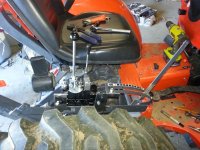
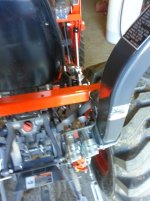
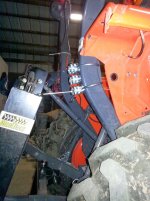
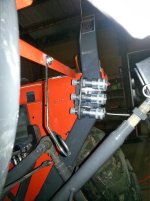
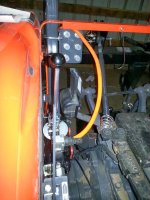
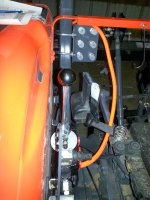
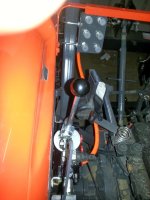
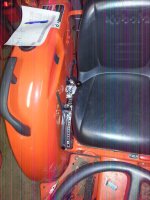
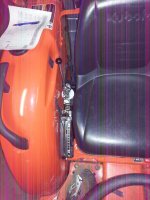
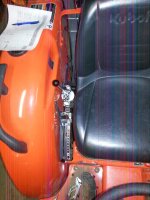
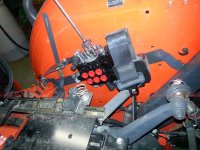
I mounted the valve to the frame with some zip ties to check how things will all go together. A couple bolts being welded to the frame makes it easy to toss the fender back on to check clearances. I also ended up loosening up the bolts holding on the seat belt & rotating that back for more room for the valve.
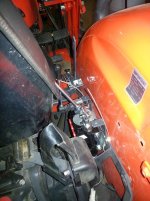
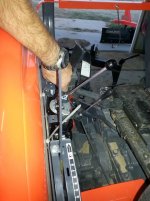
The joystick detents in towards the seat for left/right & to the rear for front/back. I'm not sure if I can swap positions between the 3rd function & joystick. I want the joystick in front, as that will be used more. However clearance issues may end up making it better to leave the small 3rd function stick next to the 3pt lever. The joystick will hit the seat when in detent to the left. While that will work, a little more clearance would be nice. I may still end up having to bend the levers (heat & bend or possibly cut & use my meager welding skills, not sure yet). I think I'm going to make new mounting ears out of some angle iron & put in holes so the valve leans towards the fender a bit so the sticks will have some better clearances.
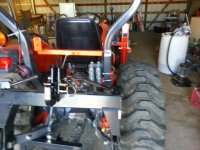
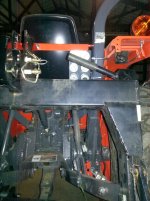
For the QD manifold I'm thinking I'll just get 2 small plates of possibly 4 pieces of flat stock. Sandwich the ROPS post between them & just mount the manifold to that on the back.
Apparently I'm out of spare angle iron & motivation, so I'm done for the day.
After pestering Mr. FitRite, he dug up a nice Bucher valve with a joystick & 3rd function from his usual sources. He seems to think highly of Bucher & everybody seems to think highly of him, hopefully it will be worth the money.
Got the valve & QC manifold in today, so started in on getting things mounted
Pulled the fender which is pretty straight forward, undo all the nuts/bolts (12mm) between the fender & tire. Most of the nuts are welded onto something, so are pretty easy to remove, a couple require a wrench on each side. A couple didn't have enough clearance between the fender & tire for a ratchet so I had to just use a box wrench. It took me under 20 minutes to pull the fender. I couldn't be bothered to jack it up to pull the tire & don't think that would have been worth the effort.
I undid the 4 bolts (10mm) holding on the tail lights so I could easily undo the zip tie holding wires loom on after I unplugged it & also to make the fender lighter. The PTO lever also had to come off, just 2 more bolts & it dangles out of the way & doesn't seem like it will need any readjustment when I reattach it. As I put a bigger toolbox on the strut across the back, I pulled that off so I don't bend it when it's just dangling there.


I pulled off the metal bracket that wraps around the 3pt lever. Getting the rubber knob off the end of the 3pt lever was a pain, but I loosened it up jamming a screwdriver between rubber & metal, then finally wiggled it off. Cut off the slot behind the 3pt slot (draft control I guess). I may have to come back & put a bracket on the end of the shield around the 3pt lever as it's only bolted down at 1 end now & dangles a bit.
After playing with the valve a bit I ground off the 2 brackets under the draft control slot.
I mounted the valve to the frame with some zip ties to check how things will all go together. A couple bolts being welded to the frame makes it easy to toss the fender back on to check clearances. I also ended up loosening up the bolts holding on the seat belt & rotating that back for more room for the valve.


The joystick detents in towards the seat for left/right & to the rear for front/back. I'm not sure if I can swap positions between the 3rd function & joystick. I want the joystick in front, as that will be used more. However clearance issues may end up making it better to leave the small 3rd function stick next to the 3pt lever. The joystick will hit the seat when in detent to the left. While that will work, a little more clearance would be nice. I may still end up having to bend the levers (heat & bend or possibly cut & use my meager welding skills, not sure yet). I think I'm going to make new mounting ears out of some angle iron & put in holes so the valve leans towards the fender a bit so the sticks will have some better clearances.
For the QD manifold I'm thinking I'll just get 2 small plates of possibly 4 pieces of flat stock. Sandwich the ROPS post between them & just mount the manifold to that on the back.
Apparently I'm out of spare angle iron & motivation, so I'm done for the day.

