At Home In The Woods

   / At Home In The Woods
  • Thread Starter
#4,321  
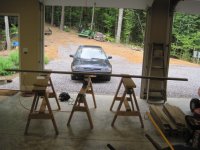
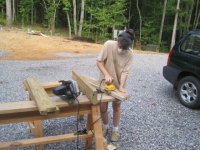
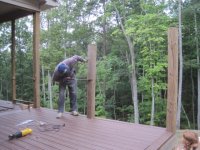
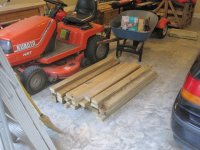
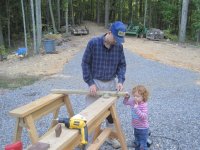
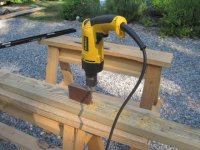
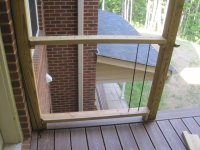
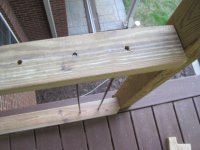
We have been cutting and sanding boards that will be used for the porch/deck railing. I am enjoying having a garage in which I can work during the rain. I cut off the top of that middle post that leans so badly. I cut around the post with a handsaw to get my cuts started straight. I finished cutting through the post with a sawzaw. The handrail will sit on top of the middle post.
 

Attachments

  • IMG_3337.JPG
    IMG_3337.JPG
    131.6 KB · Views: 201
  • IMG_3339.JPG
    IMG_3339.JPG
    166.5 KB · Views: 221
  • IMG_3340.JPG
    IMG_3340.JPG
    163.4 KB · Views: 247
  • IMG_3341.JPG
    IMG_3341.JPG
    127.6 KB · Views: 190
   / At Home In The Woods
  • Thread Starter
#4,322  
Our garden is slowing down. We bought a second motion activated Scare-Crow Sprinkler and relocated the first sprinkler to protect the fall vegetables from the deer. Our garden has stayed mostly free of critters this season. I'm pleased. I really did not want to have to put up a fence.

IMG_3342.JPG
 
   / At Home In The Woods
  • Thread Starter
#4,323  
All the boards for the porch railing have been prepped (cut, sanded, drilled). Drilling all the holes in the 2Xs to hold the vertical steel rods has been time consuming. I made a "jig" out of a scrap piece of composite decking to help me drill the holes straight. My BIL said I should just use a drill press. That would be a great idea if I had a drill press; but I don't. Each rod requires drilling 3 holes, one throught the 2x4 at the top of the rod, one half-way through the 2x4 at the bottom of the rail, and another smaller hole drilled through the bottom hole to drain rain water. We have 110 rods to install so that makes 330 holes!
 

Attachments

  • IMG_3347.JPG
    IMG_3347.JPG
    166 KB · Views: 184
  • IMG_3350.JPG
    IMG_3350.JPG
    119.7 KB · Views: 164
  • IMG_3351.JPG
    IMG_3351.JPG
    125.2 KB · Views: 152
  • IMG_3352.JPG
    IMG_3352.JPG
    147.9 KB · Views: 174
  • IMG_3353.JPG
    IMG_3353.JPG
    124.4 KB · Views: 172
  • IMG_3354.JPG
    IMG_3354.JPG
    98.5 KB · Views: 165
   / At Home In The Woods
  • Thread Starter
#4,324  
This picture shows one of the rods beside a smaller drill bit I used for creating the drain hole. Hopefully, the drain holes will prevent water from collecting in the holes that hold the bottom end of the rods.

IMG_3358.JPG

Here's a closeup of a hole in the bottom 2x4 that will support the rods. You can see the smaller drain hole.

IMG_3359.JPG

On the drill bit used for drilling the larger hole, I made a mark at the top of the bit. While drilling, when the mark lined up with the top of the jig, I knew my hole was 3/4" deep.

IMG_3360.JPG
 
   / At Home In The Woods
  • Thread Starter
#4,325  
Here's the first railing panel without the cap rail installed at the top. We have blocks nailed to the posts below the bottom rail and top rails for support.

IMG_3361.JPG IMG_3362.JPG

We bought some 6d galvanized finishing nails for attaching the top and bottom 2x4 rails at the local hardward stores. These nails were expensive and are some of the softest nails I've ever used. I'm sure they are made in China. It almost seemed like the nails were made of lead, as soft as they are. In order to nail 8 nails, I had to throw away 4 because they bent. And my hammering is not THAT bad. My wife is going to buy some more from Lowes or Home Depot and see if the quality is any better. I'm not terribly optimistic. I was even nailing the nails through pre-drilled holes and they would bend.

Here's the panel with the 2x6 cap rail sitting on top of the 2x4 top rail.

IMG_3363.JPG

One panel down, 8 more to go.
 
   / At Home In The Woods #4,326  
I can see those rods bending and pulling out of the holes if someone pushes or falls hard enough. I really like the looks, nice and clean.
 
   / At Home In The Woods
  • Thread Starter
#4,327  
I can see those rods bending and pulling out of the holes if someone pushes or falls hard enough. I really like the looks, nice and clean.
955Lincoln,
The rods are 5/16" steel and are quite stiff. The top end of the rod fits snuggly 1 1/4" deep inside the hole drilled through the top 2x4 rail. The bottom end of the rod sits inside a 3/4 deep hole in the bottom 2x4 rail. In order for the rods to bend, the holes in the 2x4's would also have to give. If a full grown man intentionally kicked one of the rods, he might be able to knock it out, maybe, but even then I'm not sure if he would knock it out. Someone pushing or falling against the rails will not knock them out, especially since their weight would be distributed against several rods. I'm not concerned about the ability of the rods to hold.

Obed
 
   / At Home In The Woods #4,328  
We bought some 6d galvanized finishing nails for attaching the top and bottom 2x4 rails at the local hardward stores.

Obed, Are you nailing the top 2 x 6 CAP RAIL to the top 2 x 4 TOP RAIL with the galvanized nails? What about drilling holes through the TOP RAIL, setting the CAP RAIL on top, then using galvanized screws to insert the screws from the bottom and then attaching. That way the CAP RAIL would not have any nail heads showing and the screws would pull the two boards in real tight.
 
   / At Home In The Woods
  • Thread Starter
#4,329  
Obed, Are you nailing the top 2 x 6 CAP RAIL to the top 2 x 4 TOP RAIL with the galvanized nails? What about drilling holes through the TOP RAIL, setting the CAP RAIL on top, then using galvanized screws to insert the screws from the bottom and then attaching. That way the CAP RAIL would not have any nail heads showing and the screws would pull the two boards in real tight.
Stanley,
Screwing the cap rail to the top rail from underneath is a good suggestion. That's what I will do. Thanks.
Obed
 
   / At Home In The Woods #4,330  
Stanley,
Screwing the cap rail to the top rail from underneath is a good suggestion. That's what I will do. Thanks.
Obed
Obed, you are welcome! Hope it works out for you. Stanley
 
 
Top