At Home In The Woods

   / At Home In The Woods #4,931  
For many years when I had my landscaping company I sharpened my mower blades every week using an angle grinder and putting the blades in a vice. You figure out pretty quickly what angle you need to sharpen them to. After that I used a small bench grinder and fashioned a guide that slide along a small steel tube, made sharpening much more even and easier.

By the way, sharpening is better for the grass, when blades dull they rip grass rather than cutting it which makes them susceptible to disease. For a homeowner if you start the season with sharp blades you should only have to sharpen them once assuming you don't hit anything.
 
   / At Home In The Woods #4,932  
For many years when I had my landscaping company I sharpened my mower blades every week using an angle grinder and putting the blades in a vice. You figure out pretty quickly what angle you need to sharpen them to. After that I used a small bench grinder and fashioned a guide that slide along a small steel tube, made sharpening much more even and easier.

By the way, sharpening is better for the grass, when blades dull they rip grass rather than cutting it which makes them susceptible to disease. For a homeowner if you start the season with sharp blades you should only have to sharpen them once assuming you don't hit anything.

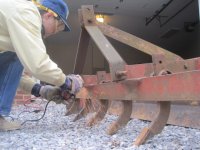
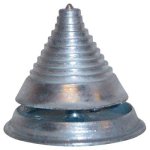
I'd second the 4" grinder to sharpen them and then balance them with a cone thing.

80183_lg.jpg


tom
 
   / At Home In The Woods
  • Thread Starter
#4,933  
Obed, I found a picture of my boxblade hitch ball. My boxblade has a hinged rear blade and the hitch is right above the piano hinge.

View attachment 311393
Jim, I like your box blade hitch ball. Do you have any pictures closer up? I'm trying to figure out how I will make mine.
Obed
 
   / At Home In The Woods
  • Thread Starter
#4,934  
I cut 20" length of 3" pvc pipe and put a cap on the bottom. Fill with 4" of kitty litter and screw to the wall at a stud with one screw in the top edge. Pre drill it. Then just stick the gun in with the handle out. The kitty litter absorbs all the drippings. I rotate it once a year or so and dump out the old litter into a waste basket and replace with new kitty litter.

For traveling I have slipped a pair of old tube socks over it.

Chris
Chris,
I like your setup. If I don't hear any other ideas I like better, I may copy yours. Thanks.
Obed
 
   / At Home In The Woods
  • Thread Starter
#4,935  
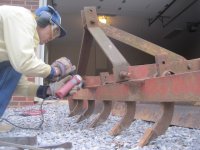
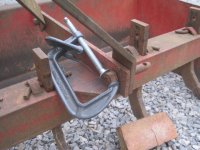
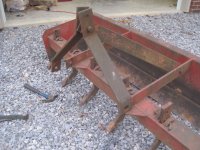
When I my welder and accessories arrived, I decided to try out the new angle grinder and remove the 3PH pins on the box blade.

IMG_0391.JPG

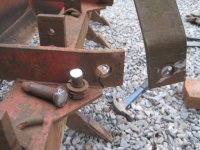
It took some trial and error but I was able to eventually cut off the first draft link pin. I started by trying to cut through the nut but failed miserably. I finally figured out there was enough slop in the pin installation that I had room cut of the pin directly.

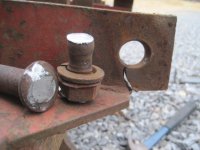
IMG_0393.JPG IMG_0394.JPG

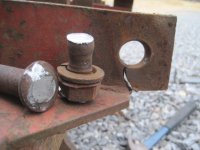
Once I removed the pin, I found a crack where the pin attaches to the box blade. When I saw the crack I did not think, "Bummer, now I gotta take this thing somewhere to get it fixed." Instead I thought, "Wow, I have a welder!"

IMG_0395.JPG IMG_0396.JPG

I found another issue. The plate where the pin is attached is also bent. That will cause the pin to not be parallel to the blade and will encourage more bending and problems. I would really like that plate straightened but I really don't know how to do that. That's got me scratching my head. I might just try beating on it with a sledge hammer and see what happens.

IMG_0400.JPG

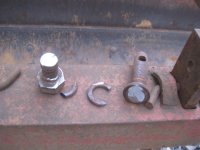
The second pin did not have enough slop to let me position the cutting wheel where I could cut off the pin. I was able to cut off the lock washer with some effort. I picked a piece of the washer off of the ground with my bare hands and got a little burn on the tip of my index finger. Cutting off the washer gave me enough slop that I could position the cutting wheel so I could cut off the pin. I learned my lesson with the first pin and used some clamps to keep the pin from spinning while I cut it off.

IMG_0397.JPG IMG_0398.JPG

I am rather pleased that I am able to fix the pins on the BB myself. I wouldn't have been able to do it without the great suggestions you guys provided. I didn't know anything about an angle grinder. It was well worth the $22. I do wish I'd have spent an extra $7 and gotten the paddle switch.

IMG_0399.JPG
 
Last edited:
   / At Home In The Woods
  • Thread Starter
#4,936  
I measured the box blade draft link pin holes. It turns out that the holes take regular 7/8" dia. Category 1 pins. However, the pins wobbled around in the holes and wore the steel so the holes are now a little bigger than 7/8". The hole is bigger on one side of the plate than it is on the other due to the irregular wear.

IMG_0396.JPG

I'll buy some Category 1 pins and will likely let them fit in the holes best they will.
 
Last edited:
   / At Home In The Woods #4,937  
Now that you have the pin out, the side that has the crack looks like (from the coloration difference) it may have been heated and straightened once before. And that pin has been wobbling around in that hole for a long time judging by the wear in the pin.

You really don't want one lower link to let go while the other remains attached. That could lead to a bent/broken lower lift arm on the side that remains attached--it's going to become a pivot point if one side lets go, and it will have a lot of leverage against the connected side.

I would consider reinforcing the cracked side, heck do both sides while you are at it. Get some 1/4" plate and cut some squares to weld on each side of the cracked location. Then maybe switch to the type of pin that has a nut on each side of the bb arm, with the pin sticking out or in as best fits your tractor lift arms/tire clearance.

Glad you are enjoying your tools!
 
   / At Home In The Woods #4,938  
Obed, it looks like you are off to a good start with the welding equipment. One hint on your welding - make sure you start with clean metal. Rust, paint or other coatings will ruin your bead. Since most of your welding will likely be on farm equipment, grinding the parts clean/bare will help increase your chances of successful welds. A clean point to attach your ground clamp will also help your welds. Don't be afraid to grind a patch clean to attach your ground clamp. Just keep some paint around to touch up and it will be fine.

A second hint is be careful about turning the amperage up on the welder. Beginners tend to have a hard time striking and holding an arc so they turn the welder up. That helps strike the arc but actually makes for harder welding especially wire welding. The amperage setting should be matched to the material and its thickness.

Take some time to practice wedding some scraps. The box blade pin hole crack is a typical challenge DIYers will face. It is a vertical weld which is a bit more difficult than horizontal welding. But practice and you will be able to fix it just fine. The other thing you mentioned was the holes are enlarged. Once you practice laying a good bead with the welder, you will be able to fill the hole a bit with weld material. That will take up some of the slop. I suspect the loose pin worked the hole and eventually caused the cracked mount. In a bind I have welded pins in place to compensate for the hole being too large. You aren't in a bind so I don't suggest it.

Good luck!
 
   / At Home In The Woods #4,939  
I measured the box blade draft link pin holes. It turns out that the holes take regular 7/8" dia. Category 1 pins. However, the pins wobbled around in the holes and wore the steal so the holes are now a little bigger than 7/8". The hole is bigger on one side of the plate than it is on the other due to the irregular wear.

View attachment 311499

I'll buy some Category 1 pins and will likely let them fit in the holes best they will.
Maybe you could find some washer with the correct hole size and weld one on top and one on bottom for the pin to go thru??
 
   / At Home In The Woods #4,940  
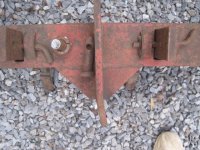
Or weld the leg of the top link frame shown in picture 4 to the horizontal piece that has the crack. Then weld the crack.
 
 
Top