The gully to pond project

   / The gully to pond project
  • Thread Starter
#111  
And yes, Jim's satellite photos will create a history of his property.

I'm lucky to have friends who own airplanes or are pilots. I can pay for their fuel and airplane rental and they'll fly me over for a photo session. That way I get to pick the time of day and the photos of interest. I can document my neighbor's growing junkyards too.:rolleyes: I've also considered shooting video and stills from a tethered balloon. Technology has opened lots of possibilities.
 
   / The gully to pond project #112  
I'm lucky to have friends who own airplanes or are pilots. I can pay for their fuel and airplane rental and they'll fly me over for a photo session. That way I get to pick the time of day and the photos of interest. I can document my neighbor's growing junkyards too.:rolleyes: I've also considered shooting video and stills from a tethered balloon. Technology has opened lots of possibilities.

I guess photos might be historically interesting and important from both: either from an airplane, fixed baloon or from satellite :)
 
   / The gully to pond project
  • Thread Starter
#113  
I apologize for not updating this thread for a long time. I've made a lot of progress, but mostly I've hauled load after load of spoils to level a gully and start building terraces. I've also set this project aside while I had some repairs done to my house and a room added. Now, I'm back to doing pond building in my spare time.:thumbsup:

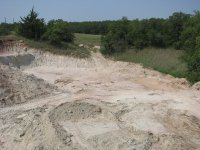
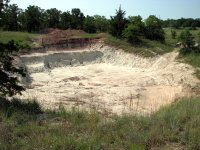
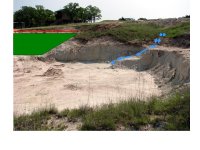
When people are building large buildings, they have a topping-out ceremony when the last floor is built. Perhaps I should have a bottoming-out ceremony because I finally reached the finished depth on the pond.:D The three pictures below show the main basin for the lowest level pond. The final picture shows how water will flow through two culverts and down into the pond from the higher pond. Of course I still have some shaping to do here, and I will build a cascade of large rocks for the water as it falls down the bank. Controlling erosion in this area will be something I will rip-rap, rocks and even concrete as needed. The green area to the left is the location of the dam with the red line showing that I will have a driveway across the top of the dam.

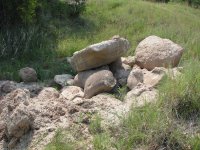
The final picture is just a tiny sample of the rocks I've collected. The rock on top of the pile probably weighs over a ton because my New Holland TC45D could not even move it uphill when I got it into my rock bucket. I'm sure messing with that rock is what blew out my hydraulic pump's seals. The NH LB75B had no problem moving it at all. If I had used it first, I could have saved myself about a $250 repair job.:confused2:
 

Attachments

  • 6-2011_BottomOut.jpg
    6-2011_BottomOut.jpg
    178 KB · Views: 390
  • 6-2011_BottomOut-a.jpg
    6-2011_BottomOut-a.jpg
    224 KB · Views: 448
  • 6-2011_BottomOut-bb.jpg
    6-2011_BottomOut-bb.jpg
    105.8 KB · Views: 456
  • 6-2011_RockSave.jpg
    6-2011_RockSave.jpg
    251.4 KB · Views: 327
   / The gully to pond project #114  
Thanks for the update. You sure have moved a lot of material!!!!!!!!

Eddie
 
   / The gully to pond project
  • Thread Starter
#115  
I have begun digging my dam's core trench that will be filled with compacted clay. I'd say I'm a bit over 1/2 done. This is a pain to dig because my backhoe can only place spoils on either side up to 90 degrees. It can't rotate all the way around like an excavator. I have to place spoils on each side of the trench and then come back and haul them away with my loader. Every move has to be planned or I end up moving dirt way too many times. That just eats up time and fuel if I don't get it right.

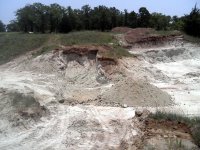
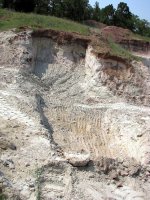
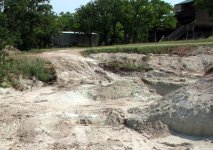
The 1st two pictures show the core trench. While it shows some of the steepness of the approach, you don't get the full effect. The 3rd picture is looking the opposite direction with the core trench barely visible on the right. It's much easier to see how steep the approach is. The core trench will extend another 15 to 18 feet and into the slope so that the approach path shown will be excavated away for the trench.

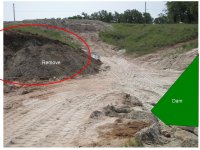
The final picture shows the area on the high side of the dam where the higher pond will be located. The location of the dam is shown with the green highlight and the circled red area will be completely excavated away for a larger basin. You can see in the background that I have filled the above this pond at least 10' deep. That fill and area is the subject of my next post.
 

Attachments

  • 6-2011-CoreTrench-b.jpg
    6-2011-CoreTrench-b.jpg
    178.7 KB · Views: 234
  • 6-2011-CoreTrench-a.jpg
    6-2011-CoreTrench-a.jpg
    234.4 KB · Views: 260
  • 6-2011-CoreTrench-aa.jpg
    6-2011-CoreTrench-aa.jpg
    202.2 KB · Views: 257
  • 6-2011_HighPond.jpg
    6-2011_HighPond.jpg
    117.1 KB · Views: 275
   / The gully to pond project
  • Thread Starter
#116  
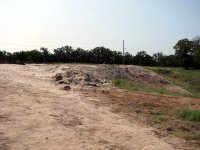
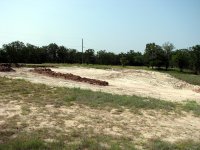
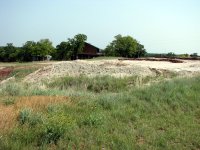
These final photos show the area of the deep gully I have filled with spoils from all my digging. I built some small temporary terraces and put some rocks in just in case it rains (not likely). By spreading the flow of water to each side of this area and then controlling erosing with rocks, I can keep this gully from reforming. Here are some photos from several angles. I will soon get some rip-rap hauled in so I can protect the final slop from erosion. I may even have to put some type of cloth down before the rip-rap to hold the soil. If I don't do something, it will just slowly erode and silt-in my high pond.

That's where I am today. I go buy $120 worth of diesel a week and just keep progress going at my pace when I have time. I'm not trying to win any races and the no-pressure approach sure makes this fun.:)
 

Attachments

  • 6-2011_FillHill.jpg
    6-2011_FillHill.jpg
    162.4 KB · Views: 212
  • 6-2011_FillHill-a.jpg
    6-2011_FillHill-a.jpg
    188.1 KB · Views: 236
  • 6-2011_FillHill-b.jpg
    6-2011_FillHill-b.jpg
    203.8 KB · Views: 219
   / The gully to pond project
  • Thread Starter
#117  
You sure have moved a lot of material!!!!!!!!

Eddie

Yes I have, Eddie. As you are famous for saying, you have to have a good plan for your spoils when you dig a pond. Luckily, Mother Nature supplied me with a place nearby to where I am digging. I'm thankful that I could haul it with my loader and didn't need a dump truck or trailer. I dont' know how I would ever have been able to get either of those down into the pond and back out when full.
 
   / The gully to pond project #118  
This is a pain to dig because my backhoe can only place spoils on either side up to 90 degrees. It can't rotate all the way around like an excavator. I have to place spoils on each side of the trench and then come back and haul them away with my loader. Every move has to be planned or I end up moving dirt way too many times. That just eats up time and fuel if I don't get it right.

Looking good Jim!:thumbsup:

Oh the joys of a backhoe. I like digging down a slope and trying to get the spoils just to stay when I dump them. Then when you do try to scoop them with your bucket, it just pushing them back down the slope. Oh what fun.:laughing: You're right. Every move has to be orchestrated.

If I ever dig out a pond again, there will be an excavator or mini ex. nearby for sure.;)
hugs, Brandi
 
 
Top