Water Line and MiraFount Installation - lots of Pictures

   / Water Line and MiraFount Installation - lots of Pictures
  • Thread Starter
#21  
Verticaltrx,
Thanks, I've installed a Ritchie before, I like the flexible line they include with the trough as it makes installing them easier. I also like that the lid requires no tools to remove and that they are cheaper than the MiraFount.

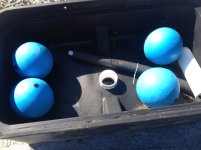
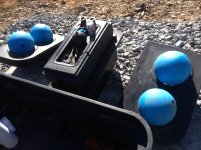
I used the MiraFount because they are black which should hold heat better, you can see the balls floating from a distance and my other four were already MiraFounts. (I'm OCD like that)

I chose the size of my pad based on a two yard minimum concrete delivery. I can buy them precast but it requires a perfectly level area and as you know that is difficult.


Daybreak,
I needed 1 1/2" pipe to get the pressure I needed. Do what ever you want to "do it right the first time" but schedule 40 pvc has always worked for me.
I just use corrugated pipe for my heat well or earth tube. Mine ended up being 6' deep but that was only because I had no idea what the final grade was going to be when I installed them.


Dave,
I appreciate you watching. I really was starting to think I was talking to myself at one point.
The reason I was posting this was to hopefully help someone who had never installed a MiraFount. Yes, this is part of a project turning a 45 acre corn and alfalfa field into pasture for rotational grazing.
 
   / Water Line and MiraFount Installation - lots of Pictures #22  
Has anyone used any of these automatic waterers with horses that wear grazing muzzles? I installed several Drinking Post waterers last year and they work great except the horses can't use them with a grazing muzzle on because they aren't deep enough and the horses are uncomfortable sticking their heads in it. They have no problem sticking their heads into a trough while wearing the muzzle.
 
   / Water Line and MiraFount Installation - lots of Pictures #23  
Maybe he likes to sniff the glue.:laughing:
 
   / Water Line and MiraFount Installation - lots of Pictures
  • Thread Starter
#24  
Has anyone used any of these automatic waterers with horses that wear grazing muzzles? I installed several Drinking Post waterers last year and they work great except the horses can't use them with a grazing muzzle on because they aren't deep enough and the horses are uncomfortable sticking their heads in it. They have no problem sticking their heads into a trough while wearing the muzzle.

I have zero experience with grazing muzzles, post waters or horses.

The openings are 9 1/2" with the water level a few inches (maybe 4) below that.
 
   / Water Line and MiraFount Installation - lots of Pictures
  • Thread Starter
#25  
Maybe he likes to sniff the glue.:laughing:

Maybe, I know for a fact that he loves beer. He'll sit on his butt like a dog and drink as many as I am willing to give him. Notice that you want to keep your fingers as far away from his teeth as possible. I like my fingers.

11.JPG
 
   / Water Line and MiraFount Installation - lots of Pictures
  • Thread Starter
#26  
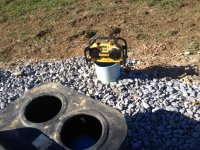
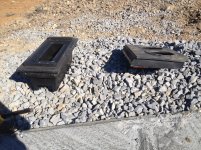
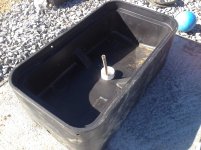
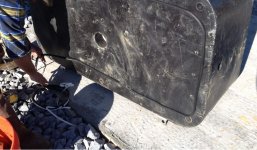
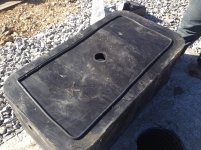
After letting the concrete dry over night it was time to install the troughs. Amazingly I brought all the tools I needed with me. They include a sawzall, pipe glue and primer, my special Mirafont tool, pliers, tape measure, rags, drill with concrete bit, small sledge hammer, Teflon tape and a few others I'm sure.

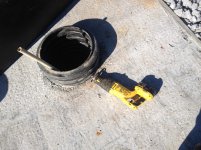
The following pictures were taken from both troughs but are combined as one to better show the steps taken in order.


a41.jpg
The most important tool of all is a good radio. :thumbsup:


a42.jpg a43.jpg
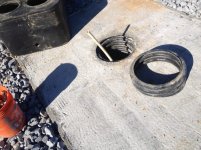
The first task is to cut the heat well pipe flush with the concrete. I use Lenox Fire and Rescue blades.

a44.jpg a45.jpg a46.jpg a47.jpg
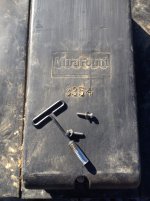
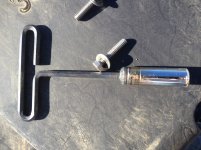
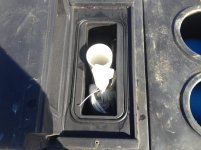
The next step is to remove the float cover (top center section) and retrieve the packet that contains the directions (which are terrible), and all the small pieces needed for installation. I use a special homemade tool that is just a 1/2" deep well socket welded to a T-handle allen wrench.


a48.jpg a49.jpg a50.jpg
Then remove the three remaining sections of the lid and arrange everything close by.​
 
Last edited:
   / Water Line and MiraFount Installation - lots of Pictures
  • Thread Starter
#27  
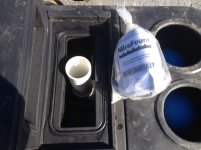
Now you open up the packet. In it are the directions, the float and valve, concrete anchors with brackets, insulation strip for the bottom of the trough, insulation for the 3/4" supply line and the drain plugs. All you need in addition are the tools, a Sharpie, pipe glue and Teflon tape.


a54.jpg
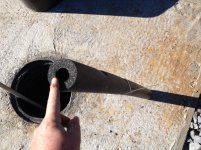
Next I place the trough over the supply line and mark on the concrete pad where I want it to be with the Sharpie. NOTE: It is important that when complete the supply line does not touch the corrugated heat well, otherwise it could freeze.


a51.jpg a52.jpg
Remove the trough and flip it on its side. Get the strip of insulation from the packet and install along the edges of the bottom of the through, it comes with a glued backer.


a55.jpg
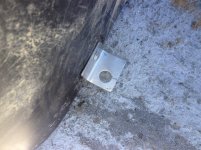
Next I loosely install the four angle brackets for the concrete anchors. This is the only picture I have. :(


a53.jpg
Then you slide the insulation tube over the supply line, slightly above flush with the concrete. It is secured with a zip tie from the packet. Now replace the trough over the supply line and back onto your placement marks.​
 
   / Water Line and MiraFount Installation - lots of Pictures #28  
DT, what are you feeding the system with? I need to install 2 of these, but the extension office is telling me to feed them with a gravity system that feeds from an uphill pond. I'll need to install a "filtering" system in the pond and punch through the dam to connect to the piping. I guess if you are using city water or pressure from a cistern, that would explain what you are doing a bit better. Can you post how you are feeding the system with water? Thanks.
 
   / Water Line and MiraFount Installation - lots of Pictures
  • Thread Starter
#29  
Sorry I meant to cover this in the very first post.

The system is plumbed to run off of a well or the county water supply. I am currently using the county water because the well pump went toes up.

The gravity systems can work well but I've also heard of some problems.

My uncle/cousin use a gravity system with water supplied by a well to fill a large tank. The well pumps up hill, for a set amount of time each day, into the tank. The water then gravity feeds to the troughs from the tank. Some of them actually gravity feed off of the same line that supplies pressurized water up to the tank.
 
Last edited:
   / Water Line and MiraFount Installation - lots of Pictures #30  
Daybreak,
I needed 1 1/2" pipe to get the pressure I needed. Do what ever you want to "do it right the first time" but schedule 40 pvc has always worked for me.
I just use corrugated pipe for my heat well or earth tube. Mine ended up being 6' deep but that was only because I had no idea what the final grade was going to be when I installed them.

Howdy,
What kind of pressure do you have at the end of 1.5" pipe? I just like using the black plastic HDPE pipe because I feel, anywhere you have a joint, that could be a place for a leak. I could lay down 1.5" black plistic pipe for 5000' with a total of 10 total joints (500' rolls) 1" pipe comes in longer lengths.
 
 
Top