Building a stick frame house in the woods in 90 days

   / Building a stick frame house in the woods in 90 days #1,421  
Simply flabergasted:thumbdown:

It appeared at first the slider in the sun room only needed a track pulley adjustment. Then as we went down along the edge there was a widening gap below the handle too.
This must mean the frame is not plum and bowed in in the middle. Better get a 4' level and start checking walls, door frames, window frames for vertical and floors and ceilings
for level. They won't be perfect, but should be very close. Run all the double hung windows up and down to see if they jam. operate the crank out windows. Open and close all the doors all the way. The front door should have a wiper of some sort along the bottom to seal it.
Why the door is bowed in at the top without even being latched is beyond me. Did it arrive in a box or was it just sitting in a warehouse somewhere as a returned item?
The outside corner baseboard is just like I was explaining about inside corners. They are not at 90 degrees after the mud is put on. On an outside corner they have to under angle the 45 cut and then file or sand away material from both pieces till they fit tight. If the try to just adjust the angle on one side it will appear as one board is thicker than the other. If they file that off you will have a rounded corner. Do they have a miter saw on site?
Baseboards are normally a little thinner than door trim for obvious reasons. It looks like your stuff is all the same thickness.
Not to argue with your neighbor, but the amount of filler your trim is going to need is way too much. You will be able to see the varying thickness from the filler
along the edge of the boards with your naked eye. The joints will probably separate. Paint can only stretch a little bit.

When these guys tell you, "that's the way we do it" tell them that's not the quality you are paying for. If they won't budge make them give you a warranty in writing that
problems won't develop from their method.
 
   / Building a stick frame house in the woods in 90 days #1,422  
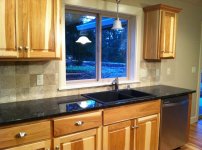
Yeah front door, sliding door, unacceptable. The "ugly" corner is pretty sad I don't recall seeing anything that bad when my house was built. Its not going to be perfect though, a bunch of 2x6's nailed together with some sheet rock is not exactly a precision surface to work with. The painters made mine look spectacular but the ugly corner that's liptstick on a pig there. That kitchen window...agree. I will say all my hardwood trim and all the natural wood on the stairs to the 2nd floor is furniture quality craftsmanship, I was impressed they were able to do that with a portable contractor saw.

Here's an idea, take a look at these two pics. This trim is in a 'craftsman' style not much different that what you are doing with two exceptions. The rails (trim) along the top of the doors and windows are thicker than the stiles and overlap the stiles about 3/8 inch on each side. The different thicknesses give it some depth and both the thickness difference and overlapping is a lot more forgiving vs trying to cut things super accurate.

det1.jpg
det2.jpg

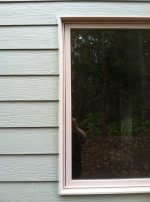
Does this look familar? I made them rip this out and fix it, no way you jam a window in like this on new construction.

det3.jpg
 
   / Building a stick frame house in the woods in 90 days #1,423  
I'm with Dave. :thumbsup: I'm not a big fan of the base board and door casing being the same stuff, too difficult to get a good/even joint, if the carpenters don't care. If the casing is thicker than the baseboard, the base just kills into the casing nicely with the reveal similar to what Dave was saying for the casing header (which I would like to have seen done as well.)

REVEAL! That was the word I was looking for, not relief. Thanks.
 
   / Building a stick frame house in the woods in 90 days #1,424  
Yes Stu, I'm the one that drove the dozer. :D

Holy crap dude. Your enthusiasm and work ethic always amaze me and this time it is stellar. Looks like you were listening to WWWV whilest tearing those trees a new arse. I think I see a new purchase in your future. How much is a used D8?
-Stu
 
   / Building a stick frame house in the woods in 90 days #1,425  
Jay,
You can be "Fart Proud"

:laughing: That pic always cracked me up.

And Peter, I would definitely bring up your concerns (I'd do it via email, so you have a record), before paint, then it's a more of a pita to fix. It does look like a carpenter isn't overly concerned with his level of work.

I will say it is amazing what good painters can do with trim work, though.
 
   / Building a stick frame house in the woods in 90 days #1,426  
I appreciate all comments guys! If anything, the ones most critical of the work being done are the most helpful! In the end, the house will be better than it otherwise would have been, and the only one that truly "suffers" is the builder, as he has to put in the extra effort to fix all those little things that I probably never would have caught, or accepted as "normal", had it not been for the very observant and experienced members on this forum.

Peter: When my wife and I had Casa Lemon as I call our house built in 1999 I caught a number of frak-ups by the clown who built our our place, and unfortunately I let other things slide that I shouldn't have. Some of which was my fault, and some of which was beyond my control. The biggest thing beyond my control was my work schedule and location only allowed me to get out here to inspect things once a week, and a lot gets done in a week's time. Now where I screwed up was letting things slide because residential construction is the bottom of the barrel in the engineering business. My background was in heavy industrial and commercial design, and I tried to shift gears to accommodate residential's lax attitude towards construction. Big mistake on my part as I let too much slide by.

Stick to your guns, and get this place done to yours and your Mom's satisfaction.

Good idea about the riser rings for the septic tank Ron. I'll add that to my list. One day I'll need to have my tank pumped I'm sure. I have lived in the house for 14 years, so that day is probably soon, especially now that I got 3 females living in the house with me. I have a good idea about where the drain field is since the grass is always nice and green there, but finding the clean out cover is going to take some detective work.

Peter: Are you saying you haven't had your tank pumped out in 14-years? If so you are long overdue. Even though it's just the two of us at Casa Lemon, I have our tank pumped out every 3 - 4 years. Excessive? Maybe; but it's cheaper than fixing a failed system.

Yep, make sure you have the turd tank's access covers exposed. Nothing pisses me off more than a builder who buries the hatches on the turd tank, especially since having the thing pumped out occasionally is a regular maintenance item. At least the clown who built Casa Lemon didn't bury our covers. I guess even an inDUHvidual can do something right sometimes. Our hatches are at grade; but I may get extension risers so they sit about 12" above grade, and put a rock mulch around the hatches. I probably will have the tank pumped out in May or June of this year, which will be our third or fourth, probably third time since we moved in here.

The most important thing to remember with problems is to NEVER EVER NEVER pay the final payment until every single little thing is taken care of. No matter how much you like the contractor, or how honest you think he is, once he is paid, it is very hard to get anybody to come back and do anything. In fact, it's usually impossible.

Eddie

Isn't that the truth! I could tell you horror stories about trying to get warranty work completed by the turd who built our place.

I know folks tend to rely on caulk these days, but it definitely could be better to start.

I swear the clown who built our place lives by the motto, "Caulk and walk" and I've found numerous places where he and/or his subs couldn't even do that right.

While I agree that the overall appearance of the wiring is important. But, don't overlook the accuracy! I was pleased with the overall neatness. I don't have any inside pictures, but the inside also looks fairly nice. What came as a surprise is the mistakes. I have recently identified numerous labeling errors. I have one circuit that is labeled on 2 breakers. I have a bedroom circuit that is not on an arc fault circuit interrupter. I found a breaker that was not labeled at all. And my favorite, I found a circuit wired with #14 that is on a 20A breaker (it is an AFCI). I would at least spot check the labeling.

Residential electricians generally do a crap job of labeling circuits in the breaker box.

Remember, building inspectors don't enforce quality, all they care about is that the building meets minimum code requirements, and of course making sure sure the local Gummint gets its pound of flesh out of your wallet.
 
   / Building a stick frame house in the woods in 90 days #1,427  
The bright light test is a good way to show up the flaws in the plasterboard mud job. Using the camera and flash gives you an indexable record.
I would suggest you do this along all walls. If the flat ceiling is not going to be stomped/mopped with mud, get up on a step ladder and photograph it too.

I would like to know from you guys on the thread how do you correct the mud ridges under the paint effectively ??

I had one little section like this inside a closet. I figured it wouldn't show so primed and finish painted it. When the boss got home she said no way.
So I tried sandpaper. That just got clogged up. Heavier grit didn't work and the latex paint started turning dark. So then I tried mesh cloth on a pad
and that started grabbing the latex paint and peeling it. Quite a mess, getting worse by the minute, along with my attitude.
Finally re-mudded the area and sanded and painted. I can still see it though. Of course when you do things yourself, you always see your mistakes, even
if others look right over them.

Bad enough in a closet but Peter has this on main walls. I remember a pic he took that showed the office room from the grand entry with the wall looking even worse than
this one attached. The contractor blew it off and said they would fix it. With all the gable fascia, trim, doors and other things to be redone but not started to be, I'm smelling the
game of the delay being so long that Peter and his mom will just give up and accept the mess as it is, or so the contractor hopes.....

Anyway, how do you fix the mud ridges on the walls, under the paint? Real experiences, not how you might...
Ron
 
   / Building a stick frame house in the woods in 90 days #1,428  
Pacerron caught the same issue I noticed on the drywall next to the fireplace. Take a strong flashlight and go around checking the drywall and check for imperfections. Personally I'd get a new trim crew (term used loosely here) and let them finish. Stop being Mr. Nice guy with the builder, granted you want to be cordial to him but your mom is paying BIG bucks for their work. He isn't do this for free or as a favor. And as others have said don't make that last payment until everything is PERFECT. Things were going really good on the framing but the interior work is royally substandard. I wouldn't let these guys near the cabinets either.
 
   / Building a stick frame house in the woods in 90 days #1,429  
I would like to know from you guys on the thread how do you correct the mud ridges under the paint effectively ??

As mentioned earlier, studs are not perfect in a wall, and even if you use the best quality wood, odds are that one of them will bow on you over time. Usually it's more then just one, especially ceiling joists. Texture on the walls hides this. I was surprised that they went with smooth walls on this job, but that's a personal choice. I like a light orange peel finish, but in some remodels that I've done, the walls are so bad that a heavy texture is needed. I have a 24 inch straight edge that I use to float out really bad areas, but that's just feathering it out so it's not noticeable.

When sanding, be sure to use a straight edge on those bad areas to make sure you don't sand too much.

The lower the luster on the paint, the harder it is to see the imperfections. The greater the sheen, the more light it reflects and the more you can see. Gloss is the worse thing for a wall because it shows everything. I use eggshell for walls and semi gloss for trim. Flat on the ceilings unless I'm using the same paint for the walls on the ceiling, which is becoming more and more common. Then it's just eggshell all over. Ceiling paint is normally flat.

On ceilings, popcorn was used for a very long time because the joists would start to show up over time. It's not painted, making it even duller and giving it an even flatter finish then just ceiling flat paint, which hides even more. Now we use 5/8's sheetrock on ceilings instead of half inch, which costs more, but you get a much better ceiling that can handle the 24 inch spacing of the lumber.

Eddie
 
   / Building a stick frame house in the woods in 90 days #1,430  
My comments. I have enjoyed this thread immensely and truly appreciate your time and effort to update it so often and in such detail. Thanks for that. I have to chime in finally and agree with the others that this build has impressed me greatly up until fit/finish time. I know it's raw, but man that trim job and door install is so raw it won't be pretty with 3 cases of caulk. I'd hound the builder pretty good on this point. After all his hard and excellent work, this is what actually gets seen.

I also don't like the anti-siphon spigots. Had the exact same ones and nothing but trouble with them. Just had the plumber replace all of them for leaking profusely. They freeze and break, then leak everywhere including back into the crawlspace and down the face of the house. Only one of four wasn't broken, but I went ahead and had it replaced too because it was just a matter of time. House was built in '07.
 
 
Top