New woods trailer for our RTV...

   / New woods trailer for our RTV...
  • Thread Starter
#11  
The wiring diagram will work to combine the two functions onto one light. But I don't think the resistor will dim the LED like a running light would be. The LED works on a lower voltage than the circuitry that drives it.
I base this theory on my Led flashlight that runs on the same battery pack that my drill uses. As the battery gets weaker the Led never dims, it just goes out, then the battery recovers a little and the LED comes on then the battery dies again, and the LED goes off, so it just flashes.
I have seen LEDs advertised to work from 5v to 30v, so I guess it depends on the circuit that drives it.
I had similar thoughts. Perhaps I will call them and ask if their lights dim at lower voltages
If you don't have a brake lights on the tractor, you don't need dimmer, as in not as bright, marker lights
Let us know what you come up with.
The tractor doesn't have brake lights per say, but it has 4 ways, turn signals and running lights. When you turn on (for example) the left turn signal the right turn signal goes on solid and looks like it would on a car with brakes and turn signal on at the same time.

Thanks

Aaron Z
 
   / New woods trailer for our RTV... #12  
Update??
 
   / New woods trailer for our RTV...
  • Thread Starter
#13  
Have the sides and the deck ready to cut out (3/4" pressure treated plywood), welded stake pockets on today, hoping to get some primer on it so that I can paint it next week (Monday?)

Aaron Z
 
   / New woods trailer for our RTV... #14  
Have the sides and the deck ready to cut out (3/4" pressure treated plywood), welded stake pockets on today, hoping to get some primer on it so that I can paint it next week (Monday?)

Aaron Z

Sounds good.

What about the tail lights?
 
   / New woods trailer for our RTV...
  • Thread Starter
#15  
Sounds good.
What about the tail lights?
They are sitting on my desk. We ran out of gas for the MIG welder so the trailer hitch didnt go on and neither did the mounting plates for the lights. Sometime next week.

Aaron Z
 
   / New woods trailer for our RTV...
  • Thread Starter
#16  
And next week turned into a couple of weeks... Got rust converter (3M Rust Reformer) on the rusty spots (mostly surface rust, plus a little on the welds from condensation). Next to put on Kubota Orange (tomorrow?) and then some undercoating where the deck will sit on the frame.
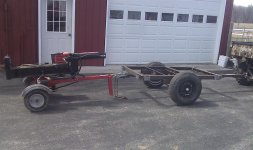
Pictures:
From the side with the splitter hooked up:
IMAG0099 (Custom).jpg
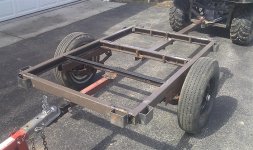
The view from the splitter's perspective:
IMAG0100 (Custom).jpg
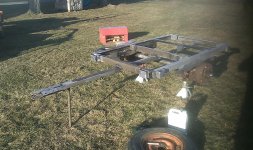
Rust Reformer drying (sorry about the fuzzyness on the right side, the back slipped partway off my phone):
IMAG0101 (Custom).jpg
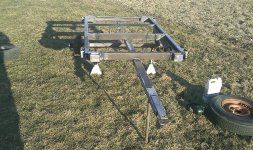
From the front:
IMAG0102 (Custom).jpg

Tires: The current tires are old and leak down. If I get bored, I plan to pull them, perhaps try electrolysis to clean them off, repaint them and put on a couple of the mostly dead 13" snowtires that are currently taking up space in the shop. They are ~3/4" smaller in diameter and are ~1.5" wider, so they should level the trailer and "float" better in soft ground.

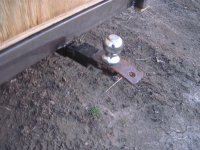
Hitch: The receiver hitch on the back is just a piece of 2"x2" 1/4" angle with a piece of smaller (1.75"x1.75"?) angle welded inside it to make a box. I couldn't see paying $30 for a 8" piece of hitch tube at Tractor Supply. I used a removable hitch for 2 reasons:
1. This way, I can turn the ball mount around and nothing sticks out of the back of the trailer
2. I had a ball mount sitting around from my previous car

Aaron Z
 
   / New woods trailer for our RTV... #17  
Looking good :thumbsup:

I like the hitch :)
 
   / New woods trailer for our RTV...
  • Thread Starter
#18  
Looking good :thumbsup:
I like the hitch :)
Thanks. Couldn't see spending $30 on a piece of tube when I had all of the parts to make it and I would have needed a piece of angle to tie back to the 2nd crossmember anyway.

Aaron Z
 
   / New woods trailer for our RTV...
  • Thread Starter
#19  
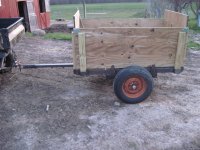
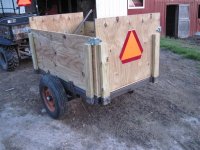
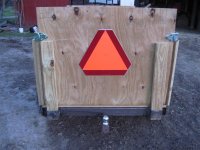
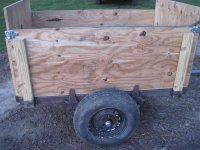
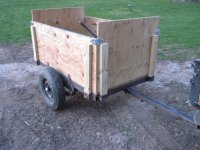
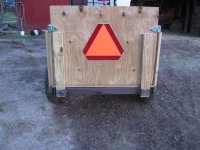
Everything is ready for paint now. Had a weld on one of the stake pockets for the back that didnt hold, and once I got the sides on, I realized that I needed something to keeping them from bowing out, so I added 2 tabs on each side. Here are some pictures:
Walkaround:
IMG_2352 (Custom).JPG IMG_2353 (Custom).JPG IMG_2355 (Custom).JPG IMG_2357 (Custom).JPG IMG_2358 (Custom).JPG
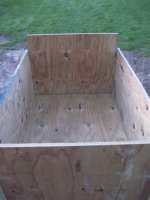
Looking into the box from the front:
IMG_2359 (Custom).JPG

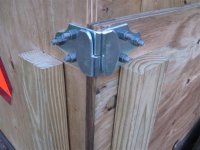
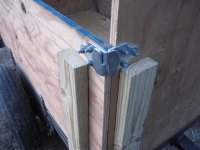
RR and RF corners showing brackets there to lock sides together at the top. Will eventually cut the bolts off flush, or add acorn nuts:
IMG_2360 (Custom).JPG IMG_2361 (Custom).JPG

Hitch closeup:
IMG_2356 (Custom).JPG
Hitch stowed:
IMG_2354 (Custom).JPG
Hitch out:
IMG_2355 (Custom).JPG

Still need to paint it, but cold weather shouldn't be a problem going forward.

Aaron Z
 
   / New woods trailer for our RTV...
  • Thread Starter
#20  
To those who said that the tongue wasn't strong enough, you were right, but the problem was the vertical dimension, not the horizontal one. My brother was using it last week to move dirt and when i got home from work he told me that "The first load, I filled it all the way up, the second, I only filled it halfway and the tongue broke" . My guess is that the first load was filled all of the way back, while the 2nd only put dirt in front of the axle (causing more tongue weight, but less overall trailer weight).
Adding diagonals wouldn't have helped much with this though as it bent vertically:
View attachment 330784
Need to hit up the local fab shop and get a heavier piece of c channel or tube to replace the tongue.

Aaron Z
 
 
Top