In another thread, I said I would post how this project went together once it was done, so here it is.
An aluminum deck vendor was mentioned in another thread, Aluminum Decking, Railing, Fencing, Pergolas and Deck Framing by Nexan Building Products and I was looking to see if they had something suitable to use to make a pergola. I was hoping to come up with something that would not rot or need regular repainting.
They not only had something suitable, they had complete kits in a number of sizes and a couple of styles so I ordered an 8x12 "economy" kit. Their deluxe kits have bigger fluted posts and double headers.
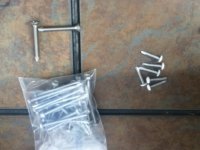
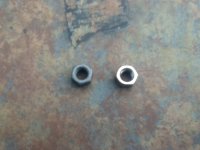
This is the the hardware that comes in the kit, self threading flathead screws mount the base plates to the posts. Everything else is put together with the painted self drilling sheet metal screws, except the top slats which use the longer galvanized screws. It also came with 3" wedge anchors, but I decided to embed carriage bolts in my concrete instead so would not have to wait for the concrete to be hard enough to take an anchor. I made a jig out of 3/4 ply with holes copied from a base plate.

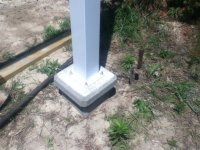
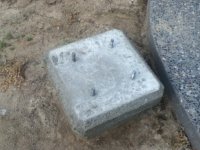
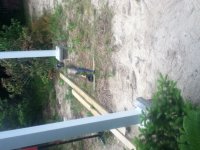
I dug four 4' deep holes (frost depth in my area) with a hand auger and dropped in 8" sonotubes and a 10' chunk of rebar, bent double, resting on a half brick at the bottom of the hole. I also made a couple of "c" shapes from 1' rebar wire tied to the bolts. Since this was to be a decorative project, I made a decorative base form and reused it for all 4 holes. This meant that I could only really pour one per day so it would be stiff enough to strip the form without damage.

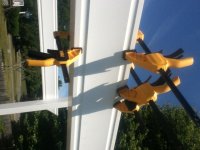
The base plates went on the posts OK, but being stainless (soft) the philips heads were starting to strip by the time the bolts were all the way in. Impact might have helped? Bolting the posts to the bases was fairly painless. I got lucky, once the posts were tight to the bases they were all plumb and I didn't need to shim any.


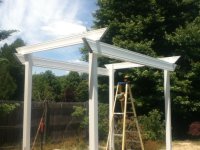
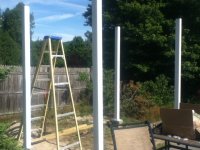
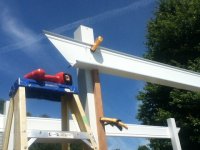
The "headers" and "rafters" are made from 2 pieces of extrusion which snap together. I made a design change from their instructions, I mounted the headers 6" lower than what they called for so that I could attach the end two rafters to the posts as well as to the headers (their directions only attach to the headers). This meant that the stiffness in narrow direction is improved, it doesn't just come from the post base plates. I used more screws, but they were very generous with the fasteners. There were at least two extra of everything. They gave me 125 screws, and I have maybe 20 left over even after using an extra dozen. Oh, and losing 6" of height was another reason to use the base form. It made it easier to level all the bases to each other because I only had to tweak how high the form sat.


All the mitered ends get covered with decorative end caps (I think die cast from the weight). The top slats are held on with double sided 3M tape, and they include spacer blocks to make setting the spacing easier. I measured and marked 10" from the end for the overhang, and then put all the marks facing up so you would not see them from the ground. Then the ends are screwed down with long screws and there are die cast caps for the slats, too.


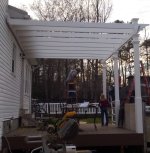
Overall, I like the look. The price was reasonable and included truck freight (hardware arrived separately UPS). The design appears to be robust, and since nothing is predrilled, it easily accommodated where I was off a bit in my base locations (about an inch the long way on the back posts, about half an inch the short way).
Time will tell if it holds up to sun, snow, and nor'easter winds.
Next part of the project will be a paver patio under and around it. Haven't decided which pavers I will use yet.
An aluminum deck vendor was mentioned in another thread, Aluminum Decking, Railing, Fencing, Pergolas and Deck Framing by Nexan Building Products and I was looking to see if they had something suitable to use to make a pergola. I was hoping to come up with something that would not rot or need regular repainting.
They not only had something suitable, they had complete kits in a number of sizes and a couple of styles so I ordered an 8x12 "economy" kit. Their deluxe kits have bigger fluted posts and double headers.
This is the the hardware that comes in the kit, self threading flathead screws mount the base plates to the posts. Everything else is put together with the painted self drilling sheet metal screws, except the top slats which use the longer galvanized screws. It also came with 3" wedge anchors, but I decided to embed carriage bolts in my concrete instead so would not have to wait for the concrete to be hard enough to take an anchor. I made a jig out of 3/4 ply with holes copied from a base plate.
I dug four 4' deep holes (frost depth in my area) with a hand auger and dropped in 8" sonotubes and a 10' chunk of rebar, bent double, resting on a half brick at the bottom of the hole. I also made a couple of "c" shapes from 1' rebar wire tied to the bolts. Since this was to be a decorative project, I made a decorative base form and reused it for all 4 holes. This meant that I could only really pour one per day so it would be stiff enough to strip the form without damage.
The base plates went on the posts OK, but being stainless (soft) the philips heads were starting to strip by the time the bolts were all the way in. Impact might have helped? Bolting the posts to the bases was fairly painless. I got lucky, once the posts were tight to the bases they were all plumb and I didn't need to shim any.
The "headers" and "rafters" are made from 2 pieces of extrusion which snap together. I made a design change from their instructions, I mounted the headers 6" lower than what they called for so that I could attach the end two rafters to the posts as well as to the headers (their directions only attach to the headers). This meant that the stiffness in narrow direction is improved, it doesn't just come from the post base plates. I used more screws, but they were very generous with the fasteners. There were at least two extra of everything. They gave me 125 screws, and I have maybe 20 left over even after using an extra dozen. Oh, and losing 6" of height was another reason to use the base form. It made it easier to level all the bases to each other because I only had to tweak how high the form sat.
All the mitered ends get covered with decorative end caps (I think die cast from the weight). The top slats are held on with double sided 3M tape, and they include spacer blocks to make setting the spacing easier. I measured and marked 10" from the end for the overhang, and then put all the marks facing up so you would not see them from the ground. Then the ends are screwed down with long screws and there are die cast caps for the slats, too.
Overall, I like the look. The price was reasonable and included truck freight (hardware arrived separately UPS). The design appears to be robust, and since nothing is predrilled, it easily accommodated where I was off a bit in my base locations (about an inch the long way on the back posts, about half an inch the short way).
Time will tell if it holds up to sun, snow, and nor'easter winds.
Next part of the project will be a paver patio under and around it. Haven't decided which pavers I will use yet.
Attachments
Last edited: