Creating a Lake

   / Creating a Lake #31  
<font color="blue"> It was explained to me that you always get compaction first, then go back later and put in what you have to.
</font>

Not sure why that's done. When they excavated my pond they compacted all the soil from the bottom of the core trench right up to the top of the finished dam. After it was all finished they came back and dug in the overflow. It seemed kinda backward to me but then I don't dig ponds for a living either. /forums/images/graemlins/frown.gif
 
   / Creating a Lake #32  
Go with the KISS theory on the spillway. A long, level, grass spillway will do everthing you need done and will save you money. Don't put the spillway on the dam and plant it heavy with grass and keep it mowed. I went this route with mine and have not regretted it.
 
   / Creating a Lake #33  
</font><font color="blue" class="small">( The spillway is my biggest mystery right now. )</font>

Eddie,

Know what ya mean. Unless you have a huge catchment area, I would avoid a spilway altogether. A 3' or 4' stand pipe will take care of 3-4 acres quite nicely, and avoid all the pitfalls of a spillway.

If you have a large catchment area, you better have a wide spillway, and a well made one at that!
 
   / Creating a Lake #34  
Eddie, My advice coming from lots of $$$$ experience is have the Texas Natural Resource guy for your area come out if your in AG they'll do it for free he was a great help after I lost my dam in the flood of July 2002 down here in Boerne. What he came up with was a spillway channel that is 200' long 10' wide and 8' deep that takes the water away from the dam site and then turns and puts it back in the creek and a 2' flow pipe. He gave me drawings and the Farm bureau helped me put it back they paid 60% and as it was a $10,000+ project I didn't refuse. /forums/images/graemlins/grin.gif The problem I've had is I still didn't make the spillway deep or wide enough currently at 10' wide and 8' deep the most recent rains still had water flowing a llittle over the dam. And also make sure you put the collars on your flow pipe I used a 40' long 2' wide corrugated pipe and thought this would be fine without the collars "wrong" if you do some pond searches there is a site that explains why and has some progressive pictures of what happens if you skip this step and it looks like they were taking pictures of the back of my dam so now as soon as we get a dry spell I'm going to have to dig my flow pipe back out and put the collars on. /forums/images/graemlins/frown.gif Anyway good luck on your dam it can be frustrating.
Steve
 
   / Creating a Lake #35  
have_blue has some valid points about sizing the spillway to the amount of run off you have. However I must respectfully disagree with him about not putting in a spillway. As far as a spillway being problematic and a stand pipe not, I have found just the opposite. When Momma nature decides to drop one of those freak storms on your pond, a stand pipe will not handle the overflow. A good grass spillway is the least expensive way to handle overflow. They must be flat and wide to create a smooth flow so not to create rapids, which will erode. I have put grass spillways on all of the ponds I have built and have yet to have a failure. I sure have seen a lot of problems with stand pipes. If you use a metal pipe it will eventually have to be replaced or if becomes plugged during the rainy season, you had better have an emergency overflow.
 
   / Creating a Lake
  • Thread Starter
#36  
I like the grass spillway idea allto. I'm gonna have to do some thinking on how to get it in and away from the dam. The dam is going in between my hill and the creek and will be shaped kind of like a "C"

That means that if I was to build a grass spillway, then it would have to be a fair distance off he side of the hill before the dam. It's possible if I can fit it in.

The large pipe with a sleeve is something I'm really trying to avoid. Even with the sleeve, I've heard of seepage.

My current favorite idea is to build a concrete spillway on the dam. This seems to be fairly common on the government dams, or the ones that aren't paid for out of the owners pockets.

I like the siphon allot, but realize it wont handle the heavy rains. A year and a half ago, we got over 12 inches of rain in a week. After the first inch, everything else just runs off.
 
   / Creating a Lake #37  
One trick to help prevent seepage around the stand pipe is to attach plastic around the pipe (like a sheet of plastic). When you set the pipe you let the plastic lay out flat and bury it. You can either glue the plasic to the pipe or tape it but what it does is make any water that wants to try and seep along the pipe go around it and the water does not usually stand a chance getting around it. Water wants to take the path of least resistance so give it resistance and don't worry.
 
   / Creating a Lake
  • Thread Starter
#38  
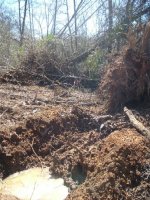
My next goal is to mark the shoreline and figure out where the dike will end. I've been calling it a dam, and that's not correct.

I'm runnning my laser level at 6 feet above the water level in the swamp. Current depth is around six inches but there are numerous spots with the water much higher then that.

This hole is from a root ball. It filled up overnight and is at the shoreline.

I'm unsure if it's a good thing having such a high water table, or will it be an issue.
 

Attachments

  • 601496-Lake 043.jpg
    601496-Lake 043.jpg
    85.6 KB · Views: 4,801
   / Creating a Lake
  • Thread Starter
#39  
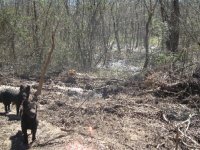
Blue (in front) is next to a flag marking the shoreline.

Just a few feet back is the hole that I created when I got my backhoe stuck a few weeks ago. The water is overflowing from that hole.

Behind that is another hole that is still a foot higher then the main swamp in the background.

Either I have numerous springs or the ground is totally saturated.
 

Attachments

  • 601502-Lake 045.jpg
    601502-Lake 045.jpg
    88.4 KB · Views: 3,891
   / Creating a Lake
  • Thread Starter
#40  
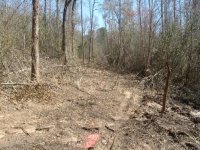
When I decided to explore the area I wanted to build the lake, all I knew was what I'd seen on a topo map.

This is my first pass into the area. The orange paint marks the shoreline.

I got really lucky the way it's all fitting together.
 

Attachments

  • 601506-Lake 046.jpg
    601506-Lake 046.jpg
    86.2 KB · Views: 4,421
 
Top