Finally, a barn built with our new connectors

   / Finally, a barn built with our new connectors #1  

wroughtn_harv

Super Member
Joined
May 12, 2002
Messages
6,055
Location
Denison, Texas
Tractor
2013 Volvo MC85C
It's been awhile in the making. And the inspiration for the whole thing started with two influences. One was a friend wanting me to come up with some new products his factory could manufacture. The other was all the interest shown here on TBN by members wanting a chance to build a metal building that would be strong, simple, and not require welding or equipment they needed to rent to do the job.

The patent application is in the mail. The attorney says I can now share it under "patent pending".

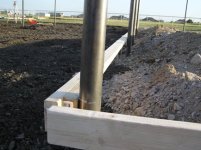
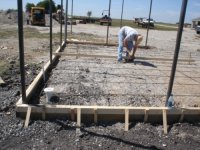
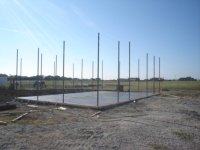
We're building a twenty four by forty shop with twelve foot walls, three-twelve pitch roof, and a sixteen foot overhang on each side. It'll have two twelve foot wide openings for roll up doors and one service entrance.

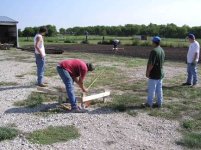
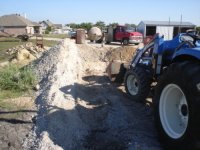
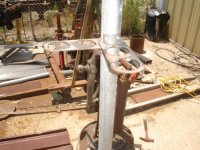
First we had to lay it out.
 

Attachments

  • 738413-the shop 021.jpg
    738413-the shop 021.jpg
    35 KB · Views: 1,826
   / Finally, a barn built with our new connectors
  • Thread Starter
#2  
Then we had to drill holes and set posts.
 

Attachments

  • 738421-the shop 055.jpg
    738421-the shop 055.jpg
    34.4 KB · Views: 1,256
   / Finally, a barn built with our new connectors
  • Thread Starter
#3  
After that is was time to form up the shop floor. This is a picture of the brick ledge kind of thing we do on metal buildings. We use a two by two (one and fiva eighths by one and five eighths) nailed to our forming lumber. This gives us a ledge for the sheet metal to go down bdside the slab and still have a floor so the varmints don't have easy acaess.
 

Attachments

  • 738429-the shop 097.jpg
    738429-the shop 097.jpg
    39.9 KB · Views: 1,379
   / Finally, a barn built with our new connectors
  • Thread Starter
#4  
One of the things we did was put in the plumbing in the slab for a restroom if one is ever required down the road. It only takes a couple of minutes now but would be a major project later. We put in the P trap and ran the three inch PVC beyond the wall. We also put in a future water source access.
 

Attachments

  • 738435-DSC01753.JPG
    738435-DSC01753.JPG
    85.8 KB · Views: 1,151
   / Finally, a barn built with our new connectors
  • Thread Starter
#5  
We mixed the concrete on site for the slab.
 

Attachments

  • 738437-DSC01758.JPG
    738437-DSC01758.JPG
    79.8 KB · Views: 1,105
   / Finally, a barn built with our new connectors
  • Thread Starter
#6  
It took a lot of sand, gravel, and cement. We started mixing about two in the afternoon. It took sixty mixer loads. We had it all poured just before eight in the evening.
 

Attachments

  • 738442-DSC01766.JPG
    738442-DSC01766.JPG
    83 KB · Views: 1,053
   / Finally, a barn built with our new connectors
  • Thread Starter
#7  
Now we'll measure up twelve feet from the slab and cut all the posts to height. The overhang posts will be cut about three feet four inches shorter than the barn posts.
 

Attachments

  • 738446-DSC01763.JPG
    738446-DSC01763.JPG
    74.4 KB · Views: 1,108
   / Finally, a barn built with our new connectors
  • Thread Starter
#8  
When everyone arrives Saturday morning for the barn raising we'll have the posts cut to size and they'll have a coat of primer.

What makes this work and what I've applied for a patent on is this principle.
 

Attachments

  • 738447-DSC01767.JPG
    738447-DSC01767.JPG
    71.4 KB · Views: 1,239
   / Finally, a barn built with our new connectors
  • Thread Starter
#9  
These come in rights, lefts, straight throughs. The idea is the brackets are placed on the posts and attached via self tapping screws. Then the four inch purlins are cut to fit between the posts and then attached to the brackets or connectors with self tapping screws.
 

Attachments

  • 738451-DSC01769.JPG
    738451-DSC01769.JPG
    78.4 KB · Views: 1,292
   / Finally, a barn built with our new connectors
  • Thread Starter
#10  
Originally I came up with one piece that was a right, a left, and a straight through. But then as I saw confusion in the eyes of those I showed them to I realized maybe offering three pieces would be easier for folks to understand.

This is a shot of a corner using the original design.
 

Attachments

  • 738458-DSC00817.JPG
    738458-DSC00817.JPG
    86.8 KB · Views: 1,283
 
Top