Retaining Wall and Concrete Paver Patio

   / Retaining Wall and Concrete Paver Patio #1  

besserheimerpha

New member
Joined
May 17, 2005
Messages
23
Location
Central Iowa
Tractor
JD G110
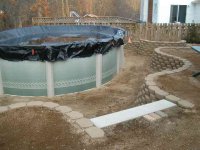
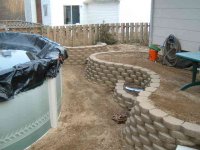
I am putting in a retaining wall and concrete paver patio this summer to replace what was lost after installing a septic system and a tearing out a neglected slab patio. I'm also installing some drainage to alleviate some of the problems that lead to the previous problems.

Does anyone have any tips, tricks or pointers before I get started on this in the coming weeks? This will be my first retaining wall, possibly with many more to come depending on how this experience goes. Also my first time laying pavers. Any help would be appreciated.

Thanks,

John
 
   / Retaining Wall and Concrete Paver Patio #2  
Do a google for ep henry pavers, versa lok, etc all the big names. they have how to's.

Also on diy network (tv) there is a show called rock solid. they do pavers all the time.

The way i was taught, was to excavate, then put in modified, crusher run etc. and tamp (3times). then using 1'' black gas pipe check for your slope and use this to screed sand on top of your modified. Smooth the sand with a trowel. Then set your pavers. use what you will to hold them in place, some people use the plastic, i use a 3 sand to one portland mix to just hold the bricks in place. then tamp the bricks. Once your done tamping brush sand in between, and hose. redo as needed.
***this is a very quick overview, watch an episode of rock solid, they have some great hints.***
I have just done my front walk way, i am doing my patio this summer, and i am going to use the concrete blocks to make two retaining walls, and about 4 planter beds. Here in Pa its stone with a little dirt, so the excavation part is a pain.
As far as i have seen, if your wall is over a certain height you should get the geo text. fabric. i will really hold up. some people i have talked to also said to back fill with gravel, put landscape fabric on top and then you can plant, and landscape.
happy digging. /forums/images/graemlins/laugh.gif
Forgeblast
 
   / Retaining Wall and Concrete Paver Patio #3  
Just to add a few things.

3/4 PVC pipe works good for setting your height when screeding the sand. It's one inch exactly and a board slides over it real nice.

Get a diamond dry blade for you saw to cut the stones. No point renting a saw when you can do it with a circular power saw. If you have a metal chop saw, that's even better. But I started out with my 7 1/4 inch circular saw. You can do retainig wall blocks too, just have to work your way around them.

Eddie
 
   / Retaining Wall and Concrete Paver Patio #4  
The size of your patio and the height and lenght of your wall(s) might dictate how you go about preparing to do your project. Pavers and wall stone are not cheap to buy but they last forever (80+ years they say). I checked out the internet and visted about six suppliers and looked at displays. I shot the breeze at a local supplier and explained what I was doing then listen real carefully to what I was told as to how things are done in this local. Here in Connecticut a wall about 42" or so and you might very well need a permit. Pitching a patio for draingage is a challenge as the size of the patio increases. Stairs of wall stone and cap stones were a lot of work, expensive and time consuming. Also it was tricky to calculate the set back of the wall stone as it increases for each layer of black and my project went from one block in height to four blocks over a distance. I made some stais out of trex (treated lumber support) that go up to the house and some further from the house on the lawn side of the patio of wall stone and cap stones. The wichester grey trex color is a basic match to the wall cap stones. Last summer I put down a small patio about 10'X10' and another patio about 38'X15', holland stone nicolock pavers [with coloring all the way thru the block] and unilock roman pisa II concrete wall stone to about 32" around most of the edge, plus about 16-30" of gravel and stone dust under it. A great base is real important. As you know if you are going to drive over your project you are probably looking at a 12"+ base. I ended up about two tons short on stone dust becaseu they delivered two tons less than I asked for. Used my utility trailer to make about five or six trips to pick up the two tons or so to save on delivery cost. I was able to buy the stone dust in five gallon buckets when I needed just a tad more to finish. (Gravel and stone dust used here easily exceeded 35 tons I'd say so kinda frustrating to be a few 5 gallon buckets short but nice to be able to buy in five gallon buckets!) I used good knee pads, a quality deadblow hammer to set the pavers, (cost about $35 worth every penny) a 24" level, two 48" levels and one 60" level. Beat the heck out of the 24" level as I dragged it as needed to level off rough spots (note that the "foundation" of gravel and stone dust under the wall stone needs to be pretty darn level and this is one good spot to use the 24" level. Also used a couple of torepedo style 8" levels on about half to three quarters of the blocks and individual pavers to make sure they were properly pitched/level. Also used a steel waterfilled hand roller to settle and level the base in about 6 -8 inch lifts, wetting the base down off and on. Next time I might use a rented vibrator/compactor but the rock dust I was using compacted real well. The pallets of gravel, pavers and wall stone are heavy (paver pallets I was told 3000+lbs) and when delivered the truck might have to stop a good distance from the poject to aviod wrecking the lawn. I thought my lawn would support the truck carrying gravel and I was wrong - only left about about fifteen feet of ruts cause we were watching closely. Seeing the paver pallets and wall stone pallets stacked two high up to about six feet did make me ask myself if I was in over my head - sweated a lot on delivery day over that. Thank goodness for the tractor to help move most of this to where it was needed. I still moved most of it by hand to get it in the loader bucket or to walk it more than fifteen feet to lay it down. My project was not readily susceptible to staging the pallets. If I could in all future projects I would try to plan on getting the pallets delivered to the exact spot where I can put the pavers down from so I do not have to move the bricks anymore than needed. Making the wall nearly perfectly straight over more than 30 feet was not as easy as I reckoned it would be. Used masonary string to lay things out: bright color, limited stretch and tuff enough to be out in the weather for a year and still usable even today (just outside tonight laying out another paver project with last years string) and some precut stakes I got at home chepo. No doubt I could have done this all more efficiently and smarter but I had a heck of a lot of fun doing this and rate this as one of my more satisfying projects even though I worked real hard. Be prepared to change your design as you build because you might come up with a better way of doing something as you are able to visualize your work. Have fun!
 
   / Retaining Wall and Concrete Paver Patio #5  
I helped a hardscaper part time a few summer's back. You have gotten some good advice so far but I'll add more. I never did a retaining wall but a lot of paver's.
As said before it start's and really end's with the base. You need to dig out 6 inches for a walk/patio or 12" for a drive plus if I remember correct 3.5" on EP Henry Paver's" below your final grade. Then lay down landscape fabric allowing enough to go up the side's also. Then lay down 3" of quarry blend "that is what it is called here" keep it as even as possible then run a plate tamper over it a few times. Then add more to get you up to your 6" of even compacted base this part takes the most effort and if not done right could lead to paver's being uneven in a few years. Now it goes fast lay down 1" pipes and throw in the sand and screed. Stay off the screeded sand. Then pull or slide pipe's depends on how far you can reach placing the paver's and fill in the void left from the pipe. Now lay your paver's in the pattern that you choose note if possible design with min cut's. Now place your edging hammering spikes in at an angle toward's the paver's. Throw sand on top and sweep in, tamp, sweep in, tamp, etc till cracks are filled. You could now seal it or leave it be. I like the look's of it with out the sealer. Now most important sit back with a beverage of your choice and enjoy your handy work if you can move. Doing this work is the hardest work I have done that's including unloading hay from sun up to sun down
 
   / Retaining Wall and Concrete Paver Patio #6  
In CA any retaining wall over 3' requires a permit and engineering.

The design strength of a retaining wall neeeds to be proportional to the cube of the height. For instance a 5' wall needs to be 125 times as strong at the base as a 1' wall, and approx 5 times as strong as a 3' wall.

Depending on the wall height, you may also need a key. Get an engineer to design it for you, the cost is minimal compared to the cost & effort of re-building it.
 
   / Retaining Wall and Concrete Paver Patio
  • Thread Starter
#7  
Thanks for the info guys. I had already talked with some professionals and professional "do-it-yourselfers" and had a pretty good idea of what I needed to do, but I tend to do things the hard way. I didn't know if there were any tricks that might make the grading easier, or a better way to split/cut the blocks, etc etc. Thanks again.
 
   / Retaining Wall and Concrete Paver Patio #8  
Go to the Keystone and Pavestone web pages; a Google search will find them. Both have excellent information on building walls with various block.

Of particular note, get the foundation dug out, filled with a good base gravel, and level it level it level it level it. Did I mention level it? If you get the foundation/base level dialed in right, the rest is easy, piece of cake. If not; you will fight it every block you lay.

Make sure you get your drainage behind the wall.

Make sure to backfill with gravel behind the wall as illustrated by the manufaturer, and compact it well.

Personally, one of my favorites is Keystone "Country Manor". It is a really nice looking stone. It is a pin system, and has alignment holes to allow forward and backward offsets. I like to mix a couple colors for texture. While doing that, I like to put random blocks offset forward here and there; it really lends a nice texture to the wall. Country Manor is the blocks shown on the Keystone main web page.

Your mileage on availability will vary by region; different parts of the country have different manufacturers and availability.

Another poster also mentioned, check height requirements. In many area's any wall over 3', concrete, wood or whatever, has to be engineered...

Check out the various styles out there. The Keystone "Legacy" style is made by most companies, and is an ok block. But, it looks real industrial; there are lots nicer blocks for working around home.
 
   / Retaining Wall and Concrete Paver Patio #9  
Just finished this one- boy mu back hurts! /forums/images/graemlins/crazy.gifthe walkway & patio are in more pics to follow.
 

Attachments

  • 860607-wall2.JPG
    860607-wall2.JPG
    27.4 KB · Views: 2,034
   / Retaining Wall and Concrete Paver Patio #10  
here's another view
 

Attachments

  • 860610-wall3.JPG
    860610-wall3.JPG
    27.4 KB · Views: 1,945
 
Top