EddieWalker
Epic Contributor
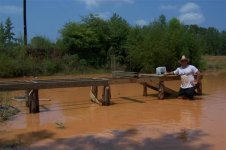
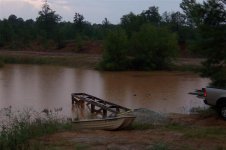
I have a small 3/4 acre pond near the front of my land and close to my house. With the drought we've been having, it's about three feet low right now and I've been thinking about building a small pier on it.
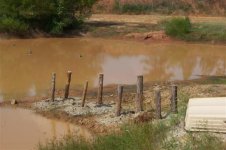
I have quite a bit of scrap lumber that I could use, plus a bunch of cedar logs that I think should work for posts. The posts have been my sticking point on getting started on this. The water has been down for awhile, and I've been kicking this around in my head for about a year now without coming up with the perfect solution.
The pond will have a fence all around it and be part of a longhorn pasture that will be part of my entrance. Nobody will be allowed near the pond or on the pier except us. It's just a place to sit and feed the fish type of thing, so safety isn't an issue.
Having it last is my problem. After weighing the options, I went with cedar because I think it will last just as long as PT wood from the stores. Steel and concrete would have been better, but this is also a project without a budget. No money for it as I have other priorities.
The first thing, and the hardest, was to measure out where it would fit and how I'd tie it into the bank. I decided on 24 feet long and a frame 3 feet wide with decking to be 4 feet wide.
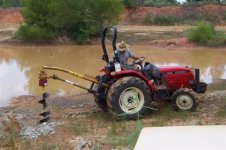
Here's my Centruy 2535 CUT with my Limbach Line post hole digger and 12 inch auger. I'm drilling 8 holes for posts in the exposed bottom of my pond.
Eddie
I have quite a bit of scrap lumber that I could use, plus a bunch of cedar logs that I think should work for posts. The posts have been my sticking point on getting started on this. The water has been down for awhile, and I've been kicking this around in my head for about a year now without coming up with the perfect solution.
The pond will have a fence all around it and be part of a longhorn pasture that will be part of my entrance. Nobody will be allowed near the pond or on the pier except us. It's just a place to sit and feed the fish type of thing, so safety isn't an issue.
Having it last is my problem. After weighing the options, I went with cedar because I think it will last just as long as PT wood from the stores. Steel and concrete would have been better, but this is also a project without a budget. No money for it as I have other priorities.
The first thing, and the hardest, was to measure out where it would fit and how I'd tie it into the bank. I decided on 24 feet long and a frame 3 feet wide with decking to be 4 feet wide.
Here's my Centruy 2535 CUT with my Limbach Line post hole digger and 12 inch auger. I'm drilling 8 holes for posts in the exposed bottom of my pond.
Eddie

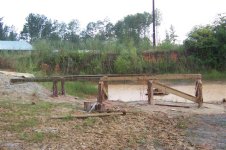
") Very nice job! All you need is the fishin pole now
Very nice job! All you need is the fishin pole now