CUT Box Blade Newbie - Road Pictures

   / CUT Box Blade Newbie - Road Pictures #21  
Obed, looks like your road is shaping up. Nice pics and description.Don't forget you have the FEL. You can use it to help grade up the road too.
 
   / CUT Box Blade Newbie - Road Pictures
  • Thread Starter
#22  
dirtworksequip said:
Obed, looks like your road is shaping up. Nice pics and description.Don't forget you have the FEL. You can use it to help grade up the road too.

Thanks dirtworksequip. I saw on your posting that you back-graded with your front frame mounted blade. ROAD MAINTENANCE/EQUIPMENT with PICS Sounds like a technique I need to try. When it gets dry enough to fine-tune my road, I'll need to smooth out all the tire ruts. I've been wondering how to do that. I've been concerned that the box blade will dig and move too much dirt and soften everything up again. I'd like a nice firm surface before adding gravel.
 
   / CUT Box Blade Newbie - Road Pictures #23  
To put 1" (loose) of gravel on 300' of road @ 8' wide, would take 7 1/2 cu yds. That's really not much at all. I am a gravel contractor in Canada. I would recommend having 20 yd spread on it in 2 passes - likely in & out, with about a 3' overlap in the center - to build up the crown. Then don't hesitate to add 10 yd yearly for the next 3 years. After that you can likely cut back to every 2nd or 3rd year. Maybe a small pile in your yard that you can dig into with your FEL to fix up any trouble spots might be a very good idea too.

As far as what size of gravel to get...3/4" or 1" maximum size. crushed gravel preferrably, as the rough crushed edges tend to lock the stones into place. Round material tends to shift around. Stay away from 'pit-run' gravel....unless it is 2" or smaller, the big, round stones are even worse than small ones.

You may want to look into finding some larger 'rip-rap' stone (4 to 6") to place across your new ditch to slow the flow of the water running down it. or even a few straw bales if you have access to them. This will give a chance for some vegetation to grow and stop the erosion.
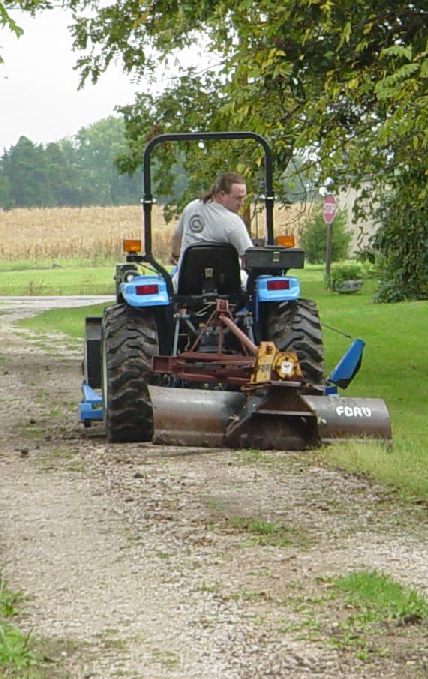
 
   / CUT Box Blade Newbie - Road Pictures #24  
Obed,
Way to go using your new (used) boxblade. You are doing exactly what you need to do and that is get out there and try different settings and adjustments until you get the hang of it. I learned just like you are doing and I have been maintaining my 3,000' road for a year and a half now. I've cut gutters and crowned the road often. I've also pushed in a bunch of new roads on my property using various boxblade techniques. You may have seen this thread? Pushing in New Roads and Trails or this one about preparing a food plot and plowing with the box blade? Plowing Food Plot

There are numerous things you can do with the boxblade. I love mine so much I converted it to have gear driven hydraulic rippers. If you want an easier time of adjusting the boxblade, get yourself a hydraulic top link and side tilt cylinders. Then you can adjust on the fly without ever having to get off the tractor.
 
   / CUT Box Blade Newbie - Road Pictures #25  
the the box blade is king for cutting and moving material....

a rear blade is king for road maintance. IT allows you to angle the blade both right and left but also tilt to add crown (although this can be done with the 3point tilt also)

the nice thing about a rear blade as opposed to driving diagonally from the side of the road across your ditch to move the material, you could have tilted and angled the blade to bring material from the outside edge up and into the hole while driveing in a straight line.

with that much road to work on, id suggest lookign into getting one.

a pic with mine
rear_blade2.jpg


as you can see im tilted to the right, and set to pull the material to the center. You can see the rut in the right side of the driveway and high side on the right meaning it would hold water in this rut. My 72" landpride blade also allows me to shift the blade left/right to offset so i can pull material from nearly 2 feet outside my rear tire in/out. I one pass i cut nearly 4" off the high side at the middle of the blade and evenly deposited the material in the center in the low area giveing the driveway a nice crown overall.
 
   / CUT Box Blade Newbie - Road Pictures #26  
You did a good job and like Rob said the best way to learn is with your backside on the seat. It looks good to me, but will suggest you try to keep as much organic material as possible out of the road, as it will rot and leave holes/soft spots.
I also know what you mean on the quality control on the BB. Mine has 3 holes and a pin with a clip that holds them in place. The grove that the keeper goes into is in a different place on most ever pin, sure makes it a pain to change the rippers. Later, Nat
 
   / CUT Box Blade Newbie - Road Pictures #27  
Obed, if you have the time to wait for dry weather that will be your best time to grade the road and then put the stone on. If its wet the stone trucks will rut up your subgrade and make a mess plus track mud onto your nice clean stone. Wait for dry weather and you will get a nicer job and will use less stone as its not going to get tore up as it would if its wet out. Someone suggested going with 3 inches. Thats just not enough to hold up. Do it right the first time around with 5 to 6 inches and have agood road from the start. If you can afford it go with 8 inches. You will never be sorry that you did. I'll post some pics of a road I am just starting to give you an idea of what a good subgrade should look like and what a bad subgrade looks like.
 
   / CUT Box Blade Newbie - Road Pictures
  • Thread Starter
#28  
speedy67 said:
Maybe a small pile in your yard that you can dig into with your FEL to fix up any trouble spots might be a very good idea too.

That's something I hadn't thought about. Great idea speedy67.
 
   / CUT Box Blade Newbie - Road Pictures
  • Thread Starter
#29  
3RRL said:
Obed,
You may have seen this thread? Pushing in New Roads and Trails or this one about preparing a food plot and plowing with the box blade? Plowing Food Plot

... If you want an easier time of adjusting the boxblade, get yourself a hydraulic top link and side tilt cylinders. Then you can adjust on the fly without ever having to get off the tractor.

3RRL, I enjoyed readying about your road. Fortunately I don't have to worry about the boulders like you do. Yes the hydraulic top link and side tilt cylinders would be wonderful. However, I'm sure I couldn't get the boss to go for it. For some reason she wants a house. We've lived in an RV for 8 of the past 10 years saving our money. We're in our 40's. Now I might get her to go for the hydraulic adjustments if she gets a house out of the bargain! Our property is in a rural area 90 minutes from where I work in the city. We're evaluating the work situation to see when it makes sense to move to the property and build.
 
   / CUT Box Blade Newbie - Road Pictures
  • Thread Starter
#30  
schmism said:
the the box blade is king for cutting and moving material....

a rear blade is king for road maintance.

schmism,
Great picture using your blade. Thanks for posting it. I'd love to be able angle the blade to drag gravel back onto the road like you can with yours.

However for me it was either get the BB or get the blade; couldn't get both. For now I have a lot of dirt I need to move so the BB makes the most sense for me. In addition to the 1600 feet of road to the camper/home site that I need to maintain, I have another 1/2 mile of road on the property that needs fixing. This other road has a very steep section for about 1000 feet that is in much worse shape than the road I just graded. I'll probably need a dozer to fix it right but might try to band-aide it with my BB, FEL, and backhoe. Until I fix the other road, I can only get my tractor to 20% of my property. I tried to take my tractor down the road once but had to stop; it was just too scary.
 
 
Top