Phesants to cattle: A complete barn conversion

   / Phesants to cattle: A complete barn conversion #1  

dcyrilc

Super Member
Joined
Nov 8, 2009
Messages
5,488
Location
Woodinville, Washington
Tractor
John Deere 2240 MFWD
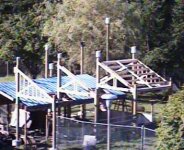
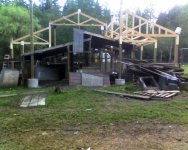
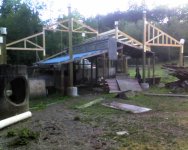
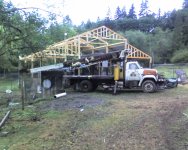
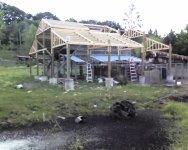
My barn conversion/rebuild project keeps coming up in conversations, so I decided to start a thread about it.

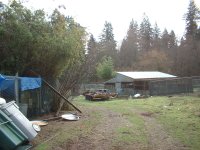
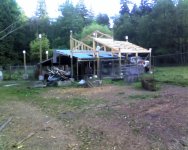
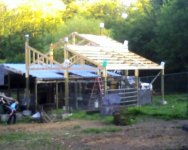
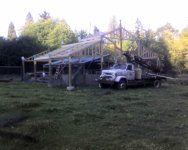
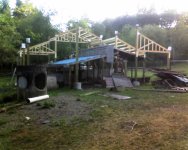
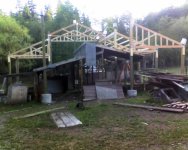
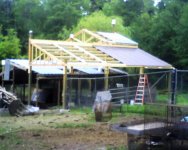
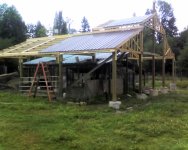
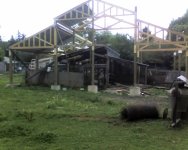
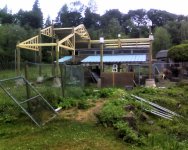
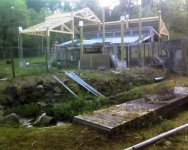
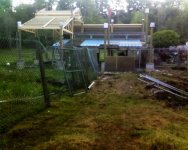
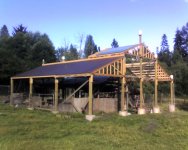
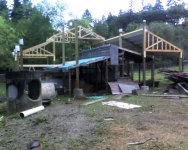
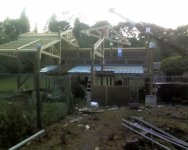
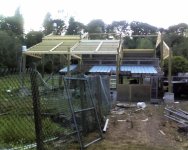
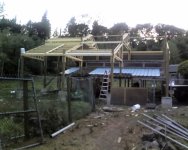
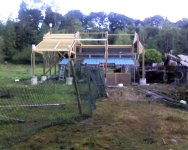
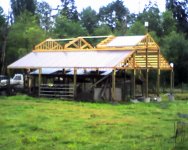
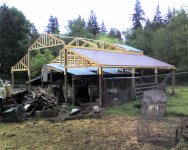
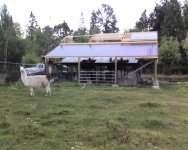
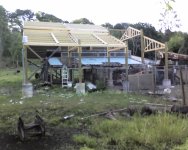
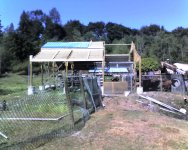
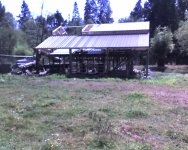
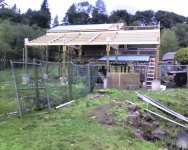
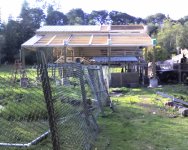
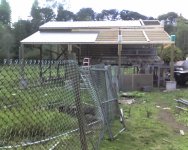
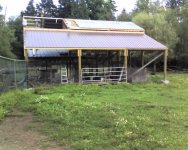
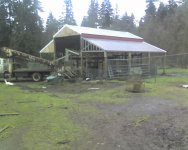
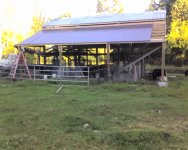
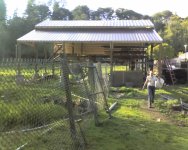
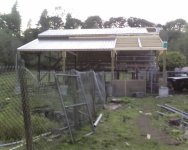
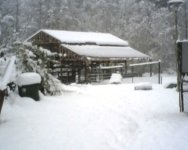
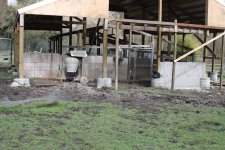
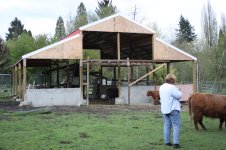
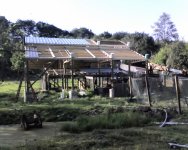
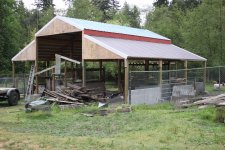
20-25 years ago, I used to raise ornimental phesants and built a 42x36 foot barn for doing so. We got out of the phesants about 15 years ago and started raising cattle 11 years ago. The origional barn was built with 9x18 foot flights and a 5 foot center walkway. It had a dirt floor of peaty soil and was covered over the center section and had the outer 9 feet on each side covered with galvenized welded wire. Needless to say this was not a great design for cattle as the floors would turn to mud very quickly when the cows were in the barn.

Here's a picture of the origional barn.
 

Attachments

  • Barn.jpg
    Barn.jpg
    328 KB · Views: 422
   / Phesants to cattle: A complete barn conversion #2  
Things being tipped over, did a tornado hit?

Are you going to lay down some concrete, or gravel base in the barn?
 
   / Phesants to cattle: A complete barn conversion
  • Thread Starter
#3  
Three years ago, I decided to rebuild the barn for handling cattle. Here are some pix from the first summer (2008). The only thing I got done that year was to get the new posts in and a roof over it. One thing to keep in mind as you go through the pix is that for the first two years of the rebuild/conversion, I had animals in this pasture the entire time so the pasture had to remain secure.
 

Attachments

  • Barn 002.jpg
    Barn 002.jpg
    32.4 KB · Views: 215
  • Barn 003.jpg
    Barn 003.jpg
    126 KB · Views: 220
  • Barn 004.jpg
    Barn 004.jpg
    113.1 KB · Views: 184
  • Barn 005.jpg
    Barn 005.jpg
    128.4 KB · Views: 185
  • Barn 015.jpg
    Barn 015.jpg
    95.3 KB · Views: 232
  • Barn 008.jpg
    Barn 008.jpg
    94.4 KB · Views: 179
  • Barn 007.jpg
    Barn 007.jpg
    107 KB · Views: 170
  • Barn 006.jpg
    Barn 006.jpg
    107.8 KB · Views: 175
   / Phesants to cattle: A complete barn conversion
  • Thread Starter
#4  
More pix.
 

Attachments

  • Barn 017.jpg
    Barn 017.jpg
    103 KB · Views: 158
  • Barn 018.jpg
    Barn 018.jpg
    116.2 KB · Views: 151
  • Barn 019.jpg
    Barn 019.jpg
    94.8 KB · Views: 134
  • Barn 020.jpg
    Barn 020.jpg
    136.6 KB · Views: 131
  • Barn 027.jpg
    Barn 027.jpg
    125.6 KB · Views: 157
  • Barn 026.jpg
    Barn 026.jpg
    137.3 KB · Views: 140
  • Barn 025.jpg
    Barn 025.jpg
    127.4 KB · Views: 187
  • Barn 024.jpg
    Barn 024.jpg
    153.6 KB · Views: 154
  • Barn 030.jpg
    Barn 030.jpg
    103.8 KB · Views: 127
  • Barn 032.jpg
    Barn 032.jpg
    122.3 KB · Views: 209
   / Phesants to cattle: A complete barn conversion
  • Thread Starter
#5  
Things being tipped over, did a tornado hit?

Are you going to lay down some concrete, or gravel base in the barn?

Patience my friend, patience.:laughing:
 
   / Phesants to cattle: A complete barn conversion
  • Thread Starter
#6  
I forgot to mention that the origional barn was built with the slope of the land and the conversion will be level.

I used my torpedo laser level to get the tops of the concrete coloms for the posts close to level. After all the posts were in, I rented a cervey laser to establish a true level line on each post. After all the posts were marked, I went around and measured down and decided that the line would represent 3 feet above final grade for the barn floor. I then could measure up 5 feet from the line to locate the bottom of each truss on it's poles and have everything be level for construction.

Here are more pix from the first summer.
 

Attachments

  • Barn 048.jpg
    Barn 048.jpg
    127.8 KB · Views: 112
  • Barn 044.jpg
    Barn 044.jpg
    119.9 KB · Views: 111
  • Barn 043.jpg
    Barn 043.jpg
    103 KB · Views: 122
  • Barn 039.jpg
    Barn 039.jpg
    137.3 KB · Views: 130
  • Barn 049.jpg
    Barn 049.jpg
    153 KB · Views: 146
  • Barn 052.jpg
    Barn 052.jpg
    115.9 KB · Views: 145
  • Barn 054.jpg
    Barn 054.jpg
    147.7 KB · Views: 117
  • Barn 055.jpg
    Barn 055.jpg
    157.9 KB · Views: 133
  • Barn 062.jpg
    Barn 062.jpg
    119.3 KB · Views: 539
  • Barn 058.jpg
    Barn 058.jpg
    122.8 KB · Views: 145
   / Phesants to cattle: A complete barn conversion
  • Thread Starter
#7  
The roof is finally getting closer as fall approches. The steel from the origional barn was moved straight up for the upper roof of the new barn and the lower roof got new steel.
 

Attachments

  • Barn 065.jpg
    Barn 065.jpg
    117.7 KB · Views: 125
  • Barn 072.jpg
    Barn 072.jpg
    152.9 KB · Views: 127
  • Barn 077.jpg
    Barn 077.jpg
    152.4 KB · Views: 119
  • Barn 081.jpg
    Barn 081.jpg
    163.7 KB · Views: 110
  • Barn 089.jpg
    Barn 089.jpg
    169 KB · Views: 131
  • Barn 087.jpg
    Barn 087.jpg
    136 KB · Views: 115
  • Barn 085.jpg
    Barn 085.jpg
    139.8 KB · Views: 135
  • Barn 084.jpg
    Barn 084.jpg
    147.7 KB · Views: 124
  • Barn 092.jpg
    Barn 092.jpg
    148.6 KB · Views: 103
  • Barn 097.jpg
    Barn 097.jpg
    148 KB · Views: 137
   / Phesants to cattle: A complete barn conversion
  • Thread Starter
#8  
Finally the roof is done just in time for winter.
 

Attachments

  • Barn 118.jpg
    Barn 118.jpg
    116.5 KB · Views: 162
  • Barn 113.jpg
    Barn 113.jpg
    124.6 KB · Views: 130
  • Barn 105.jpg
    Barn 105.jpg
    139.4 KB · Views: 117
  • Barn 100.jpg
    Barn 100.jpg
    98.1 KB · Views: 127
  • Barn 115.jpg
    Barn 115.jpg
    81 KB · Views: 140
  • Barn 116.jpg
    Barn 116.jpg
    77.2 KB · Views: 143
  • Barn 117.jpg
    Barn 117.jpg
    71.2 KB · Views: 171
   / Phesants to cattle: A complete barn conversion
  • Thread Starter
#10  
Are you going to lay down some concrete, or gravel base in the barn?

OK, time to address your question. Yes.:D:D:D:D


One of the things I decided over the winter was that I wanted to have concrete for the lower portion of the walls as well as the floors. I want to be able to hose out the stalls without worrying about the bottom of the walls rotting.

The solution I came up with was to poar a footing and wall the same way the foundation for a house is built, but to do it between each post.

There will be 16 concrete wall sections in the barn. One of the problems I faced was that the materials to properly form each wall section was around $300. I also could not put a concrete truck into the barn to poar the walls for two reasons.
1) The origional barn structure was still being used to create the walls to keep the pen secure and,
2) The peaty soil in the floor would not handle the weight of a cement truck.

My solution to this was to decide to poar the walls by hand from bags. When I did the math, it was actually quite a bit cheaper to do it with bags than to buy all the extra form material and rent a pump truck.

Last summer (2009), I mixed and poared 11 wall sections. A rough total of 48,000 lbs of concrete. I did each wall section in two poars. The footing followed a day or two later with the actual wall. I did one wall section each week for 11 weeks. This pretty much killed the summer.:laughing:

Here are pix of the wall sections getting put in. Finish grade for the floor will be approximately 5" above the top of the concrete columns.
 

Attachments

  • Barn 122.jpg
    Barn 122.jpg
    1 MB · Views: 182
  • Barn 123.jpg
    Barn 123.jpg
    1 MB · Views: 156
  • Barn 124.jpg
    Barn 124.jpg
    1.1 MB · Views: 162
  • Barn 127.jpg
    Barn 127.jpg
    886.2 KB · Views: 174
  • Barn 134.jpg
    Barn 134.jpg
    1.1 MB · Views: 141
  • Barn 139.jpg
    Barn 139.jpg
    1.1 MB · Views: 140
  • Barn_001.jpg
    Barn_001.jpg
    1 MB · Views: 146
  • Barn_006.jpg
    Barn_006.jpg
    786.8 KB · Views: 173
  • Barn_016.jpg
    Barn_016.jpg
    1 MB · Views: 215
  • Barn_018.jpg
    Barn_018.jpg
    1 MB · Views: 156
  • Barn_022.jpg
    Barn_022.jpg
    1.1 MB · Views: 162
 
Top