Teikas Dad
Gold Member
I'm sure you guys got tired of me asking questions,well I finally got off my butt and did it. I've been planning, agonizing, asking advice for the past month and practicing my welding in preparation of adding hooks on the FEL bucket of my B3200.
To all of you who put up with my endless newb questions, thank you. Your input and guidance (particularly Shield Arc) was a great deal of help.
I have the Kubota quick release on the FEL so I figured to protect the electronics on the tractor I'd drop the bucket. I couldn't believe how easy the quick release worked. Roll the bucket all the way back, pull two hitch pins and pull out the two lower pins in the mount. Roll the bucket forward (at ground level) and the bucket comes right off. Took all of about 30 seconds. When I got done, putting the bucket back on was just the opposite action and again, took about 30 seconds. Kubota did a nice job with their system. The other thing about Kubota that impressed me was the paint job on the bucket. I used a flap sander on my angle grinder to get clean metal at all the areas I was going to weld. The paint was rally thick, they put a lot into making sure the bucket was protected from the elements.
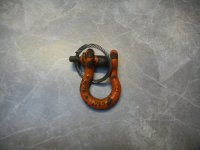
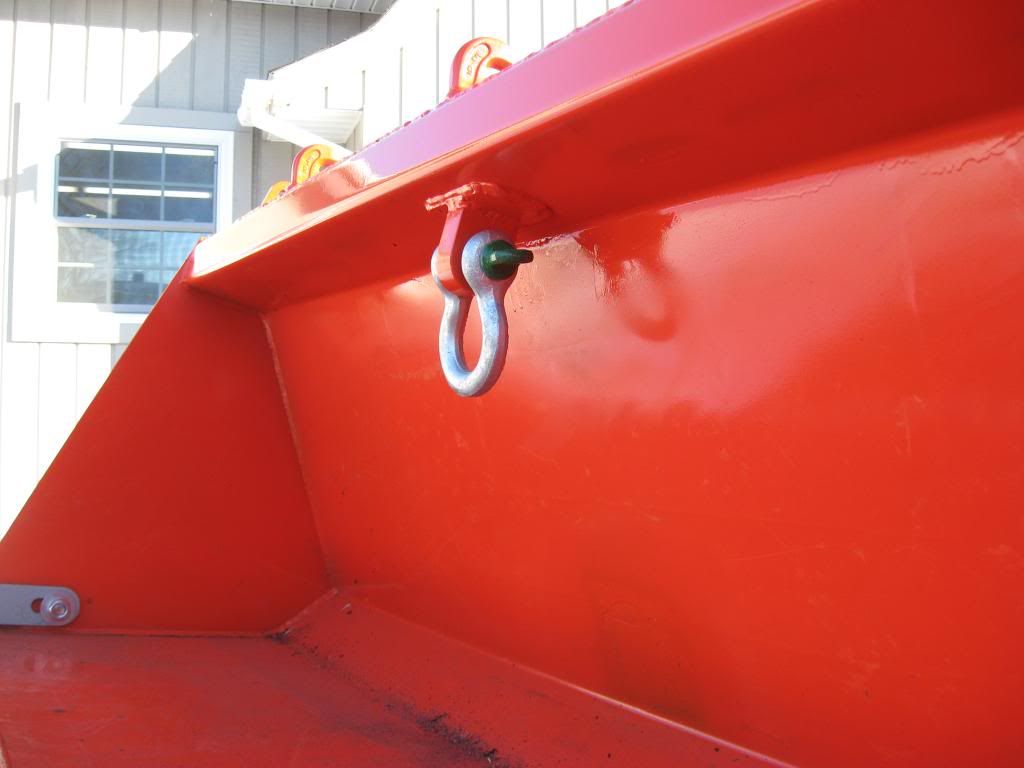
I welded one hook onto a mounting plate that I bought from Ken's on the lower portion of the rear of the bucket. I also welded a shackle mount to one of Ken's plates and welded it to the underside of the bucket lip inside the bucket. Combined with a clevis shackle I can use that for a single point lift using straps for lighter items.
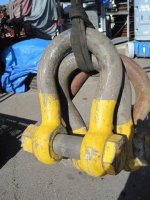
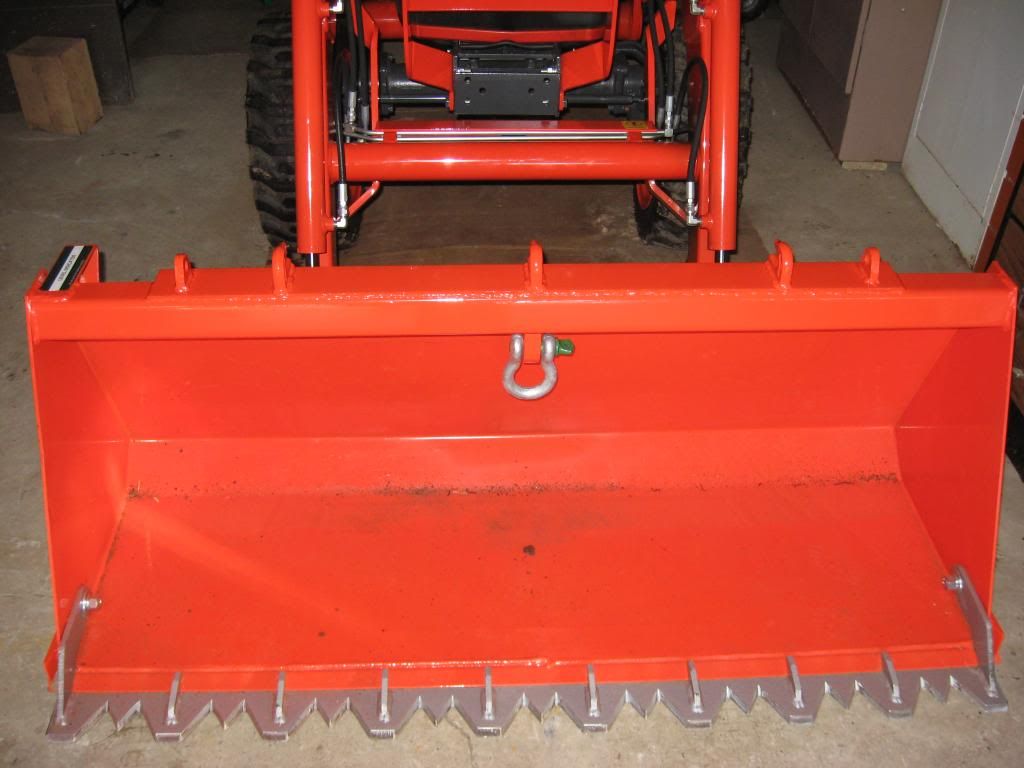
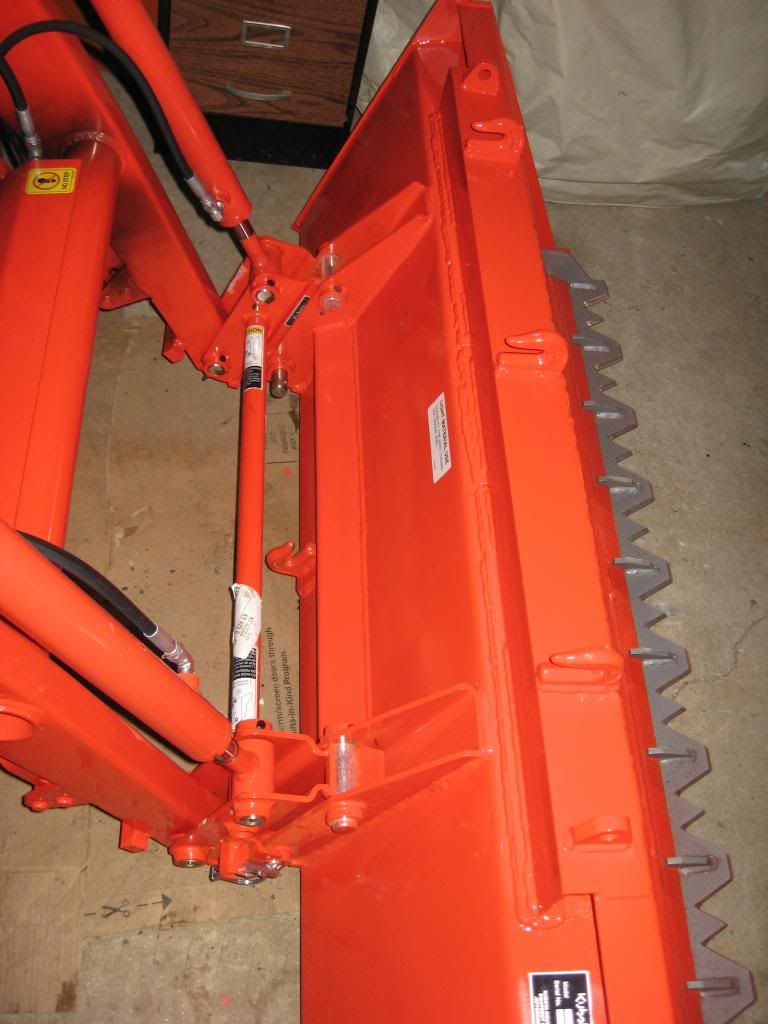
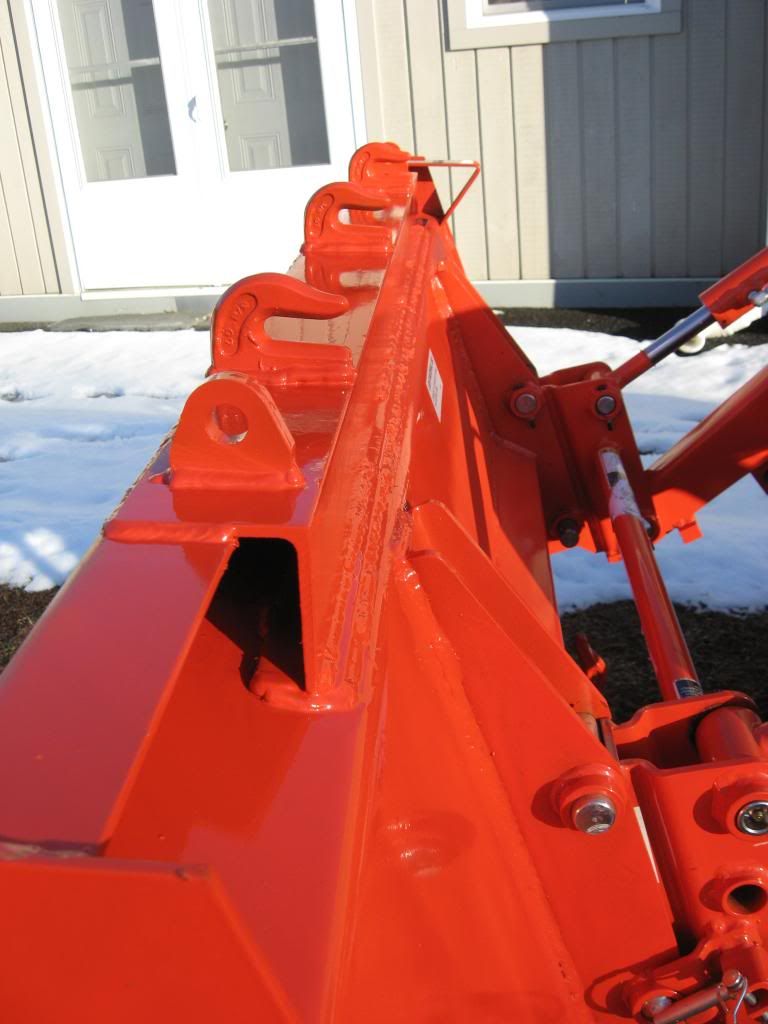
I got a length of 3/16X3X3 angle to set on top of the bucket lip which would then be welded to the lip and to the back of the bucket. This was my only problem of the day. When I measured everything up and bought the angle I forgot about the 3/16" thickness of the angle. When I set the angle flat on top of the lip there was a 3/16" gap under the vertical leg on the back. Fortunately I had some 3/16"X 1 1/2" flat stock in the shop. I welded the flat stock to the back of the bucket and then set the angle on it and welded the angle to flat stock. I stitch welded everything and moved from front to back and left side to right side when I made each weld in order to not overheat the bucket. One solid bead would have looked better, but I didn't want a warped bucket. I took my time and continued welding in the gaps until I had a solid bead all the way across the front edge and bottom leg of the angle. Hooks went on with no problem, 1 in the center and the other 2 centered on the FEL arms. Then I added 2 small shackle mounts that I got from Ken's outboard of the hooks, again just for lighter lifts with nylon straps. I didn't run the angle all the way across the bucket as the FEL is only rated for 900 to 1,000 lbs so I won't be lifting anything too heavy.
Primed then painted it all up with Kubota orange paint and this is how it came out.
To all of you who put up with my endless newb questions, thank you. Your input and guidance (particularly Shield Arc) was a great deal of help.
I have the Kubota quick release on the FEL so I figured to protect the electronics on the tractor I'd drop the bucket. I couldn't believe how easy the quick release worked. Roll the bucket all the way back, pull two hitch pins and pull out the two lower pins in the mount. Roll the bucket forward (at ground level) and the bucket comes right off. Took all of about 30 seconds. When I got done, putting the bucket back on was just the opposite action and again, took about 30 seconds. Kubota did a nice job with their system. The other thing about Kubota that impressed me was the paint job on the bucket. I used a flap sander on my angle grinder to get clean metal at all the areas I was going to weld. The paint was rally thick, they put a lot into making sure the bucket was protected from the elements.
I welded one hook onto a mounting plate that I bought from Ken's on the lower portion of the rear of the bucket. I also welded a shackle mount to one of Ken's plates and welded it to the underside of the bucket lip inside the bucket. Combined with a clevis shackle I can use that for a single point lift using straps for lighter items.
I got a length of 3/16X3X3 angle to set on top of the bucket lip which would then be welded to the lip and to the back of the bucket. This was my only problem of the day. When I measured everything up and bought the angle I forgot about the 3/16" thickness of the angle. When I set the angle flat on top of the lip there was a 3/16" gap under the vertical leg on the back. Fortunately I had some 3/16"X 1 1/2" flat stock in the shop. I welded the flat stock to the back of the bucket and then set the angle on it and welded the angle to flat stock. I stitch welded everything and moved from front to back and left side to right side when I made each weld in order to not overheat the bucket. One solid bead would have looked better, but I didn't want a warped bucket. I took my time and continued welding in the gaps until I had a solid bead all the way across the front edge and bottom leg of the angle. Hooks went on with no problem, 1 in the center and the other 2 centered on the FEL arms. Then I added 2 small shackle mounts that I got from Ken's outboard of the hooks, again just for lighter lifts with nylon straps. I didn't run the angle all the way across the bucket as the FEL is only rated for 900 to 1,000 lbs so I won't be lifting anything too heavy.
Primed then painted it all up with Kubota orange paint and this is how it came out.
Last edited:
")