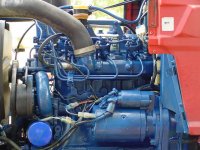
Piston Inspection/Assembly/help

   / Piston Inspection/Assembly/help #21  
I hate it when that happens that you lose a post that you have just typed up. :mad: It is frustrating.

Oh well!! svcguy is steering you straight. If the rods are good to go then oil pump and mains will also be ok. This is also true for the wrist pin bushings in the top end of the rod. Unless it was run low on oil, they should also be ok. On the blck just remove the high spots and smooth everything out. Do not destroy the machined fit by honing.

make sure that you clean everything carefully and torque everything accurately and there should not be any surprises.:eek:

Looking to hear that she is back up and purring like a kitten.:cool:

Mike
 
   / Piston Inspection/Assembly/help
  • Thread Starter
#22  
Svcguy, yes pressing in the wrist pin bushings.

Guys, I dremelled the inside of the cyl block where the sleeves will go. just wanted to cleann those stone marks out. Thought a pass with a hone would be acceptable?

Svcguy, how much of the sleeve retainer do I use per sleeve?

Ok, I will wait on injectors.


The rod bearings did show wear. I used plastigauge with old bearing and it showed over .002. So, with this information you guys are saying that there is a good chance the mains will be ok? That is what I am hoping.


Appreciate your help and will let you know how assembly goes.

Best Regards,

Jim
 
   / Piston Inspection/Assembly/help #23  
Hi Jim,

I wouldn't worry about the dremel marks. Once the sleeve is in, very few people will ever know they are there. Just make sure everything is really clean. If you are concerned, just take a piece of fine emery and touch up the dremel marks by hand. You really don't want to mess with the fit.

I would expect some wear on the rod bearings regardless, but mains hold up much better than rod bearings, unless you were running the engine with no oil at some time, I wouldn't worry. If the rod bearings were totally galled and damaged from oil starvation, it would be worthwhile to pull a cap and check, but if the wear was fairly even, I think you're fine.

Wrist pin bushings should really be pressed in with mandral support, then polished to size. An oiled wrist pin should just slowly slide through the finished bushing. If you don't have a lathe to make up a mandral or a hydraulic press to put them in, I would take the bushings and a pin to the machine shop and have them do it for you. It isn't a big job for them, but critical to the engine. The last thing you want is a slopping wrist pin. I think Mike has the right idea. Make sure they need replacing. Clean them well, oil up a wrist pin and see if it slides through nicely.

For cylinders, permatex directions are:

1. Remove any grease or oil by using Permatex® Brake & Parts Cleaner.
2. For slip fitted assemblies, apply adhesive around the leading edge of the collar and use a rotating motion during assembly.
3. For press fits, adhesive should be applied thoroughly to both bond surfaces and assembled at high press-on rates.
4. For shrink fitted assemblies, the adhesive should be coated onto the pin; the collar should then be heated to create sufficient clearance for free assembly.
5. For faster cure rates, use Permatex® Surface Prep on both surfaces.
6. Parts should not be disturbed until sufficient handling strength is achieved.
7. Any material that is on the outside of the assembly will not cure. Wipe off with a dry cloth.

Not sure what type of cylinder liner you have there, but I think its a dry liner. What does the reassembly call for in the manual?

You don't need a lot of sleeve retainer, just a fine coat will do it. But it's important to recognize it hardens in the absense of air, so you don't want to leave for lunch with half the sleeve in or stop to answer the phone.
 
   / Piston Inspection/Assembly/help
  • Thread Starter
#24  
Sounds good! I will let you fellas know how assembly went next week. Can't wait to hear it "purr like a kitten".

Probably will be wed before she is all together.

Starting to feel good about this deal. It has been a bit of a rollercoaster. I guess that is why I was told you wont know until you get in the engine.

Got a manual to, boy what a lot of help.

Have a good weekend.

Jim
 
   / Piston Inspection/Assembly/help
  • Thread Starter
#25  
Hello,

May have a problem?

Installed sleeves, Pistons / rings and oil pan today. The middle sleeve is not flush with head. I think this might should be this way. It had no obstructions and slid right in. I even hammered on ti with a block of wood and it would not go any further. The manual speaks of " original' sleeves being different and has order to reinstall them, however it says if replacing sleeves order does not matter.

Any thoughts on this one.

Head will be ready tommorrow.

Thanks,

Jim
 
   / Piston Inspection/Assembly/help
  • Thread Starter
#26  
Opps. I meant flush with block facing where head gasket sits.
 
   / Piston Inspection/Assembly/help #27  
Hi Jim,

That doesn't seem quite right to me. Usually, all three are slightly raised or all three are even with the block. You may want to look into that.

Tom
 
   / Piston Inspection/Assembly/help #28  
The original sleeves were all a different outer diameters (not sure why). The original sleeves must go back in the same hole they came out of. The replacement sleeves all have the same outer diameter of the center cylinder and do not matter which hole they go into. The height above the block on all 3 liners needs to be 0.05 to 0.075mm. If you have 1 that is higher than that you will need to remove it and find out why.


Aaron
Parts@HoyeTractor.com
(940)592-0181
 
   / Piston Inspection/Assembly/help
  • Thread Starter
#29  
Appreciate the advice guys.

She is purrin like a kitten.


Jim
 

Attachments

  • MVC-029S.JPG
    MVC-029S.JPG
    37.8 KB · Views: 139
   / Piston Inspection/Assembly/help #30  
rancher
how many hours did motor have on it?
 
 
Top