You are using an out of date browser. It may not display this or other websites correctly.
You should upgrade or use an alternative browser.
You should upgrade or use an alternative browser.
YM336D Restoration thread - Part two
- Thread starter Domush
- Start date
/ YM336D Restoration thread - Part two
#21
Need some LED Light strips for that YanMar??????? (Quick shameless Plug) Http://www.CreativeLightings.com (it's what pays the bills! ")
OP
Domush
Platinum Member
Big update today!
I am 99.5% finished the beautification and I must say.. you should really stop reading this crap and look at the pictures!. Where is a tractor parade when I need one?!
Without further ado.. the before and afters..
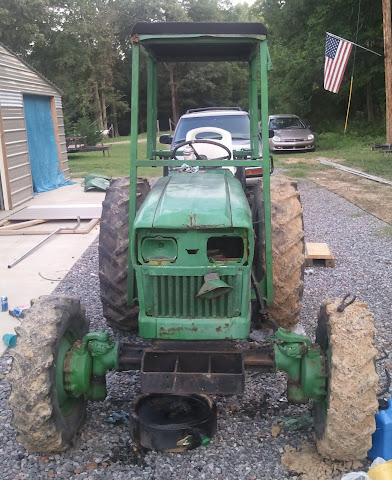
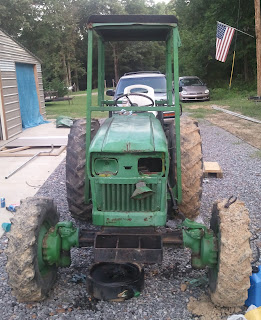
FROM:
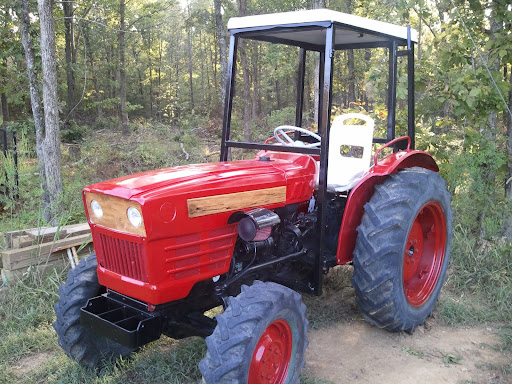
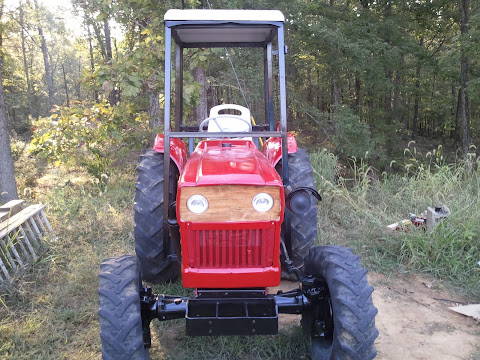
TO:
And the during..
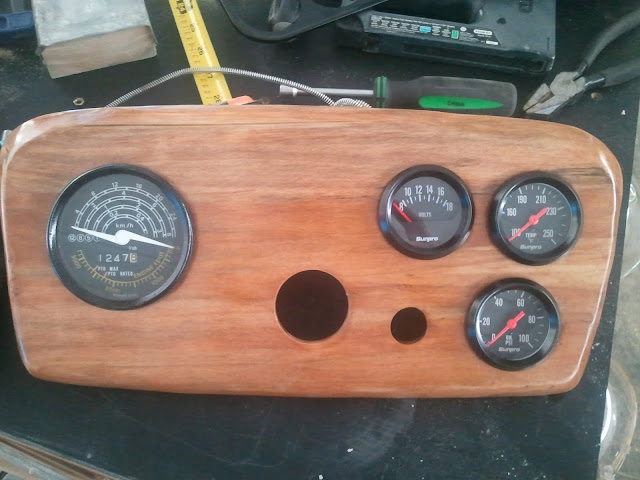
Here I test fit the gauges, which fit perfectly. The black really brings out the wood color.
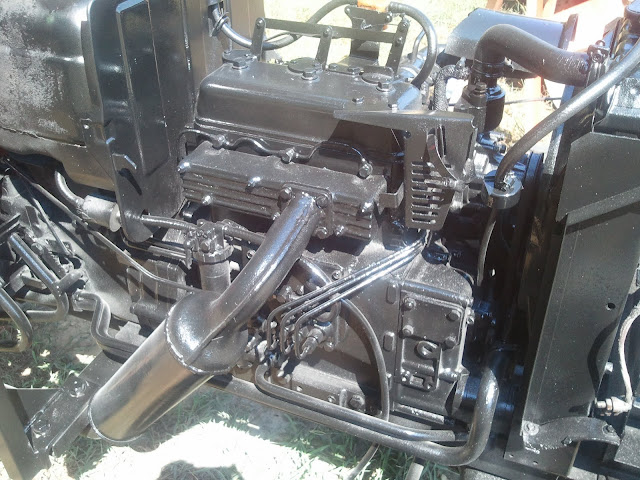

After painting the entire tractor, including the engine, I threw on a full coat of clear which I happened to have hanging around from a cancelled boat restoration. Wait until you see the difference the clear made.. (I hope you can tell through photos)
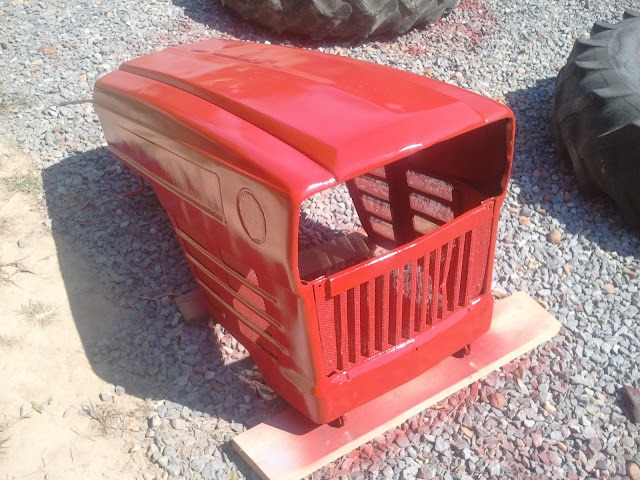
The hood with a clearcoat

The dash is finally installed! This is right before I got down to the wiring, which took FOREVER. Man, added lighted gauges adds a TON of new wiring; The wiring was crazy enough with all of the missing switches and cut wires this tractor had.

Time for some brackets for the new headlights. These are simple aluminum sheets bent 90 degrees and some holes drilled for mounting bolts. I have no idea where you can find sheets of aluminum.. a neighbor happens to own a metal shop so I get to raid his scrap bin. Before meeting him, I have no idea where I'd get sheet aluminum.

When I originally cut the headlight holes, I knew extra space was needed in case I had to adjust the aim of the headlights, so I cut the hole bigger. I added weatherstripping to the inside of the hole in order to create a seal around the lights themselves.

The resulting assembly.

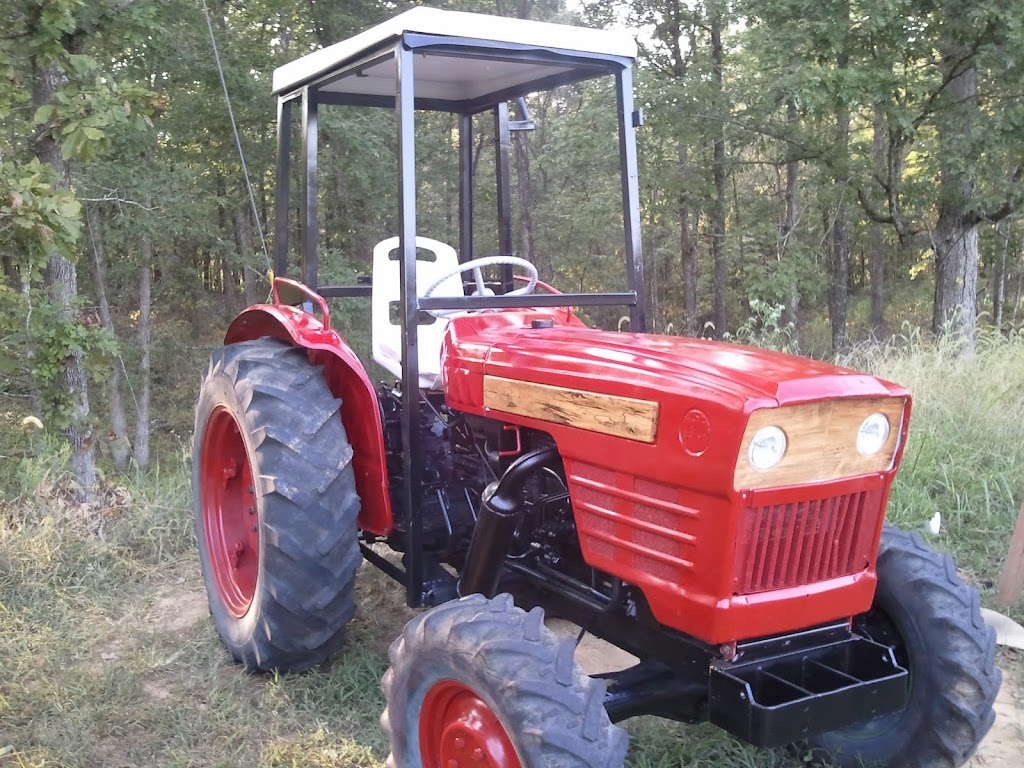
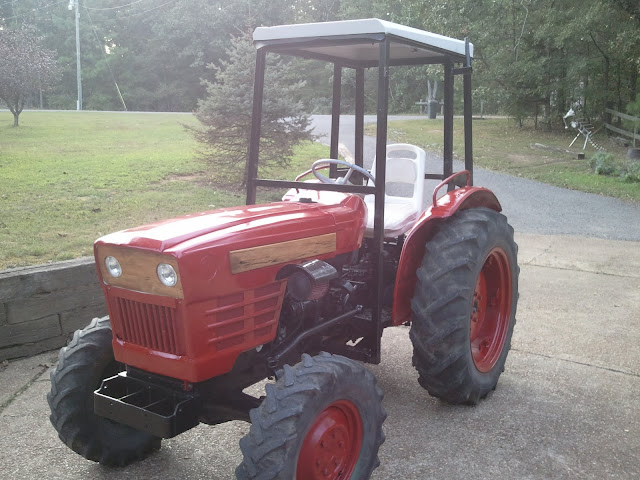
And the result of all of my hard work! All of these crappy posts have been, indeed, leading to something after all!
Exact before and after shots

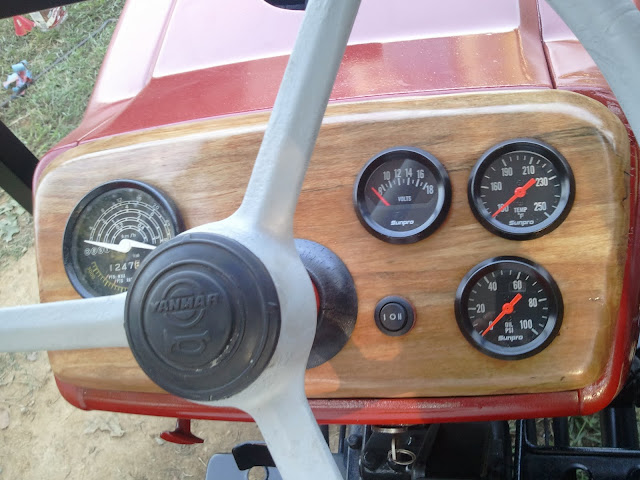
The completed dash. Note the 1/off/2 toggle switch. Set to 1, the headlights only come on while the key is on. Set to 2 will bypass the switch, in case the tractor is off or I don't have the key handy. All switches are lighted, of course.
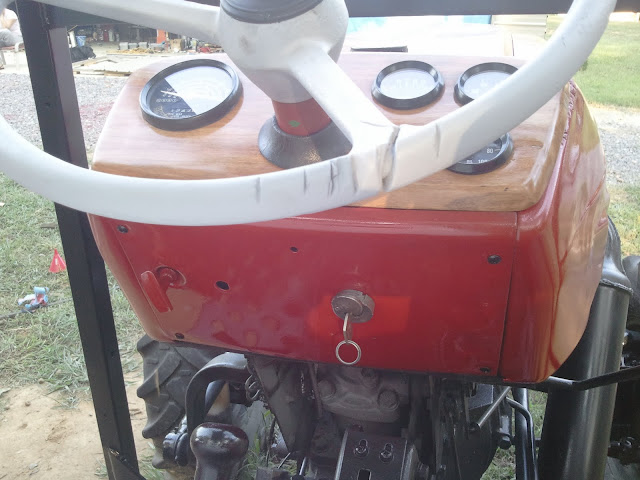
I moved the key switch to the bottom panel, as there is no reason for it to be always visible. It also seems more natural to turn the key where it is now.

Close up of the wood lights and trim.

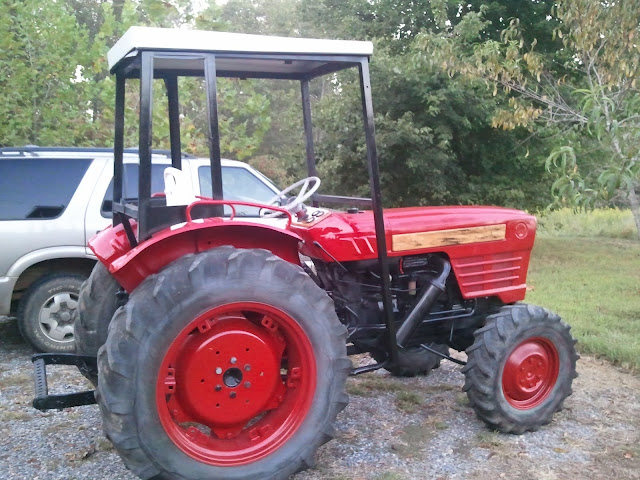
Showing it off at my neighbor's house, haha!

Dash while the engine is running. I have a bit of an anti-freeze leak after removing the thermostat I need to seal up and a coat of paint on the steering wheel is still pending, but otherwise she's a done deal for now.
Parked in my visitor parking spot in the driveway. Her new home will be elsewhere, but I wanted to be able to stare at it a few moments more, heh.
Hope you all enjoyed following along for this restore. I certainly loved sharing my experience with all of you. Let me know what you think. I love it so much I hated putting a footprint on the newly painted footrests! I really am waiting for the next parade. This thing is cruising in it for sure! I can even use the post on the canopy to hold a flag! I need an aoooooga! horn, now
I am 99.5% finished the beautification and I must say.. you should really stop reading this crap and look at the pictures!. Where is a tractor parade when I need one?!
Without further ado.. the before and afters..
FROM:
TO:
And the during..
Here I test fit the gauges, which fit perfectly. The black really brings out the wood color.
After painting the entire tractor, including the engine, I threw on a full coat of clear which I happened to have hanging around from a cancelled boat restoration. Wait until you see the difference the clear made.. (I hope you can tell through photos)
The hood with a clearcoat
The dash is finally installed! This is right before I got down to the wiring, which took FOREVER. Man, added lighted gauges adds a TON of new wiring; The wiring was crazy enough with all of the missing switches and cut wires this tractor had.
Time for some brackets for the new headlights. These are simple aluminum sheets bent 90 degrees and some holes drilled for mounting bolts. I have no idea where you can find sheets of aluminum.. a neighbor happens to own a metal shop so I get to raid his scrap bin. Before meeting him, I have no idea where I'd get sheet aluminum.
When I originally cut the headlight holes, I knew extra space was needed in case I had to adjust the aim of the headlights, so I cut the hole bigger. I added weatherstripping to the inside of the hole in order to create a seal around the lights themselves.
The resulting assembly.
And the result of all of my hard work! All of these crappy posts have been, indeed, leading to something after all!
Exact before and after shots
The completed dash. Note the 1/off/2 toggle switch. Set to 1, the headlights only come on while the key is on. Set to 2 will bypass the switch, in case the tractor is off or I don't have the key handy. All switches are lighted, of course.
I moved the key switch to the bottom panel, as there is no reason for it to be always visible. It also seems more natural to turn the key where it is now.
Close up of the wood lights and trim.
Showing it off at my neighbor's house, haha!
Dash while the engine is running. I have a bit of an anti-freeze leak after removing the thermostat I need to seal up and a coat of paint on the steering wheel is still pending, but otherwise she's a done deal for now.
Parked in my visitor parking spot in the driveway. Her new home will be elsewhere, but I wanted to be able to stare at it a few moments more, heh.
Hope you all enjoyed following along for this restore. I certainly loved sharing my experience with all of you. Let me know what you think. I love it so much I hated putting a footprint on the newly painted footrests! I really am waiting for the next parade. This thing is cruising in it for sure! I can even use the post on the canopy to hold a flag! I need an aoooooga! horn, now
Last edited by a moderator:
looknlearn
Platinum Member
Wow, Great job! That thing looks good. I especially like the wood. I'll need to remember that when I get a tractor new enough for gauges. It sure is a beauty and night and day from how it started. I just stumbled across your threads a couple of weeks ago.:thumbsup: I hope you get it 100% completed soon (isn't there something wrong with a few gears in the tranny if I remember right?)
Cheers.
Cheers.
clemsonfor
Super Member
Very nice work, my 336d has a cream/white rim color but the red is nice.
I think he knows that. They also have green engines and lift arms and trannies dont they, at least the greys do. They also dont have any wood on them, but this is his custom/resto.
Johndeere3720
Padawan Tractor Learner, Advertiser
- Joined
- Mar 14, 2009
- Messages
- 6,526
- Location
- NW Oregon
- Tractor
- Bobcat T62, MT55, E42R, E10, John Deere 4100
I think he knows that. They also have green engines and lift arms and trannies dont they, at least the greys do. They also dont have any wood on them, but this is his custom/resto.
And he did a great job on it. :thumbsup: Seriously, nice job on that 336D, only thing I would change is paint the "YM336D" emblem on either side black with white letters but this is just a suggestion.
Either way, excellent job on the restoration. :thumbsup::thumbsup:
OP
Domush
Platinum Member
Yeah, I plan to paint the circular emblems at some point. I haven't decided the best method to do it accurately yet. For now, though, I have a box blade on it already and can smooth out those blasted pot holes in my driveway (really long dirt driveway). A neighbor has offered for me to borrow any attachment he has, which I'm thrilled about. His attachments are 6'+ wide, but I should be able to make do for now. I only wish I could power the 12' batwing finish mower he has .
I have a large web project happening now, but hopefully in the next week I can lift that shift cover off and see what the 1st and 2nd gears look like. I also notice a clunk every few seconds while the clutch is out (even when standing still), which I have yet to diagnose. It sounds as though it is coming from the rear end, but I'm not positive.
For now I have a propane tank to sandblast and install and a web site to build to pay for all of this outgo
.I have a large web project happening now, but hopefully in the next week I can lift that shift cover off and see what the 1st and 2nd gears look like. I also notice a clunk every few seconds while the clutch is out (even when standing still), which I have yet to diagnose. It sounds as though it is coming from the rear end, but I'm not positive.
For now I have a propane tank to sandblast and install and a web site to build to pay for all of this outgo
Bird
Epic Contributor
Beautiful job. I'd never have the patience for something like that even if I had the talent (which I don't have).
).